Overview
The Eazybe WhatsApp Extension allows you to create and manage HubSpot contacts without leaving your WhatsApp conversations. This seamless integration helps you capture leads and maintain accurate contact information in real-time.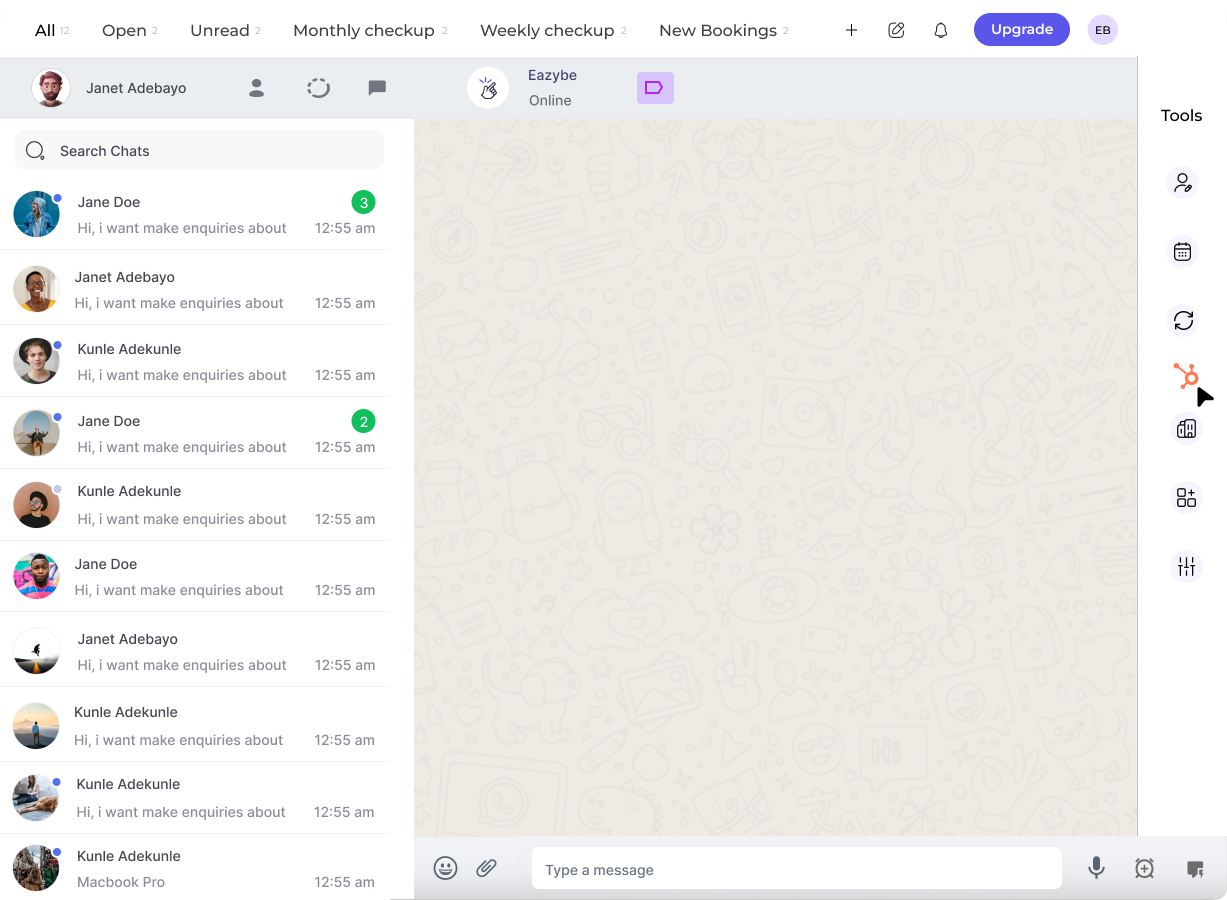
Contact phone numbers are automatically populated from WhatsApp data and cannot be edited to ensure data consistency.
Video Tutorial
Watch how to create and customize HubSpot contacts from WhatsApp:Creating New Contacts
Follow these steps to create a new HubSpot contact directly from WhatsApp:1
Open WhatsApp Chat
Navigate to the WhatsApp conversation for the contact you want to add to HubSpot.
2
Access HubSpot Panel
Click the HubSpot icon in the right sidebar to open the Mini-CRM panel.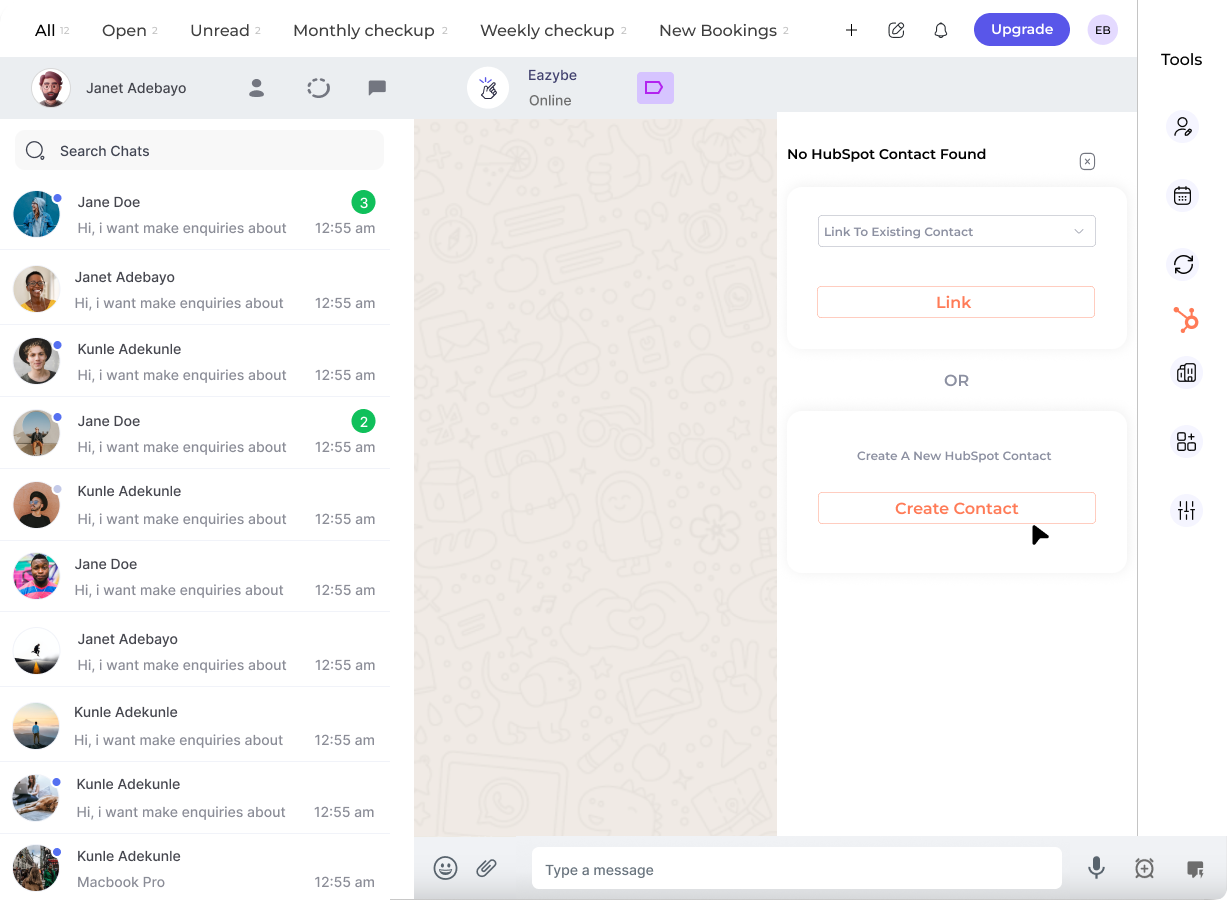
3
Create Contact
Click the Create Contact button. The phone number will automatically populate from the WhatsApp conversation.
The phone number field is auto-filled and non-editable to maintain data integrity between WhatsApp and HubSpot.
4
Fill Contact Details
Enter any additional contact information such as:
- First name and last name
- Email address
- Company name
- Any custom properties configured in your HubSpot account
5
Save Contact
Click Save to create the contact in HubSpot. The contact will be instantly available in your CRM.
Once saved, the contact is immediately synced to your HubSpot account and linked to the WhatsApp conversation.
Customizing Existing Contacts
You can easily update and customize contact properties for existing HubSpot contacts:1
Open Contact Chat
Navigate to the WhatsApp conversation of the contact you want to customize.
2
Click Edit
In the Mini-CRM panel, click the Edit button within the contact card to modify the contact properties.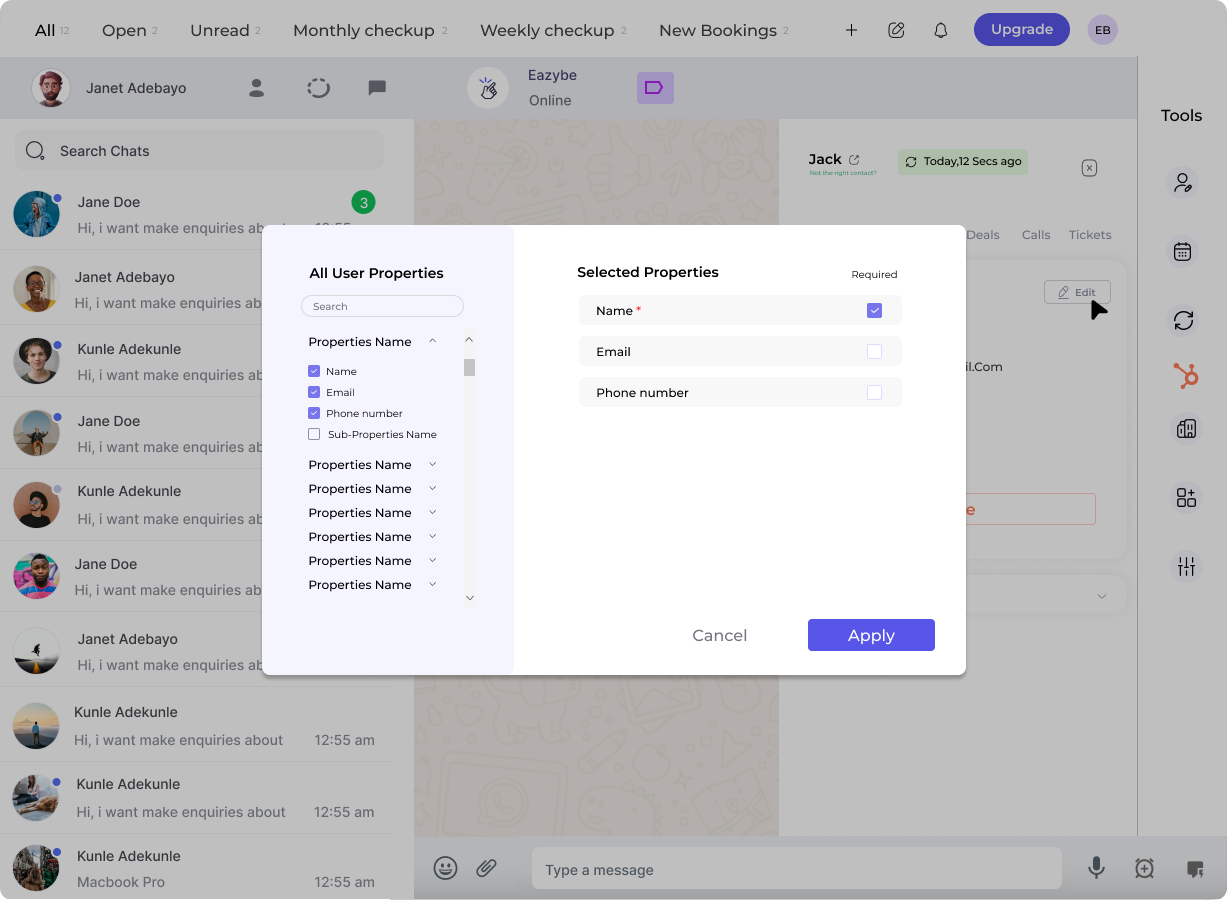
3
Modify Properties
Update the contact information as needed:
- Edit existing property values
- Rearrange the display order of properties
- Designate fields as required or optional
4
Apply and Save
Click Apply to confirm your changes, then click Save to update the contact in HubSpot.
Customizing Contact Properties Display
Watch this tutorial on customizing how contact properties are displayed:Property Configuration Options
Rearrange Order
Drag and drop properties to change their display order in the contact card.
Required Fields
Mark important fields as required to ensure complete contact data.
Optional Fields
Set non-essential fields as optional for flexibility.
Custom Properties
Access and edit any custom HubSpot properties you’ve configured.
Best Practices
Keep Contact Information Updated
Keep Contact Information Updated
Regularly review and update contact properties to maintain accurate CRM data.
Use Consistent Naming Conventions
Use Consistent Naming Conventions
Follow a standard format for names and company information across all contacts.
Leverage Custom Properties
Leverage Custom Properties
Create custom HubSpot properties for industry-specific information relevant to your business.
Verify Before Saving
Verify Before Saving
Double-check contact details before saving to avoid duplicate or incorrect records.
Need Help?
Contact Support
If you have any questions or need further assistance, reach out to us at hey@eazybe.com. We’re happy to help!