

Creating Your Analytics Dashboard
1
Access Reporting
In your HubSpot account, click on Reporting in the main navigation menu.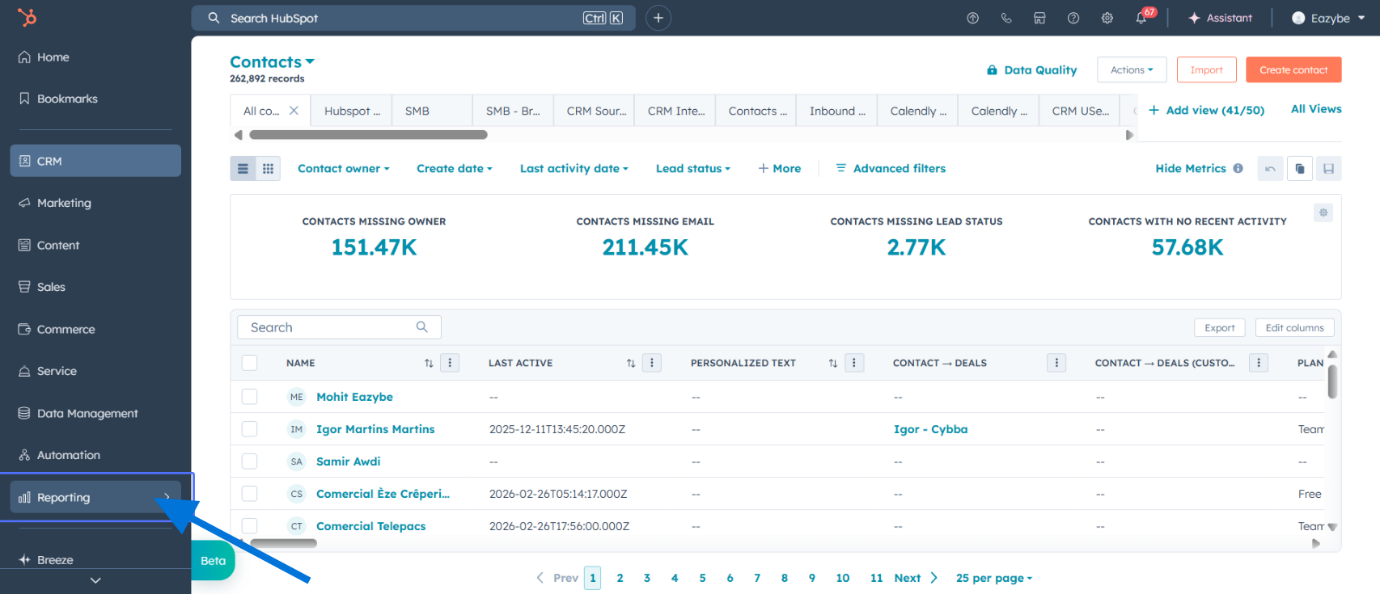
2
Open Reports
Click on Reports from the dropdown menu.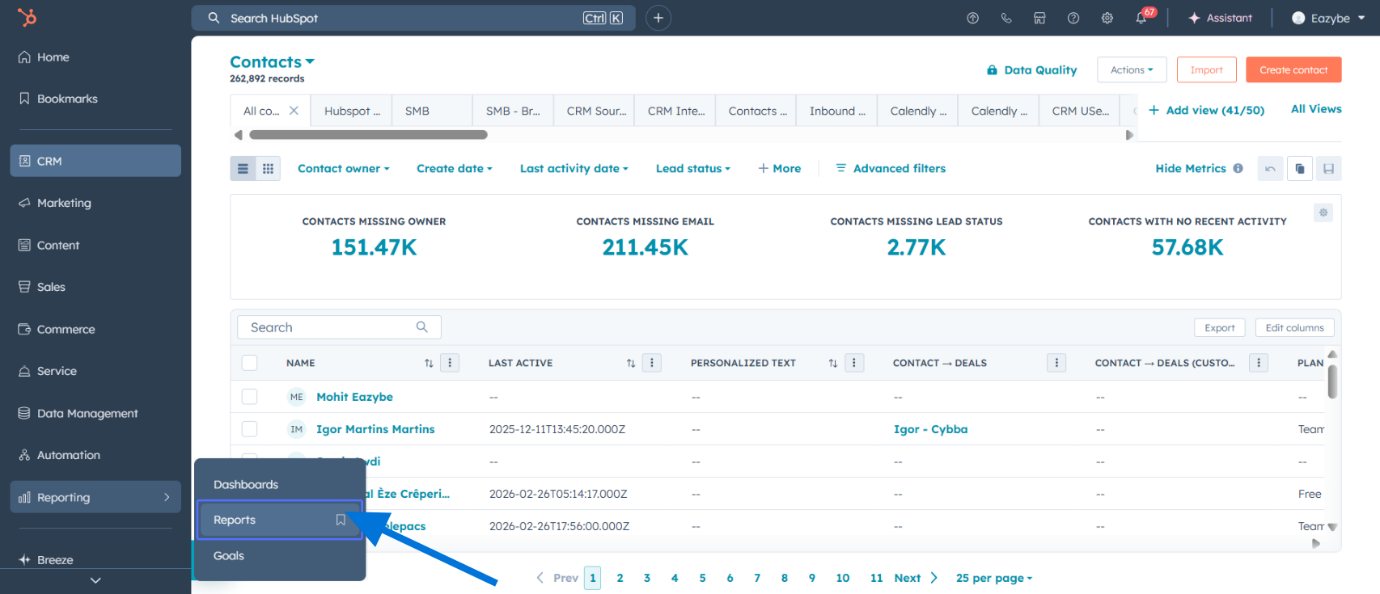
3
Create New Report
Click on Create button in the top right corner.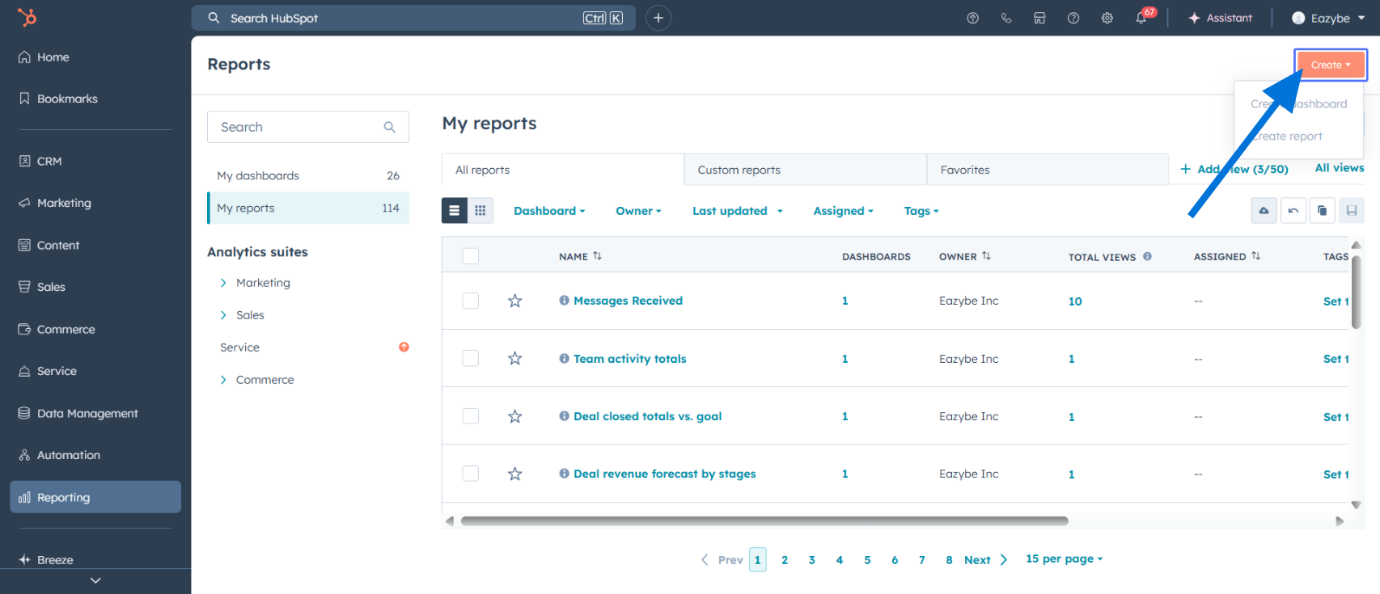
4
Select Create Report
Click on Create report from the options.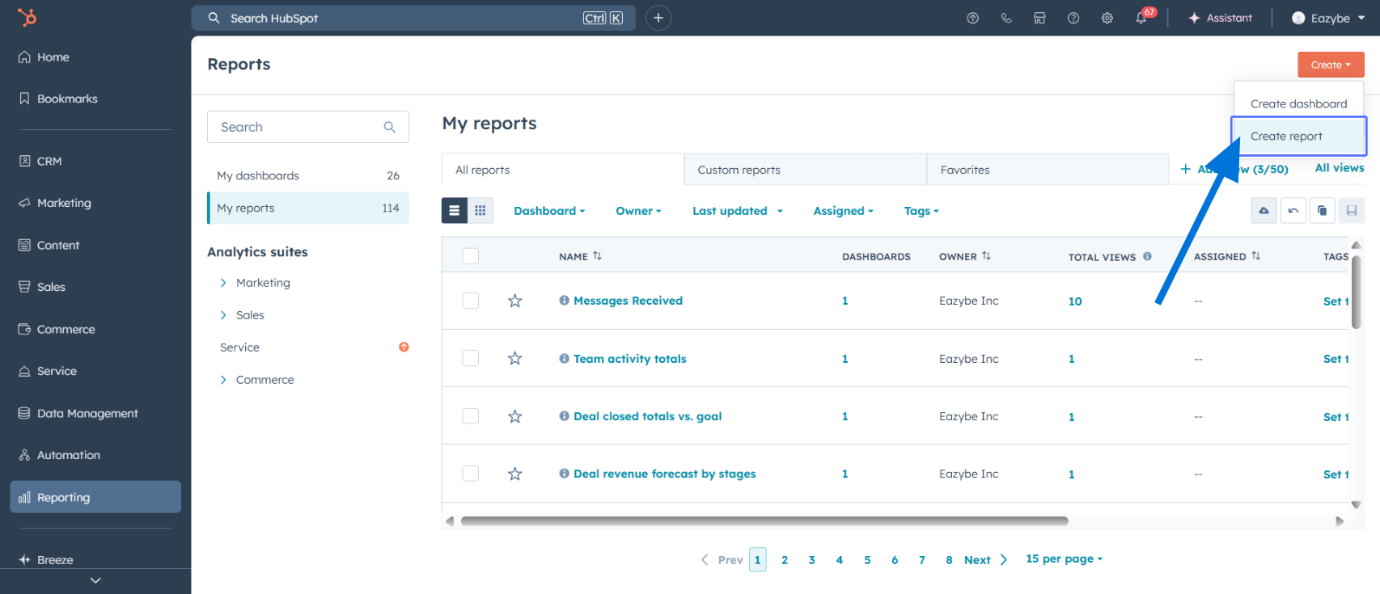
5
Proceed to Builder
Click on Next to continue to the report builder.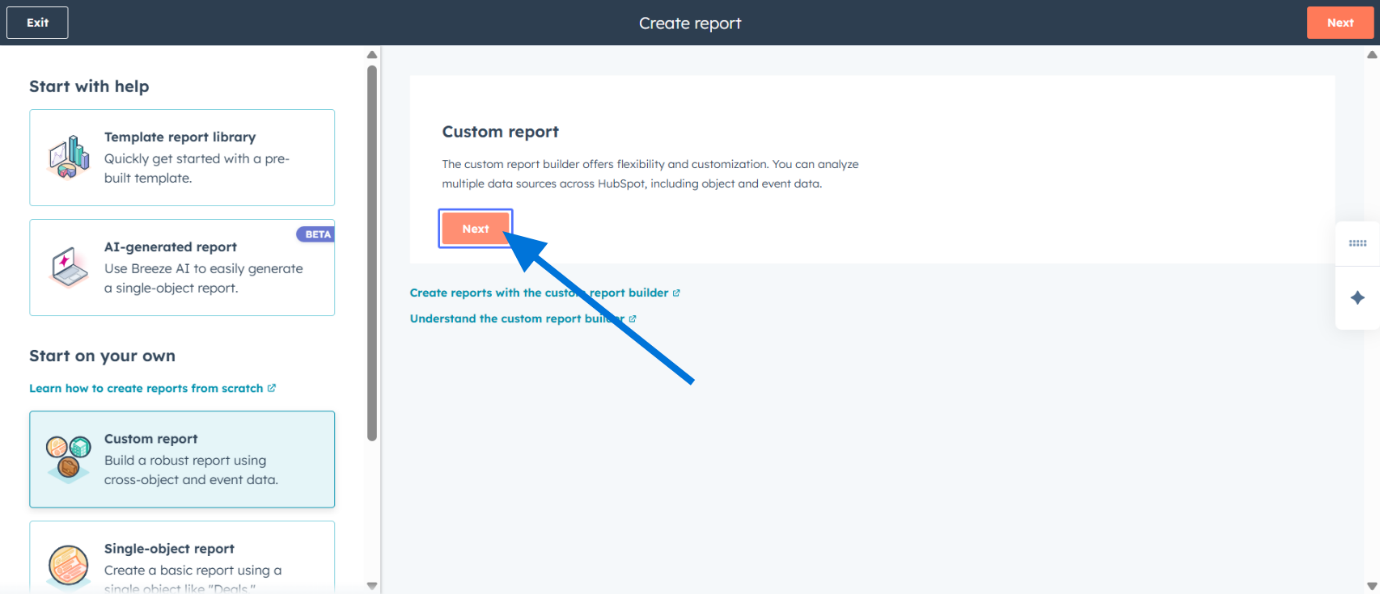
6
Enable Data Sources
On the Custom Report Builder screen, turn on Add more data sources to access additional metrics.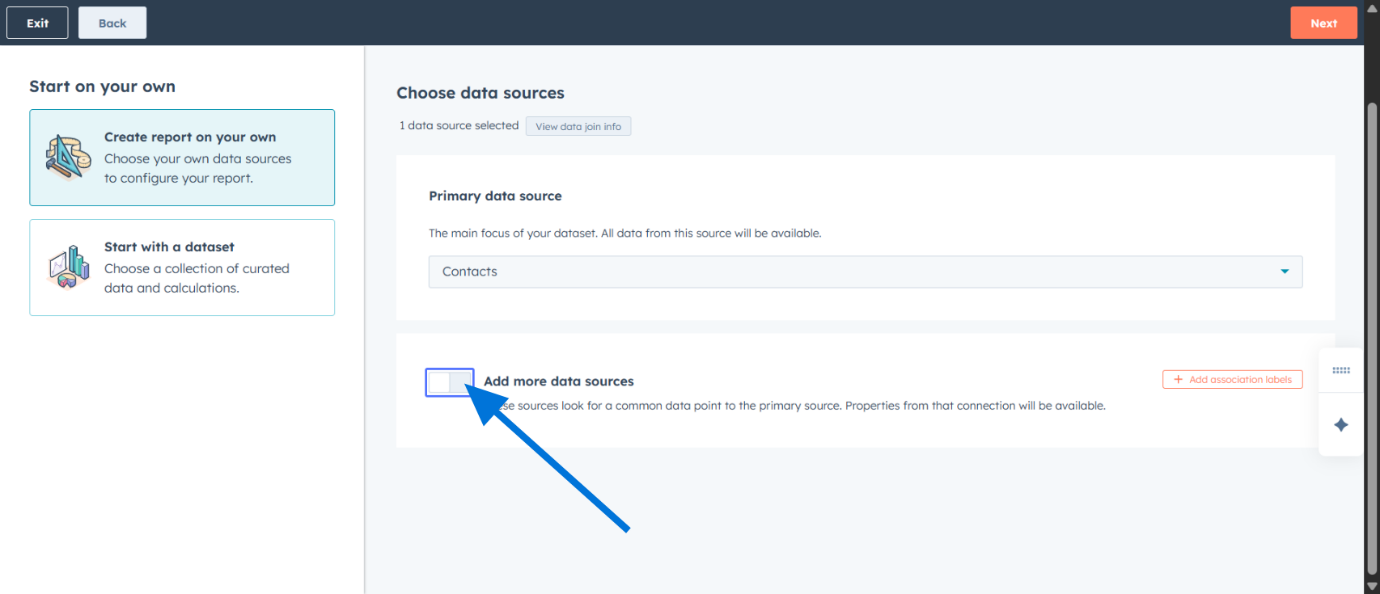
7
Continue to Data Selection
Click on Next to proceed to the data source selection.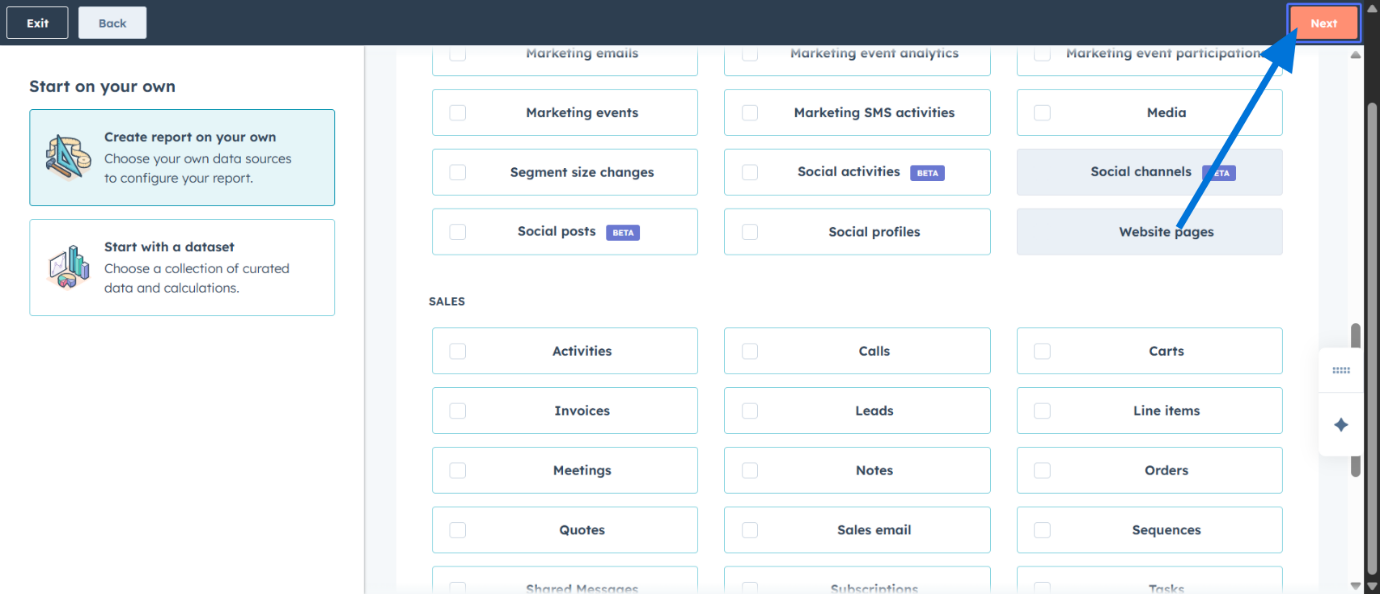
8
Search for Data Sources
Use the search bar to find the specific data sources you want to include in your dashboard.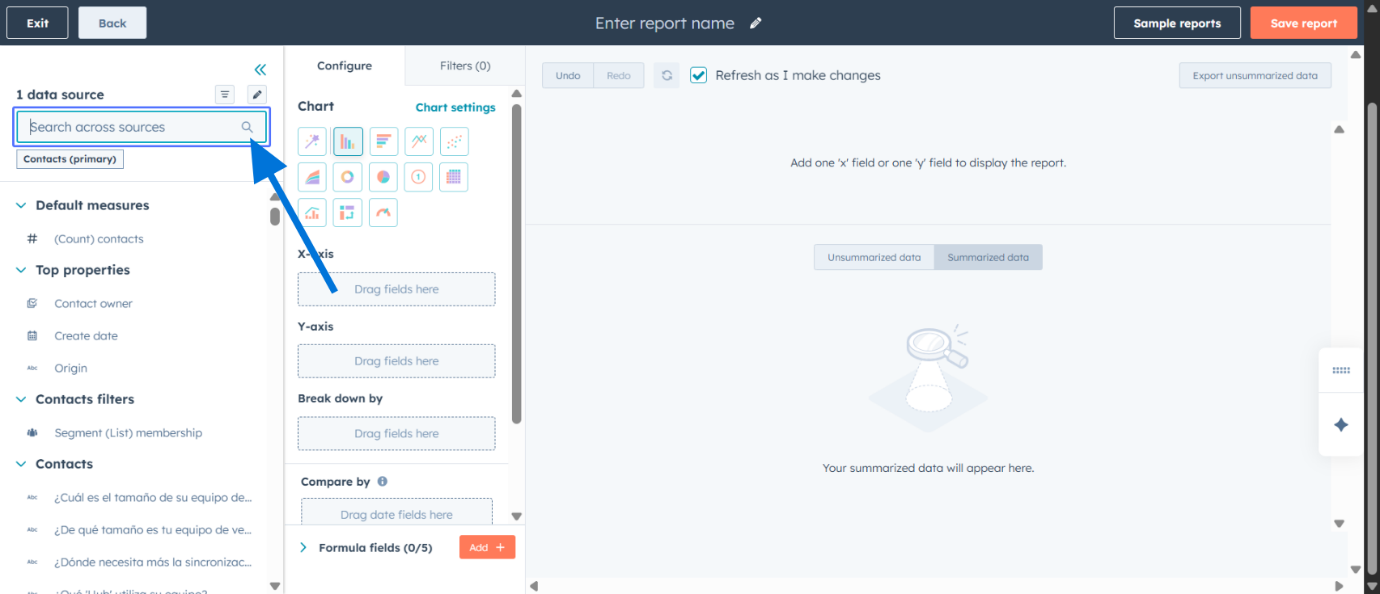
Available WhatsApp Data Sources
You can choose from the following WhatsApp messaging data sources:The availability of these data sources depends on your Eazybe integration configuration and the data synced from WhatsApp.
Building Your Dashboard
1
Drag Data to Axis
Click on your desired data source and drag it to the appropriate axis based on your reporting requirements. For example, drag Total Messages to visualize message volume.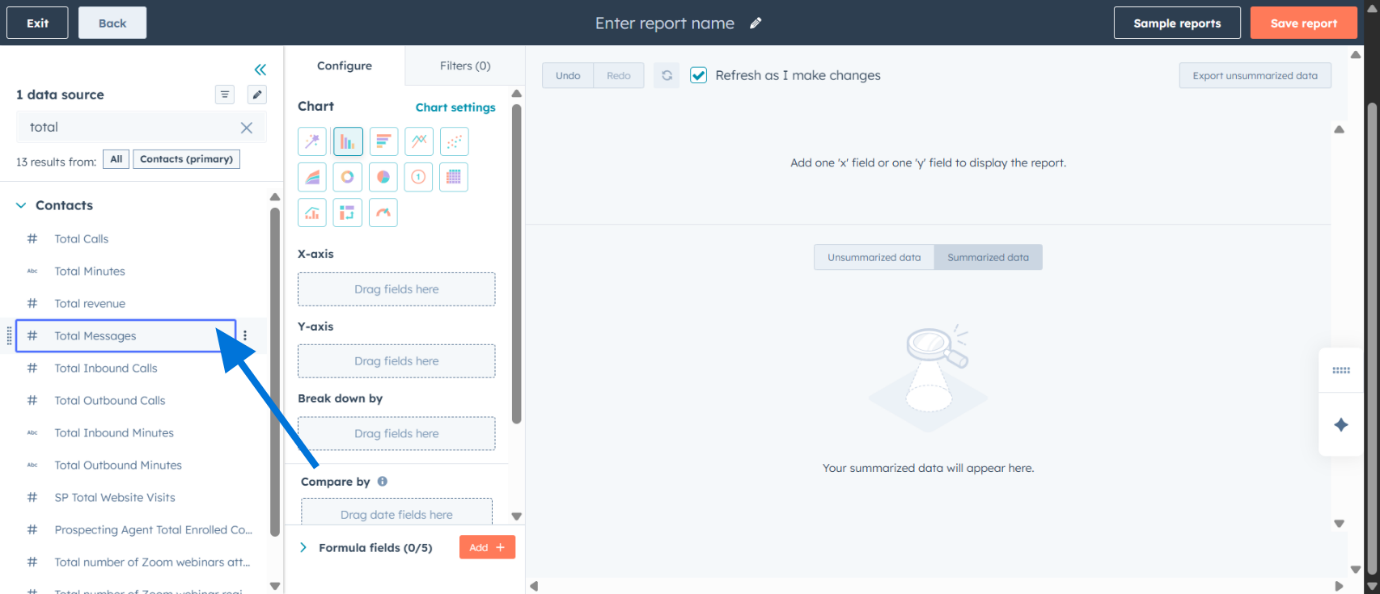
2
Add More Metrics
Continue dragging and dropping additional data sources based on your dashboard requirements. Each metric can be configured for different visualization types.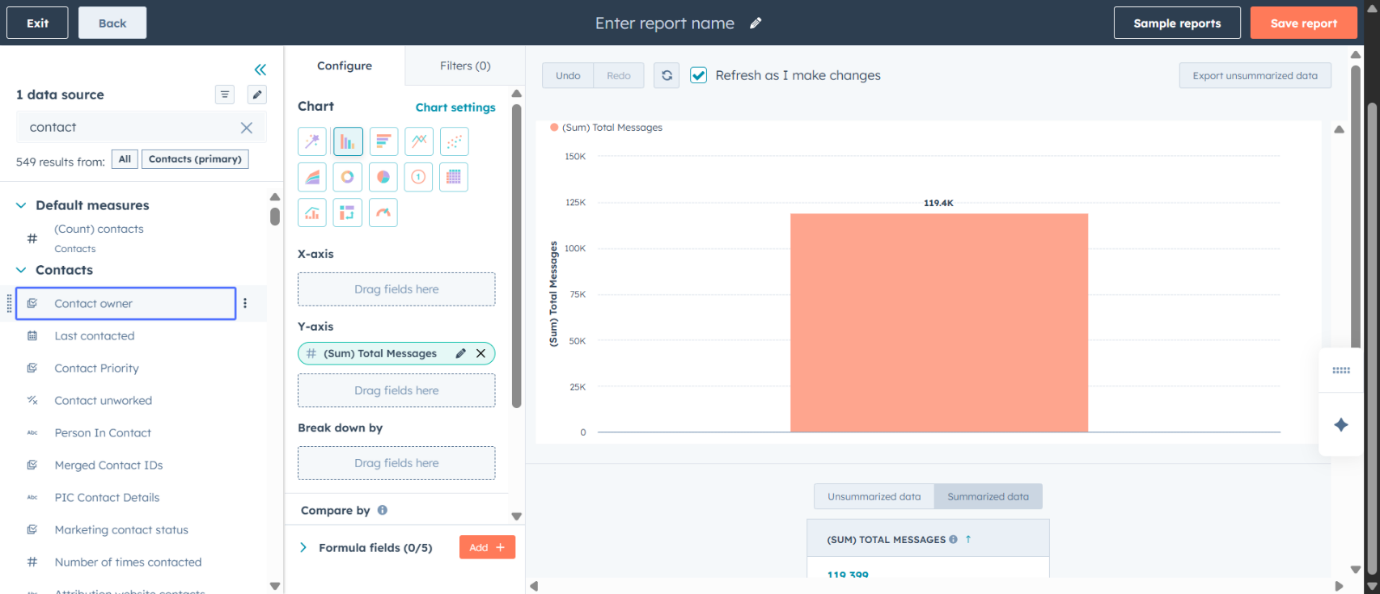
3
Save Your Report
Once you’ve configured all desired metrics and visualizations, click on Save report to finalize your analytics dashboard.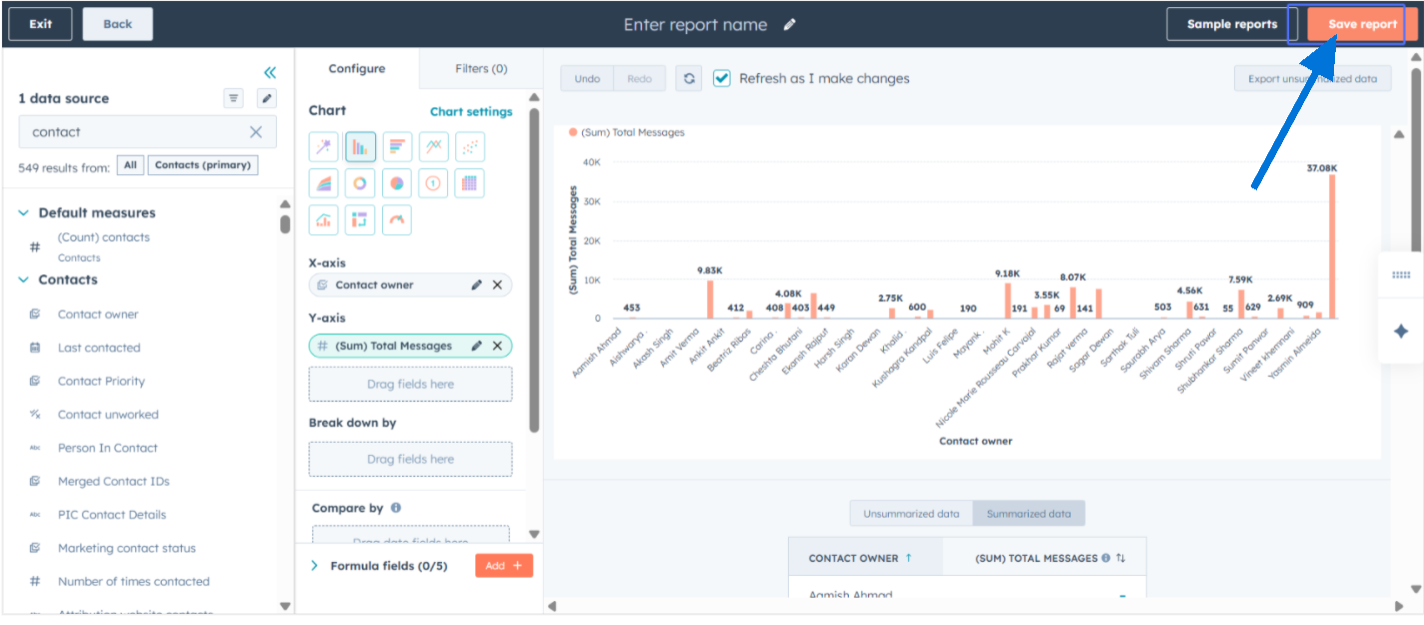
Your Analytics Dashboard is Ready
Your custom HubSpot Analytics dashboard is now configured and ready to use. You can access this dashboard anytime to monitor your WhatsApp messaging performance and track key metrics that matter to your team.Related Resources
Team Performance Metrics
Learn about tracking team effectiveness and performance KPIs
Conversation Analytics
Deep dive into conversation metrics and insights
Broadcast Reports
Analyze your WhatsApp broadcast campaign performance
Export Data
Export your analytics data for external analysis