

Prerequisites
Before setting up your workflow, ensure you have:HubSpot Account
An active HubSpot account with workflow access
Eazybe Integration
WhatsApp Integration by Eazybe installed in HubSpot
Create Your HubSpot Workflow
1
Access Your HubSpot Account
Log in to your HubSpot account to begin setting up the workflow.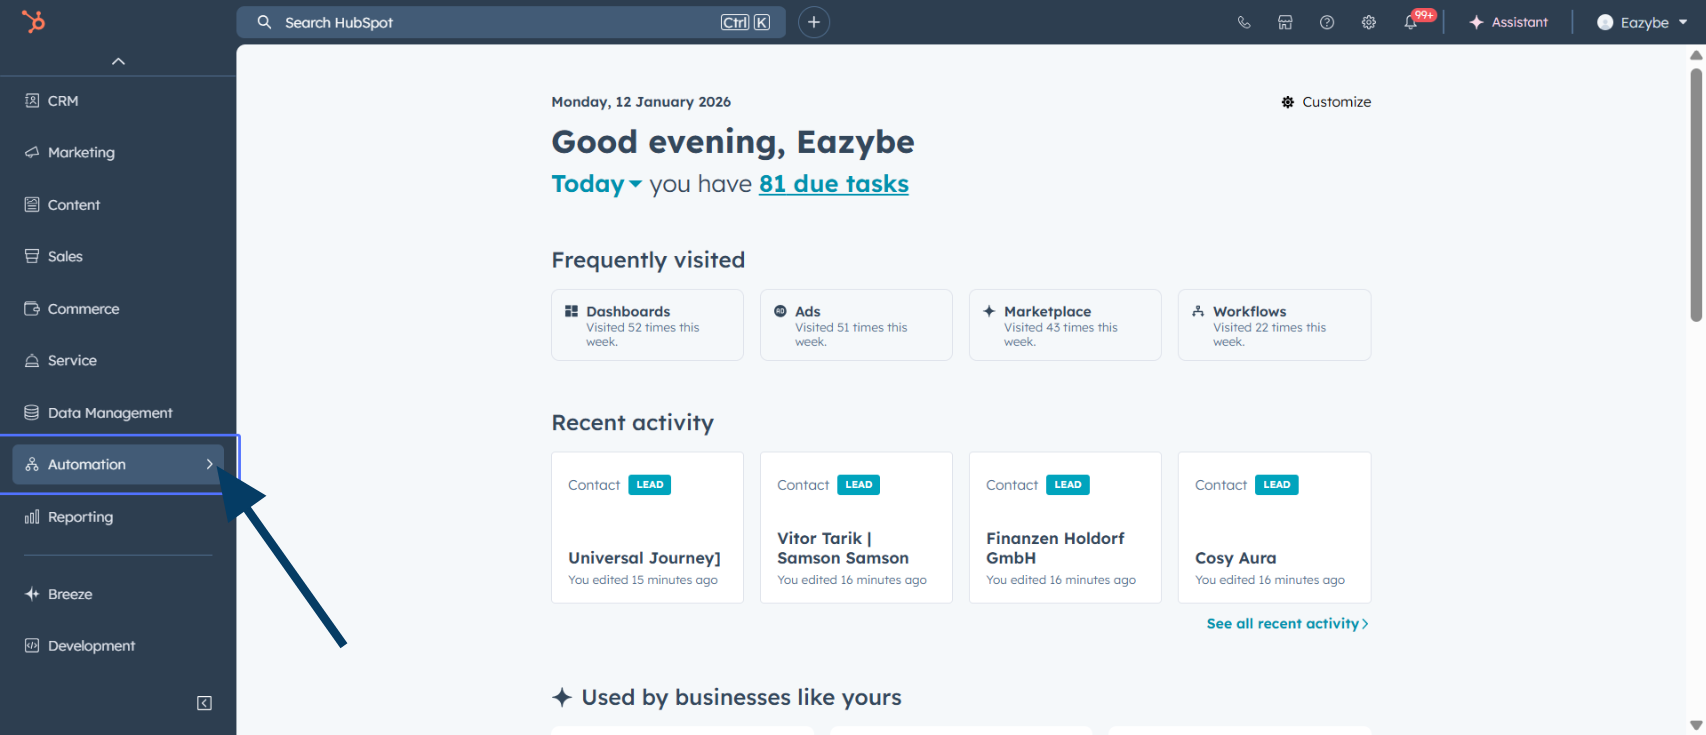
2
Navigate to Automation
Click on the Automation button in the main navigation menu.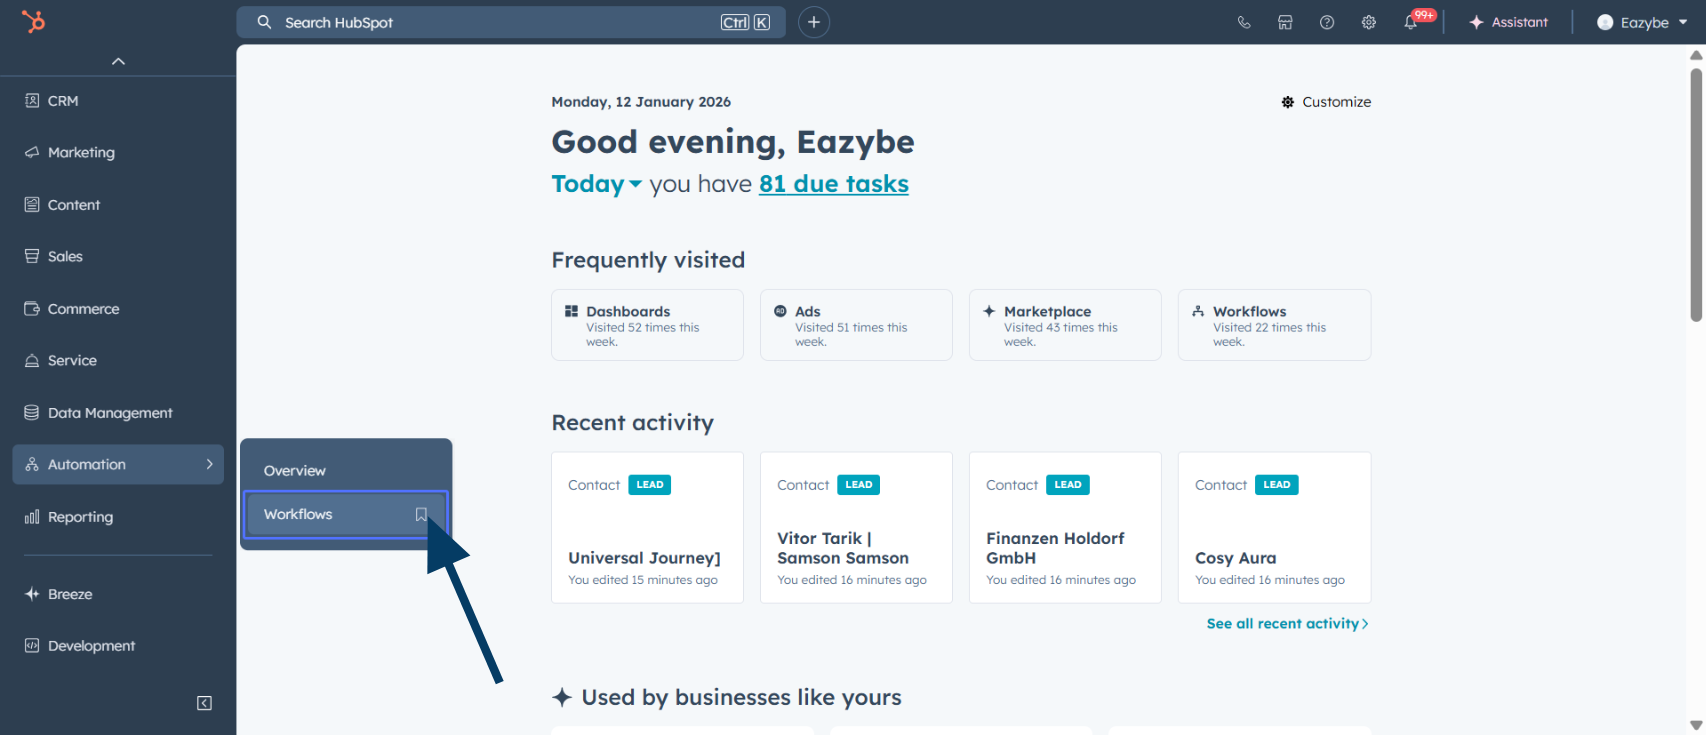
3
Select Workflows
From the automation menu, select Workflows to access the workflow builder.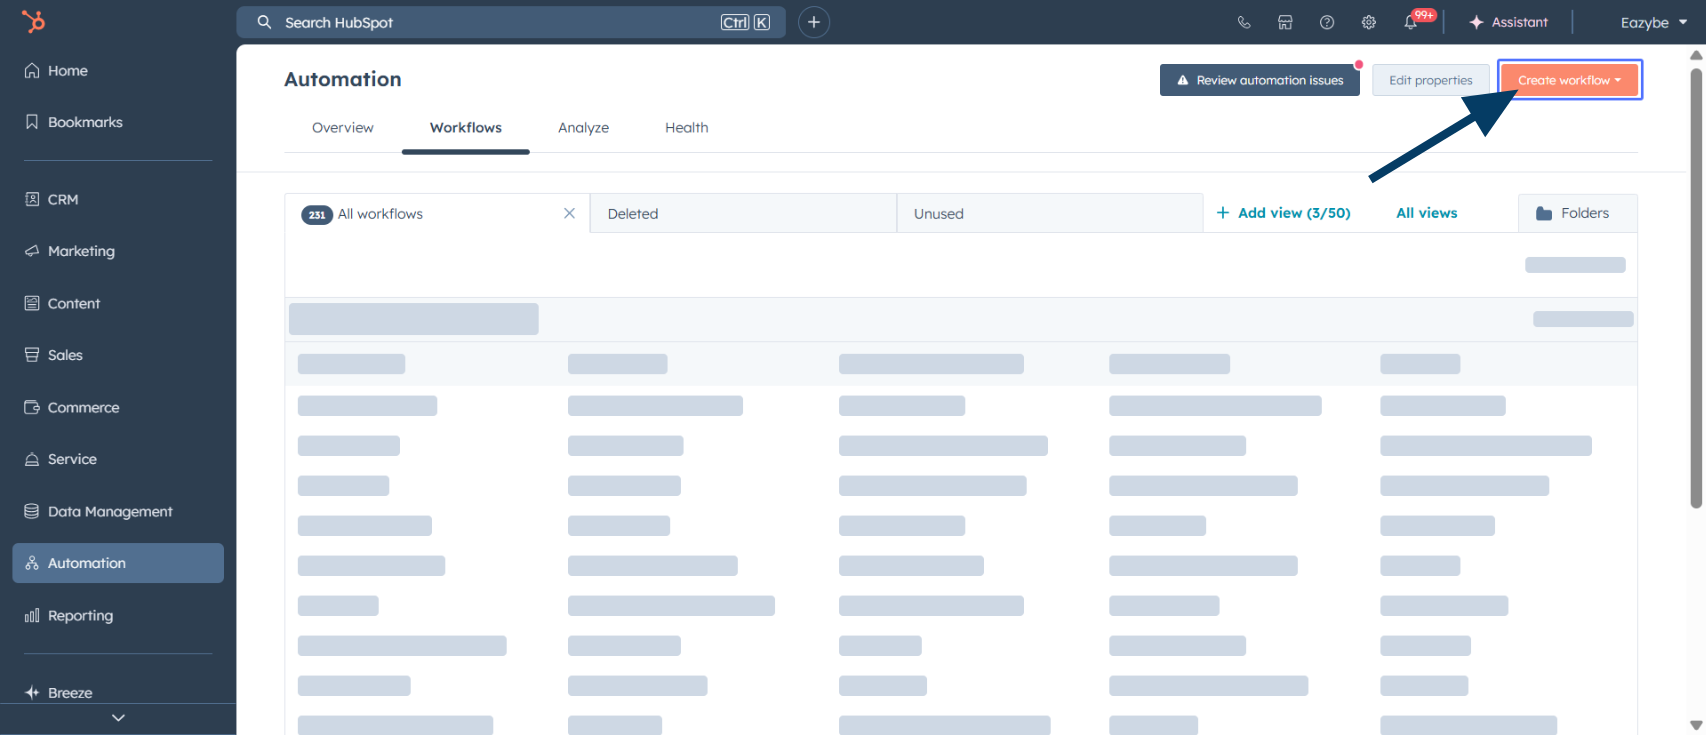
4
Create New Workflow
Click Create workflow to start building a new automation.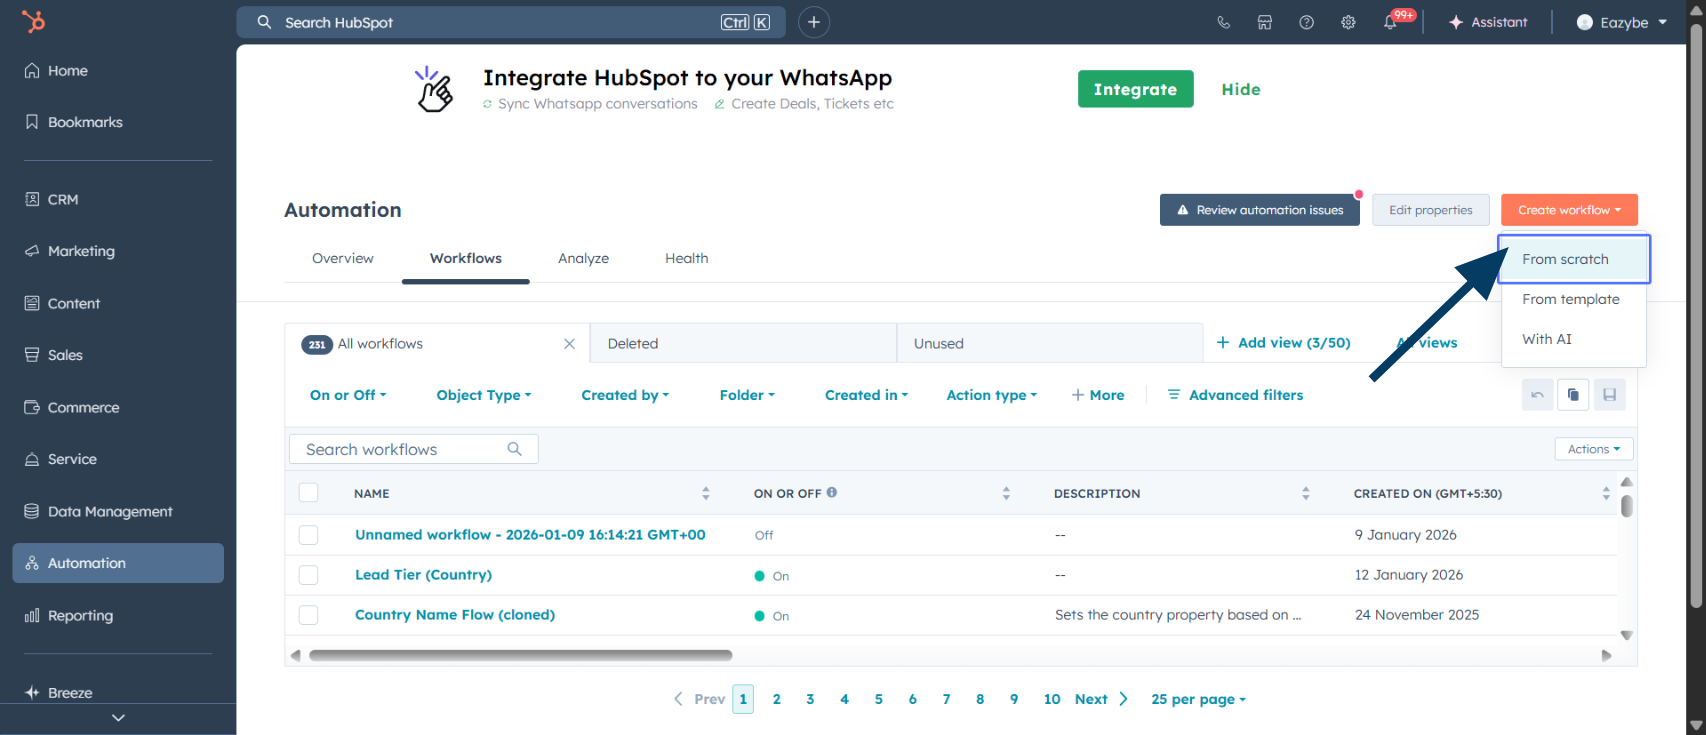
5
Choose From Scratch
Select From scratch to create a custom workflow tailored to your needs.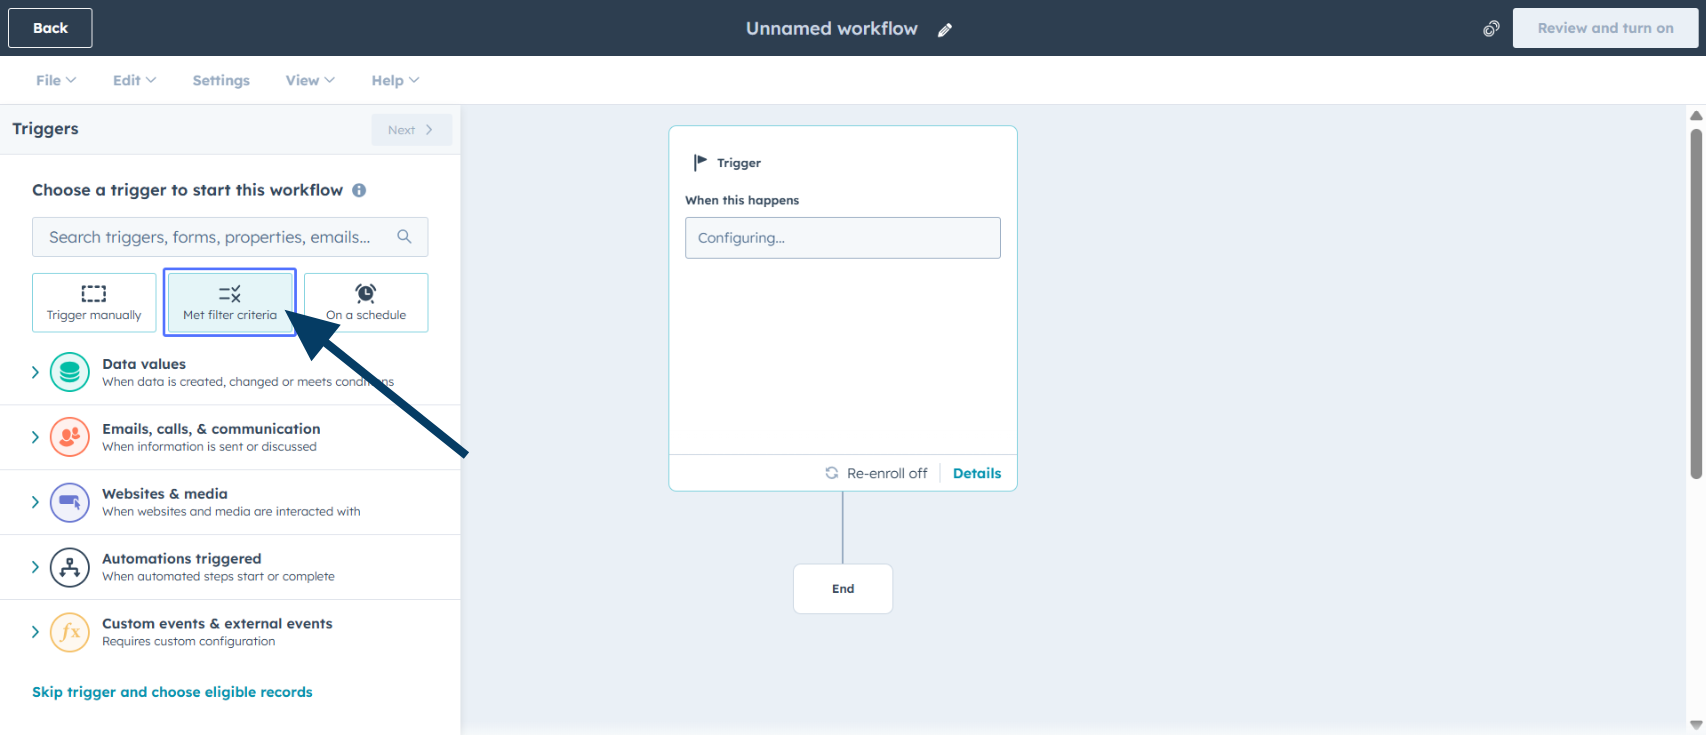
6
Set Filter Criteria
Click Met filter criteria to define the conditions for workflow enrollment.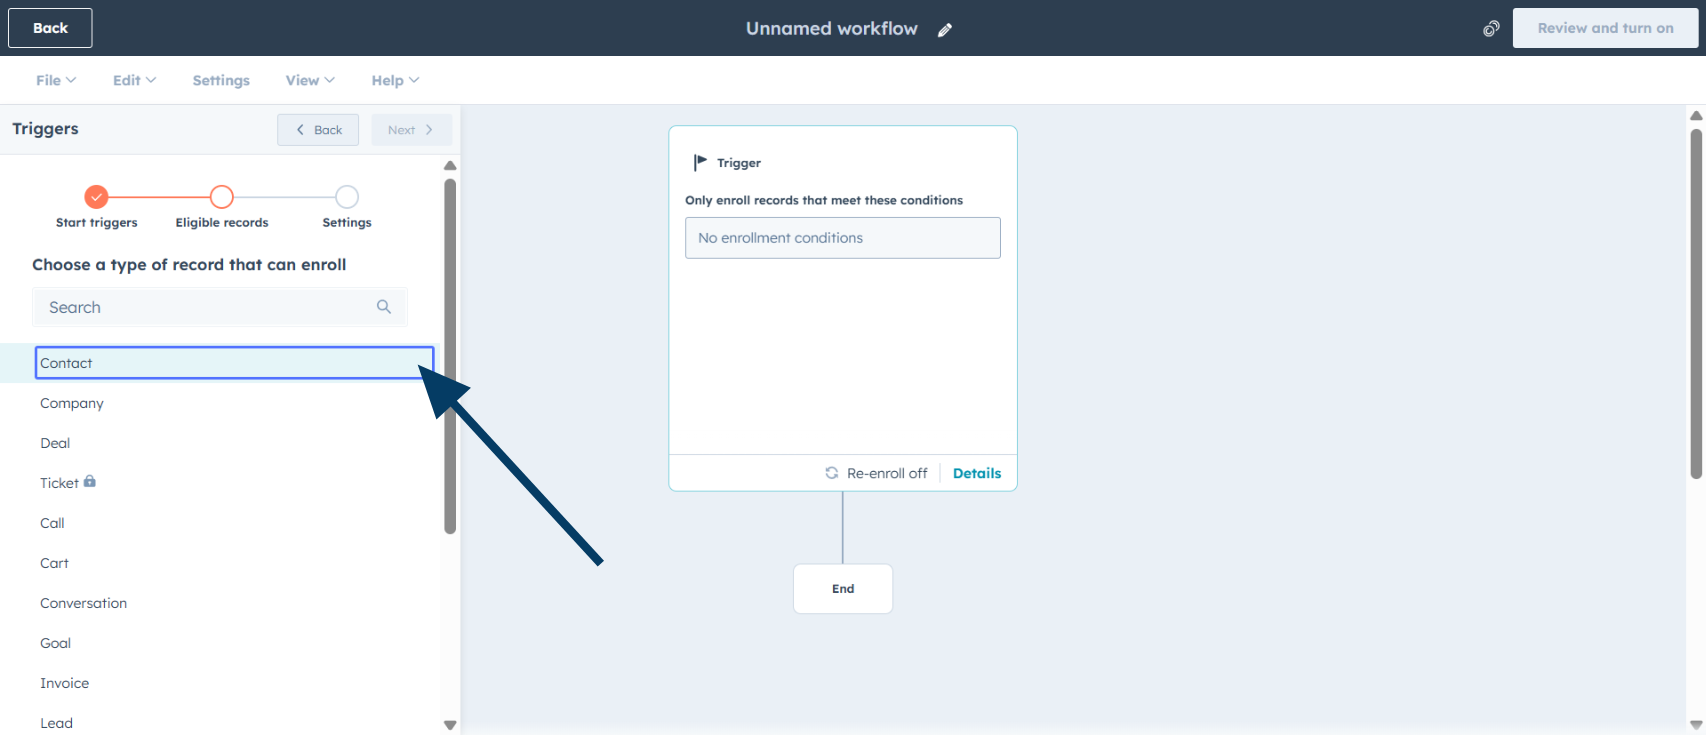
7
Select Contact as Trigger
Choose Contact as the object type that will trigger this workflow.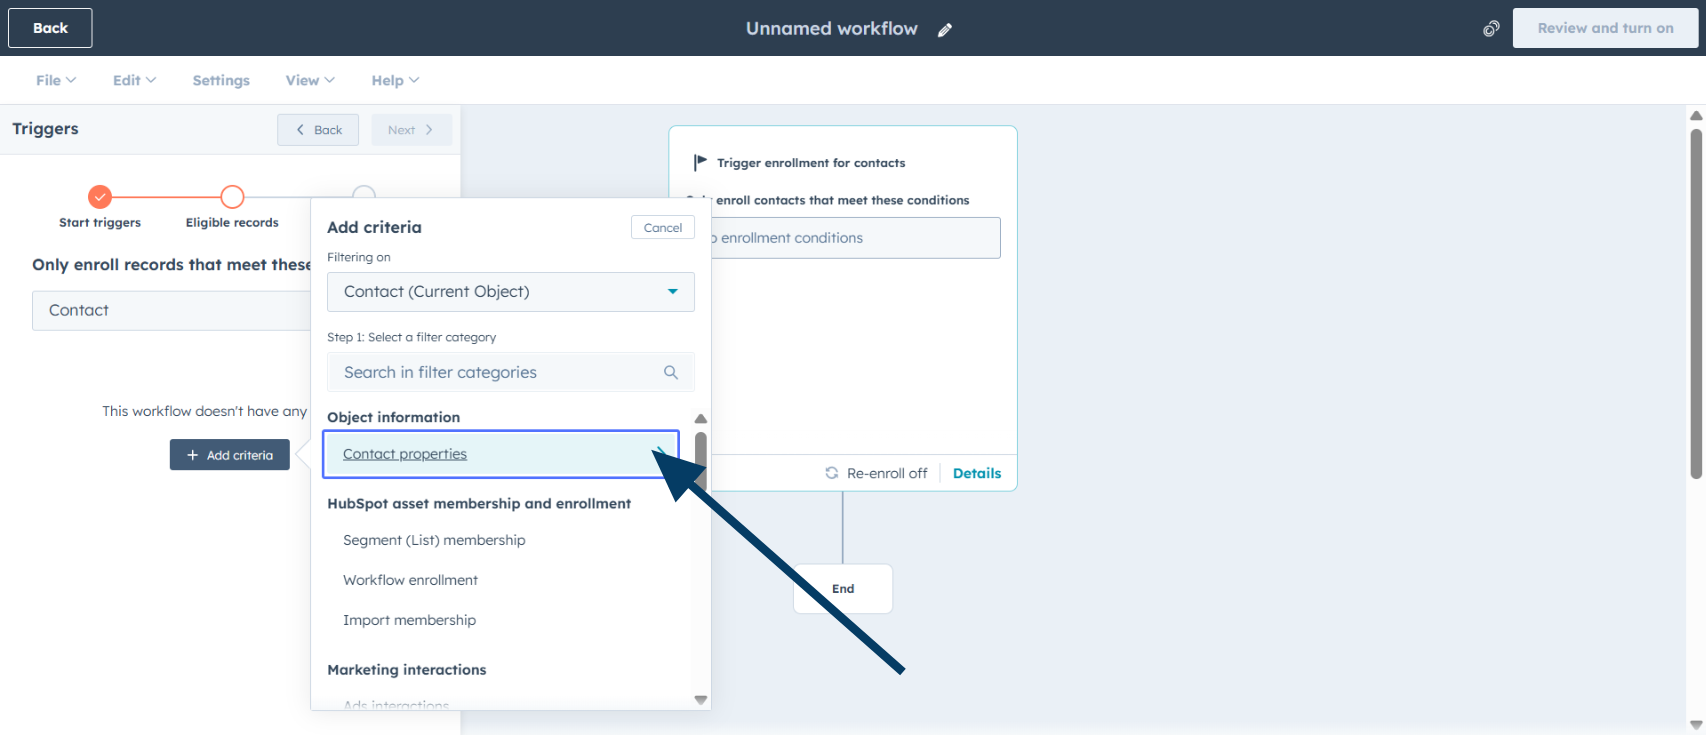
8
Access Contact Properties
Click on Contact properties to configure specific enrollment criteria.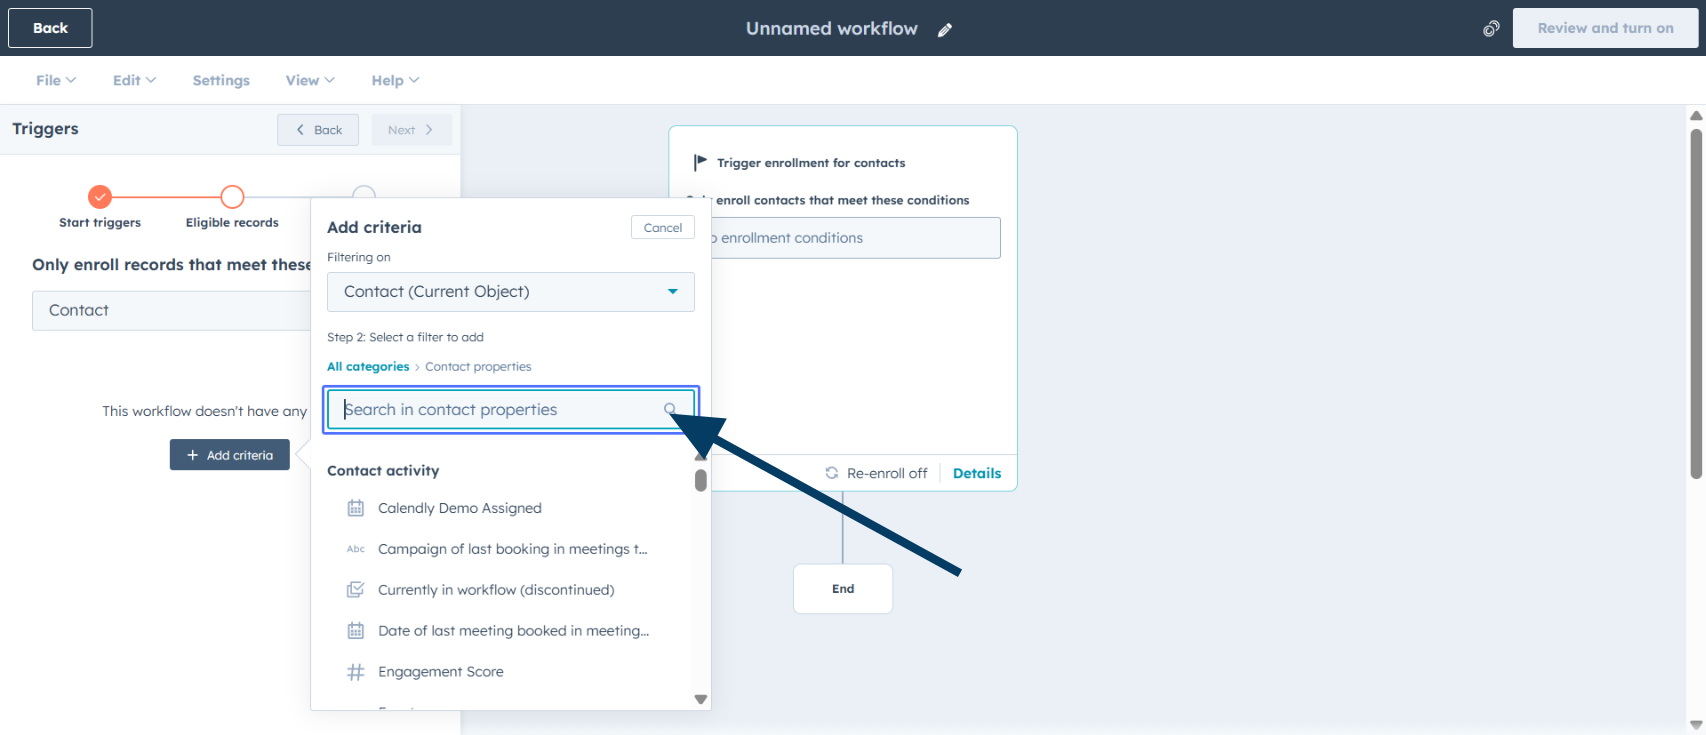
9
Search for Property
Search for the contact property you want to use as the enrollment trigger.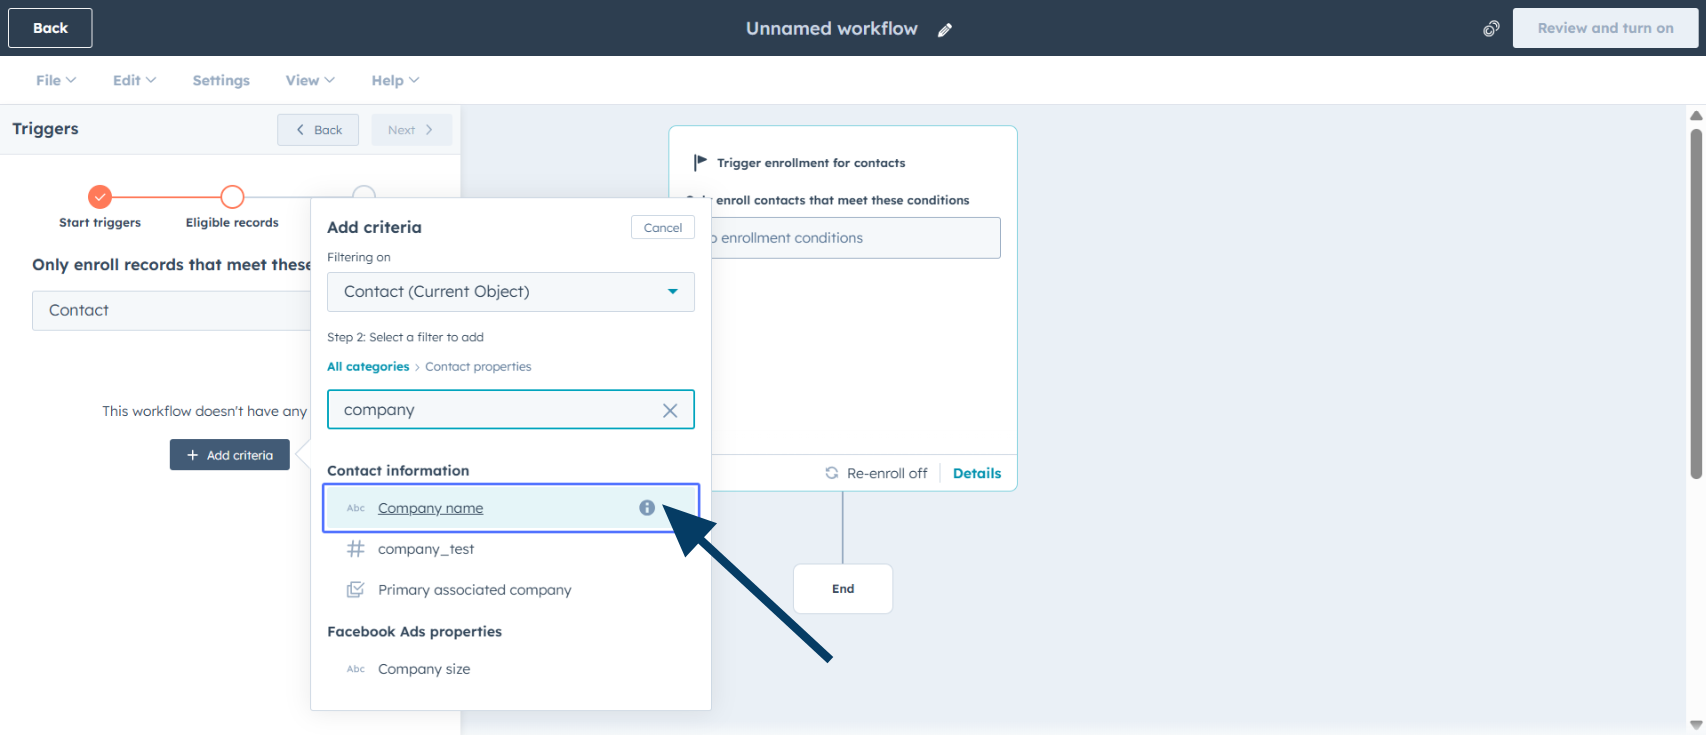
10
Choose Property Name
Select your desired property (for example, “Company name”) from the list.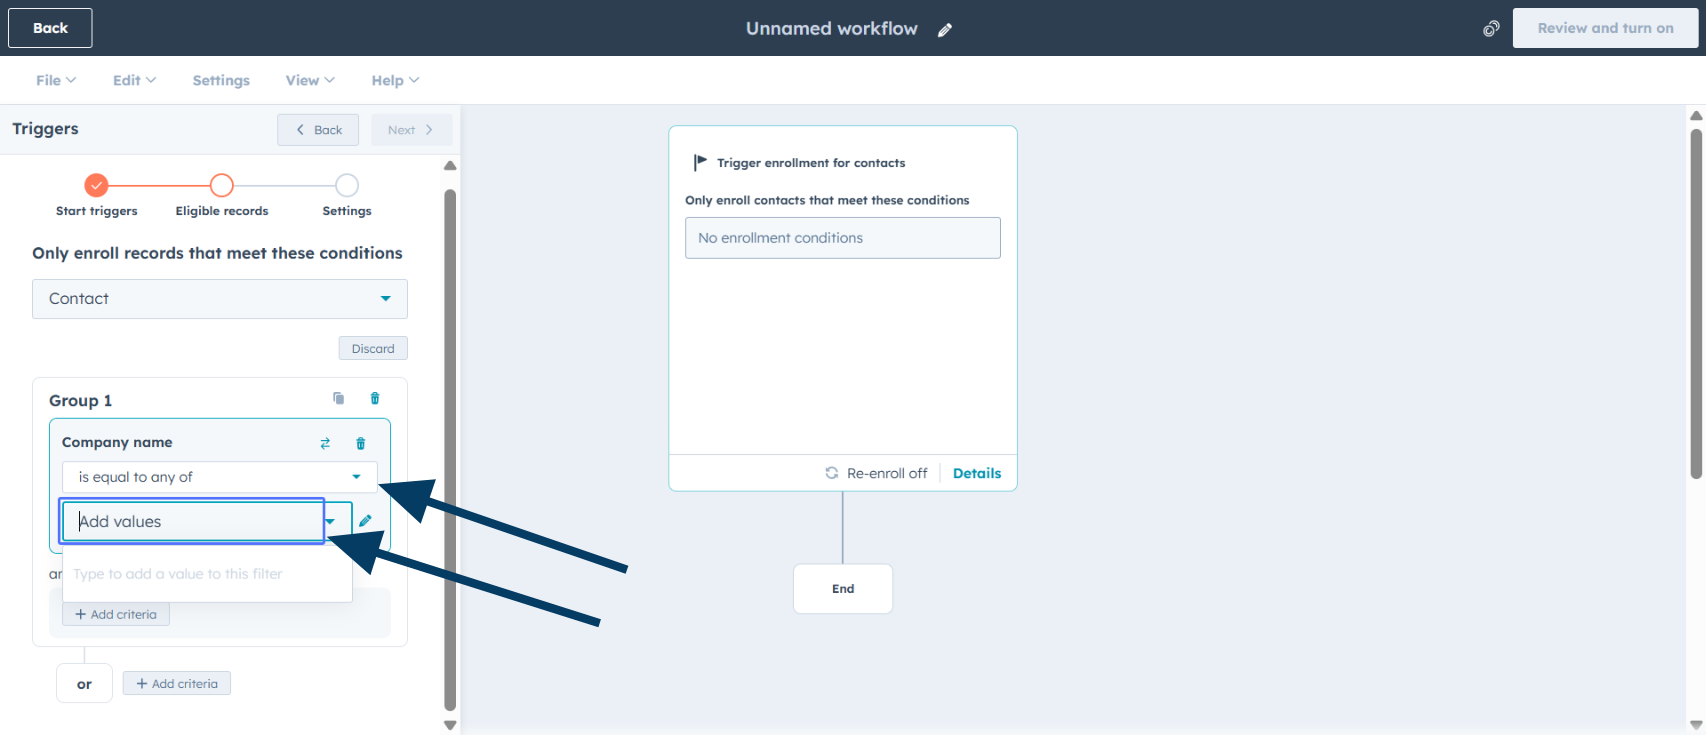
You can use any contact property such as lifecycle stage, lead status, or custom properties you’ve created.
11
Configure Conditions
Set the condition (e.g., “is equal to any of”) and add the matching values under Add values.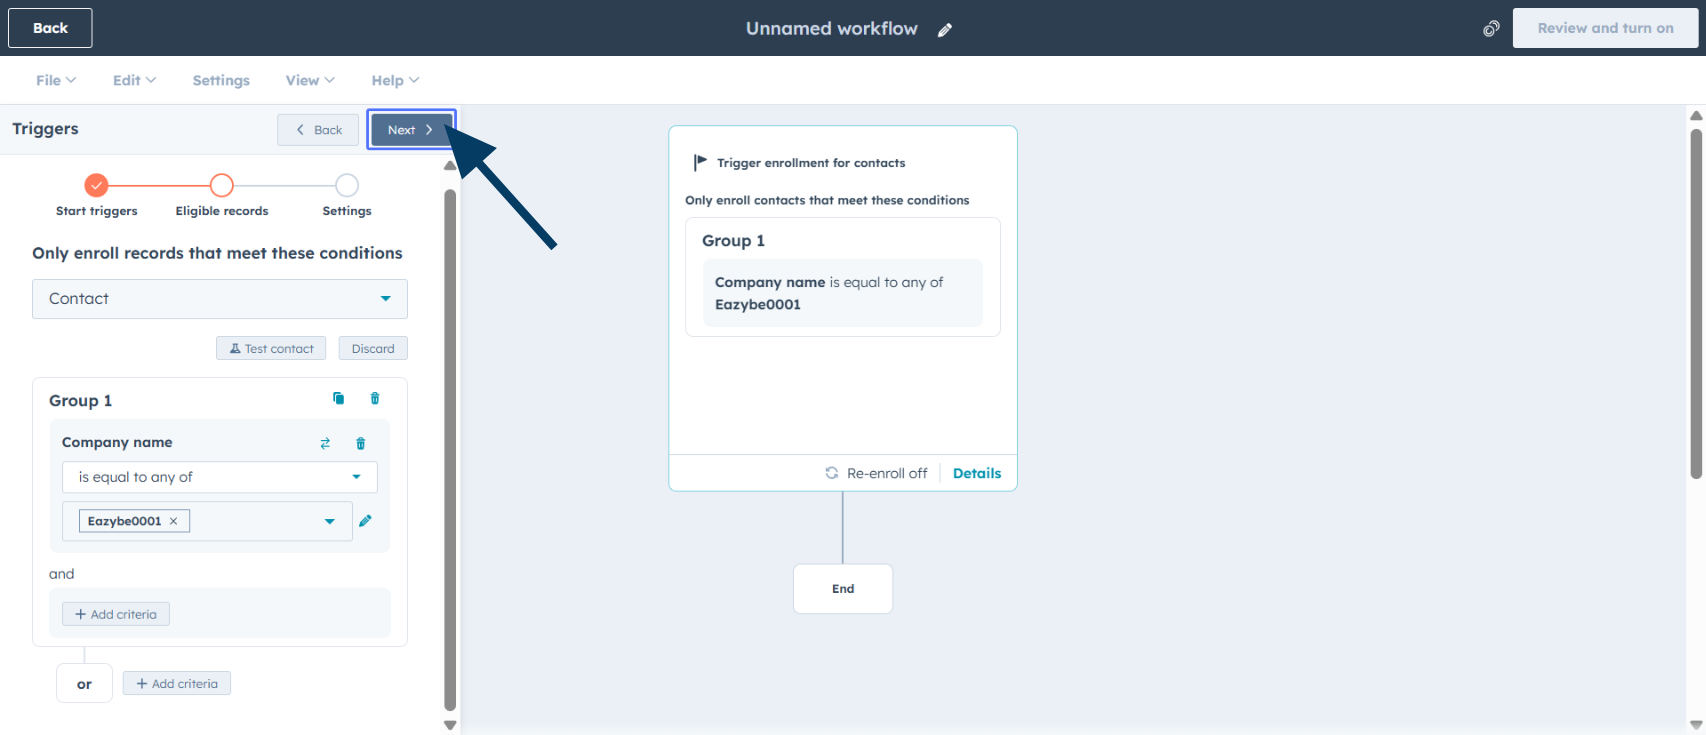
12
Proceed to Next Step
Click Next to continue to the re-enrollment settings.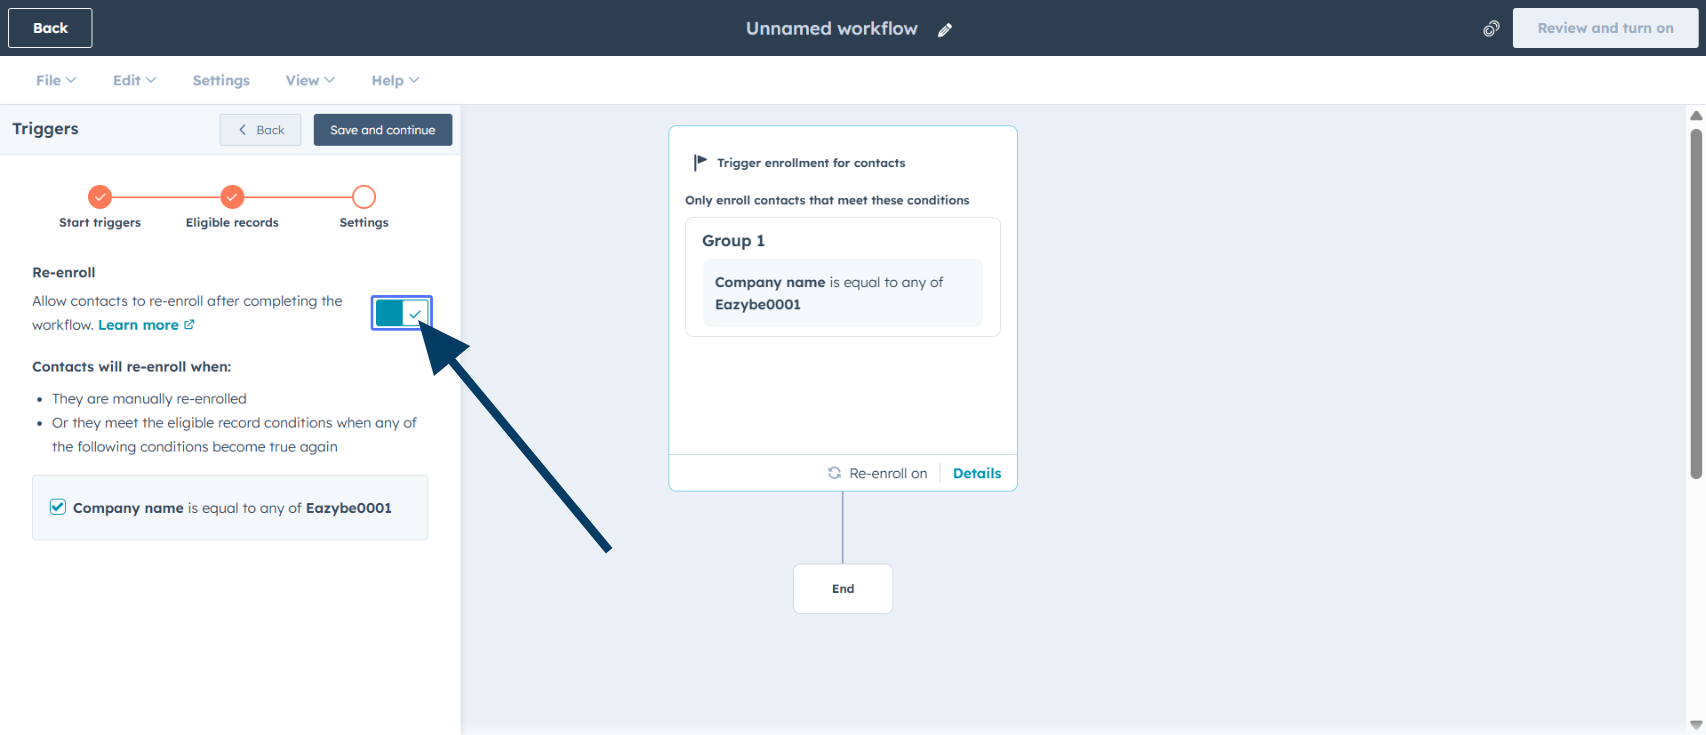
13
Enable Re-enrollment
Toggle Re-enroll if you want contacts who already met the criteria to enter the workflow again.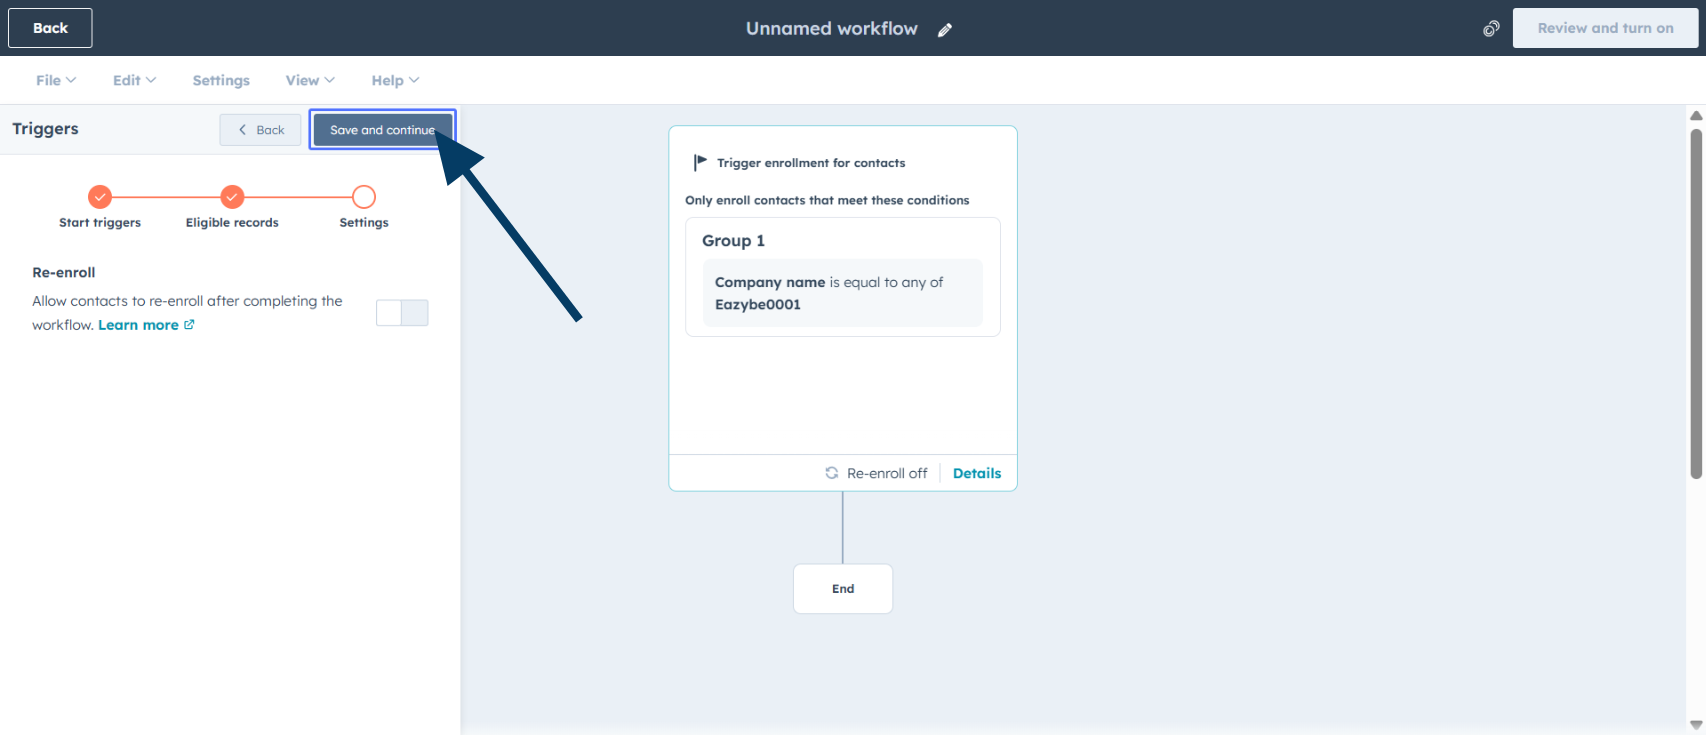
14
Save Enrollment Settings
Click Save and continue to preserve your enrollment configuration.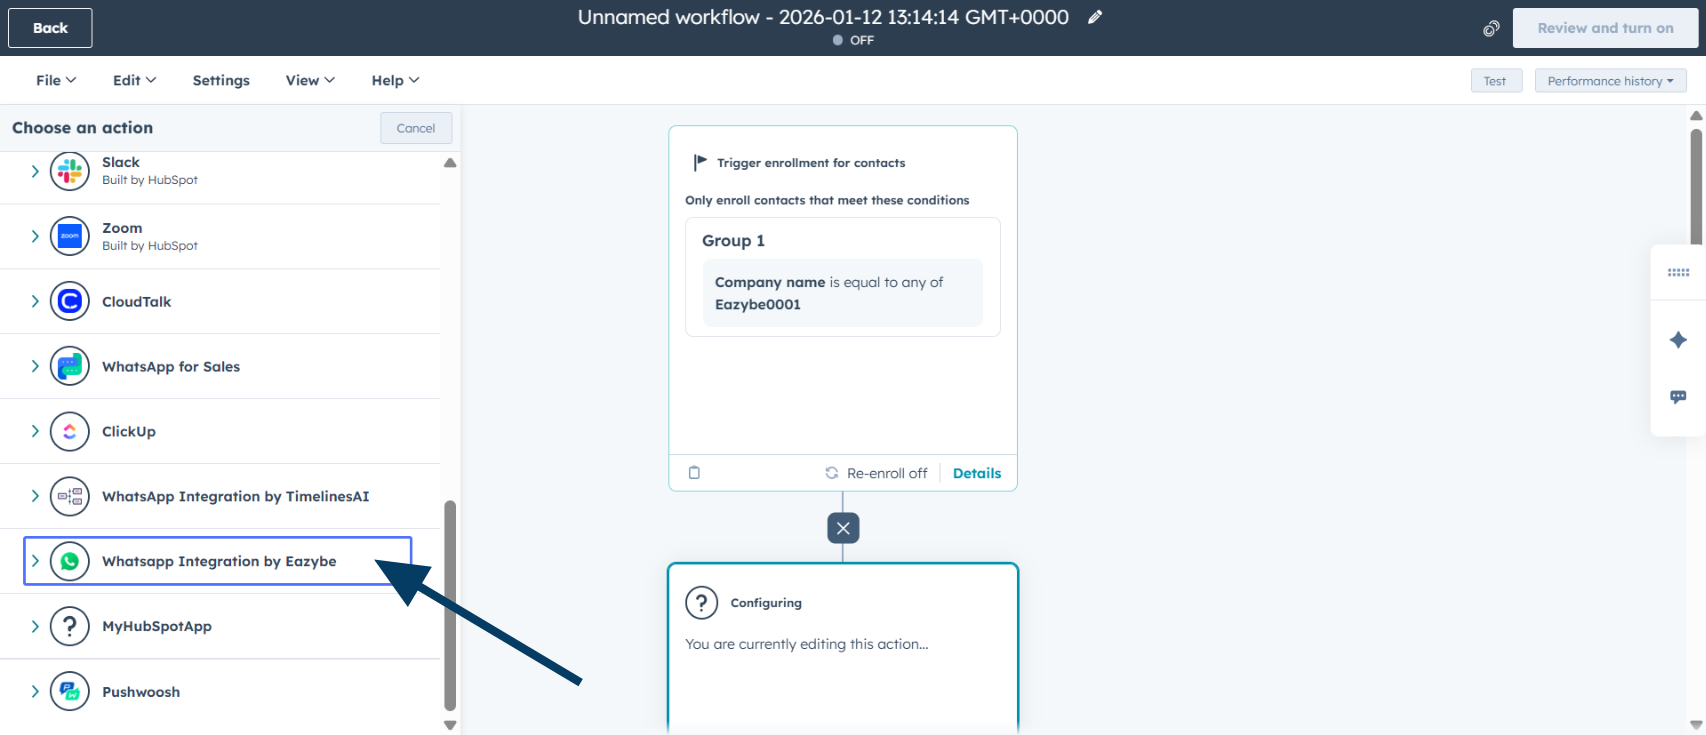
15
Add WhatsApp Integration
Scroll down in the actions panel and select WhatsApp Integration by Eazybe.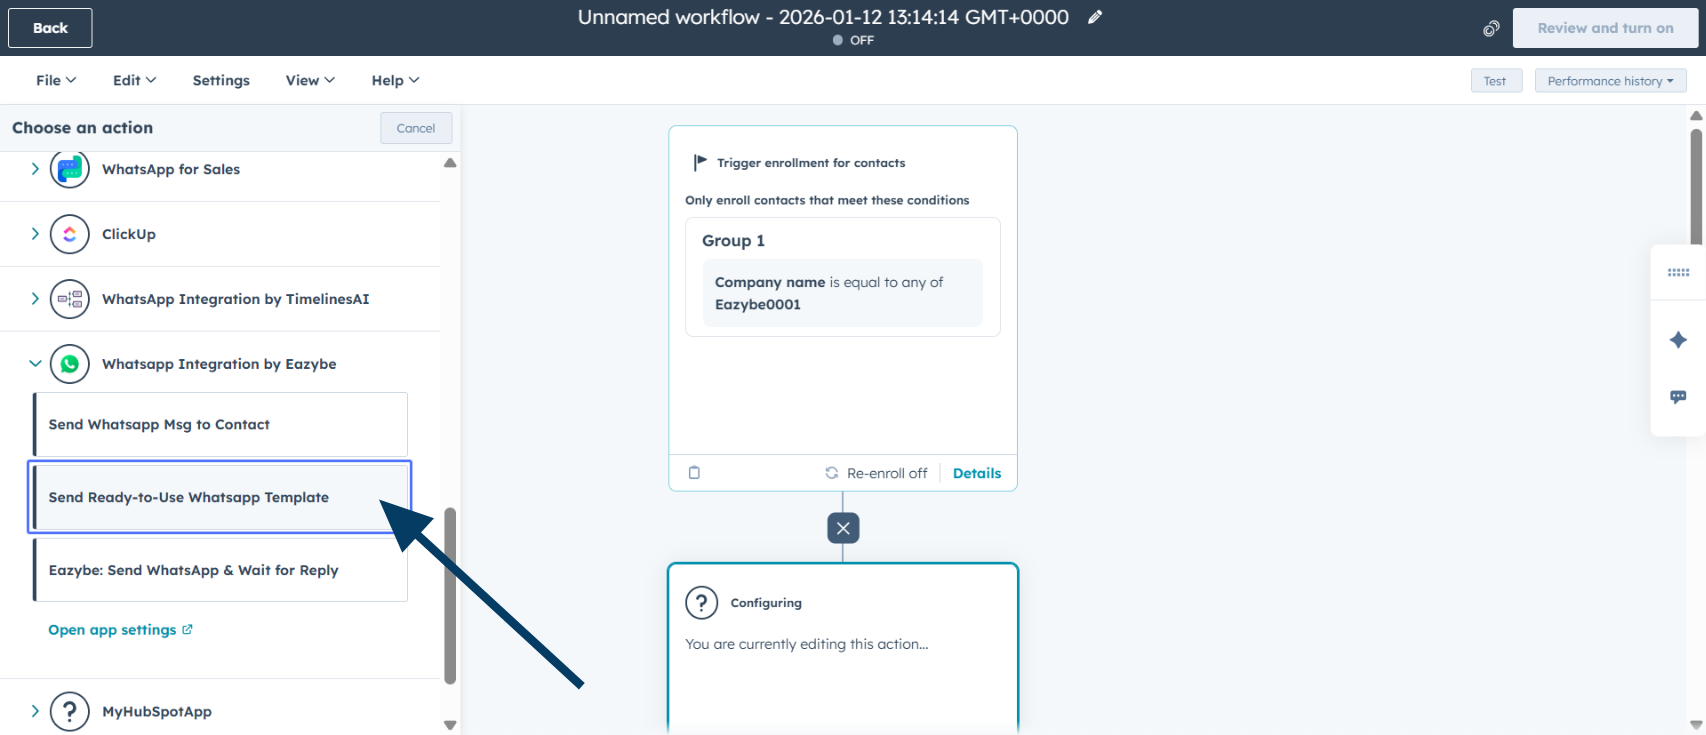
16
Recipient Phone Number
Click Recipient Phone Number and choose which HubSpot contact property to use: Mobile phone number, Phone number, or WhatsApp phone number.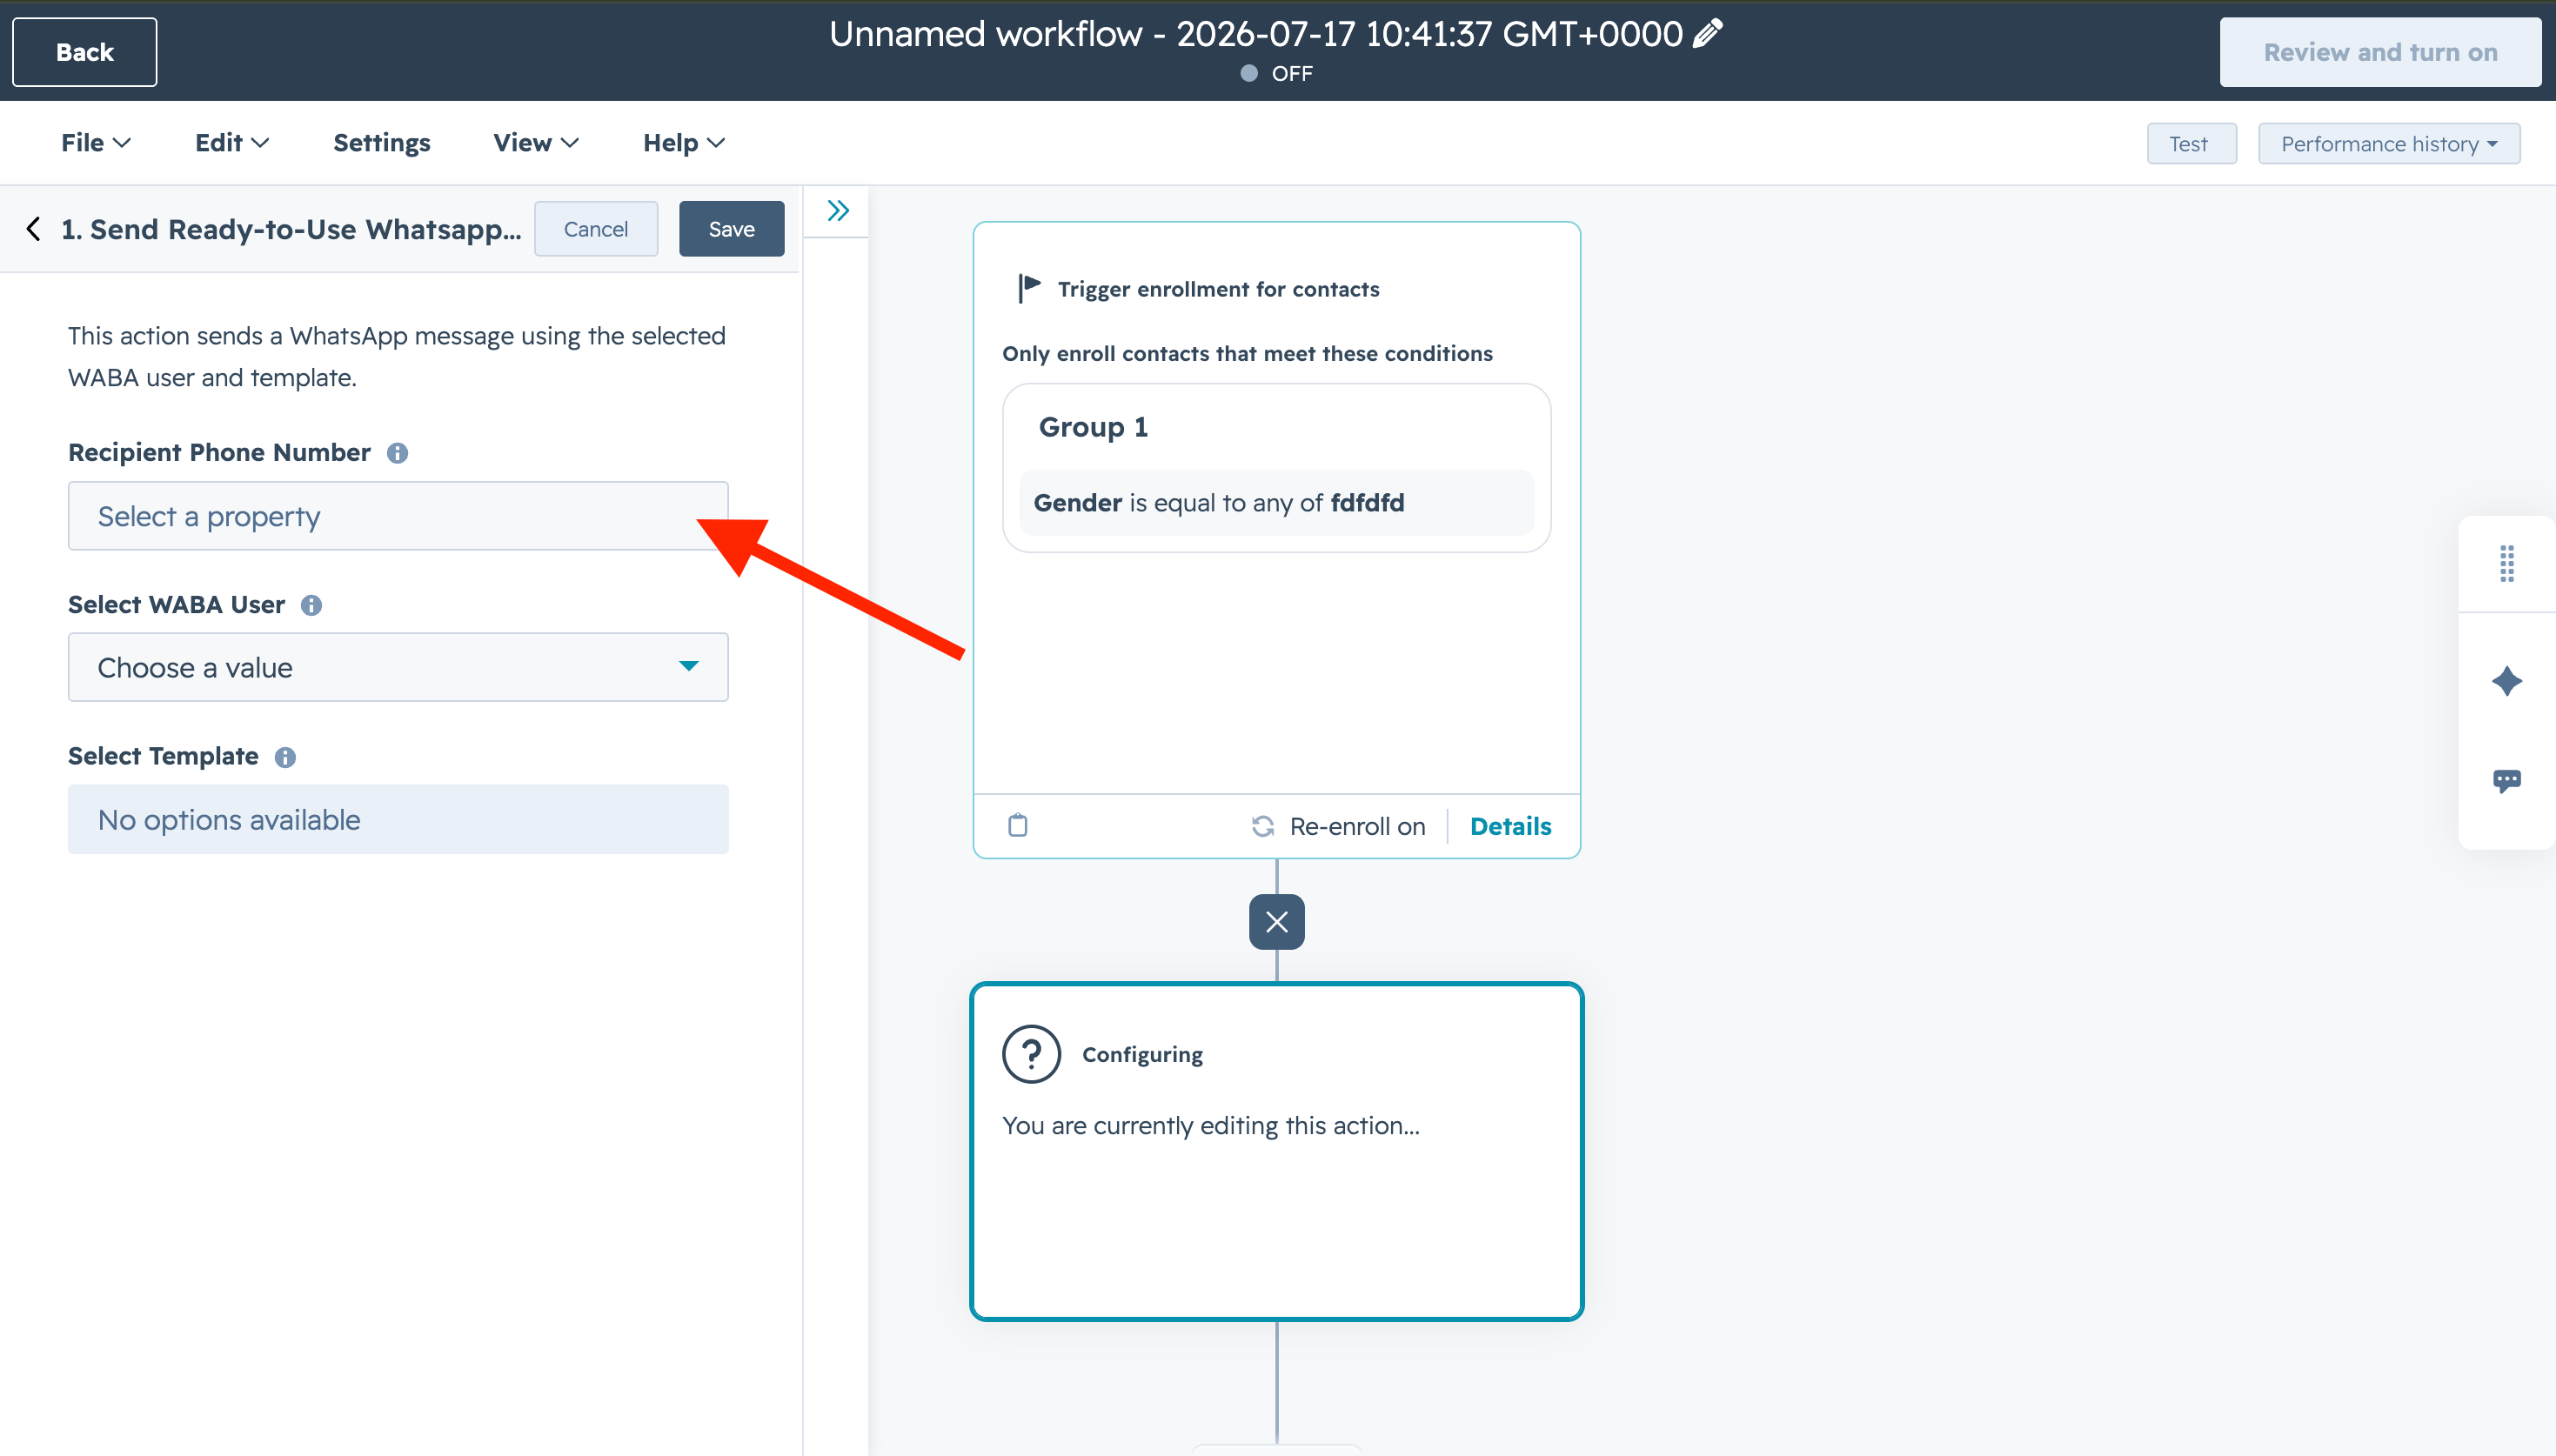
17
Select a Phone Number Property
Choose one of the available properties: Mobile phone number, Phone number, or WhatsApp phone number.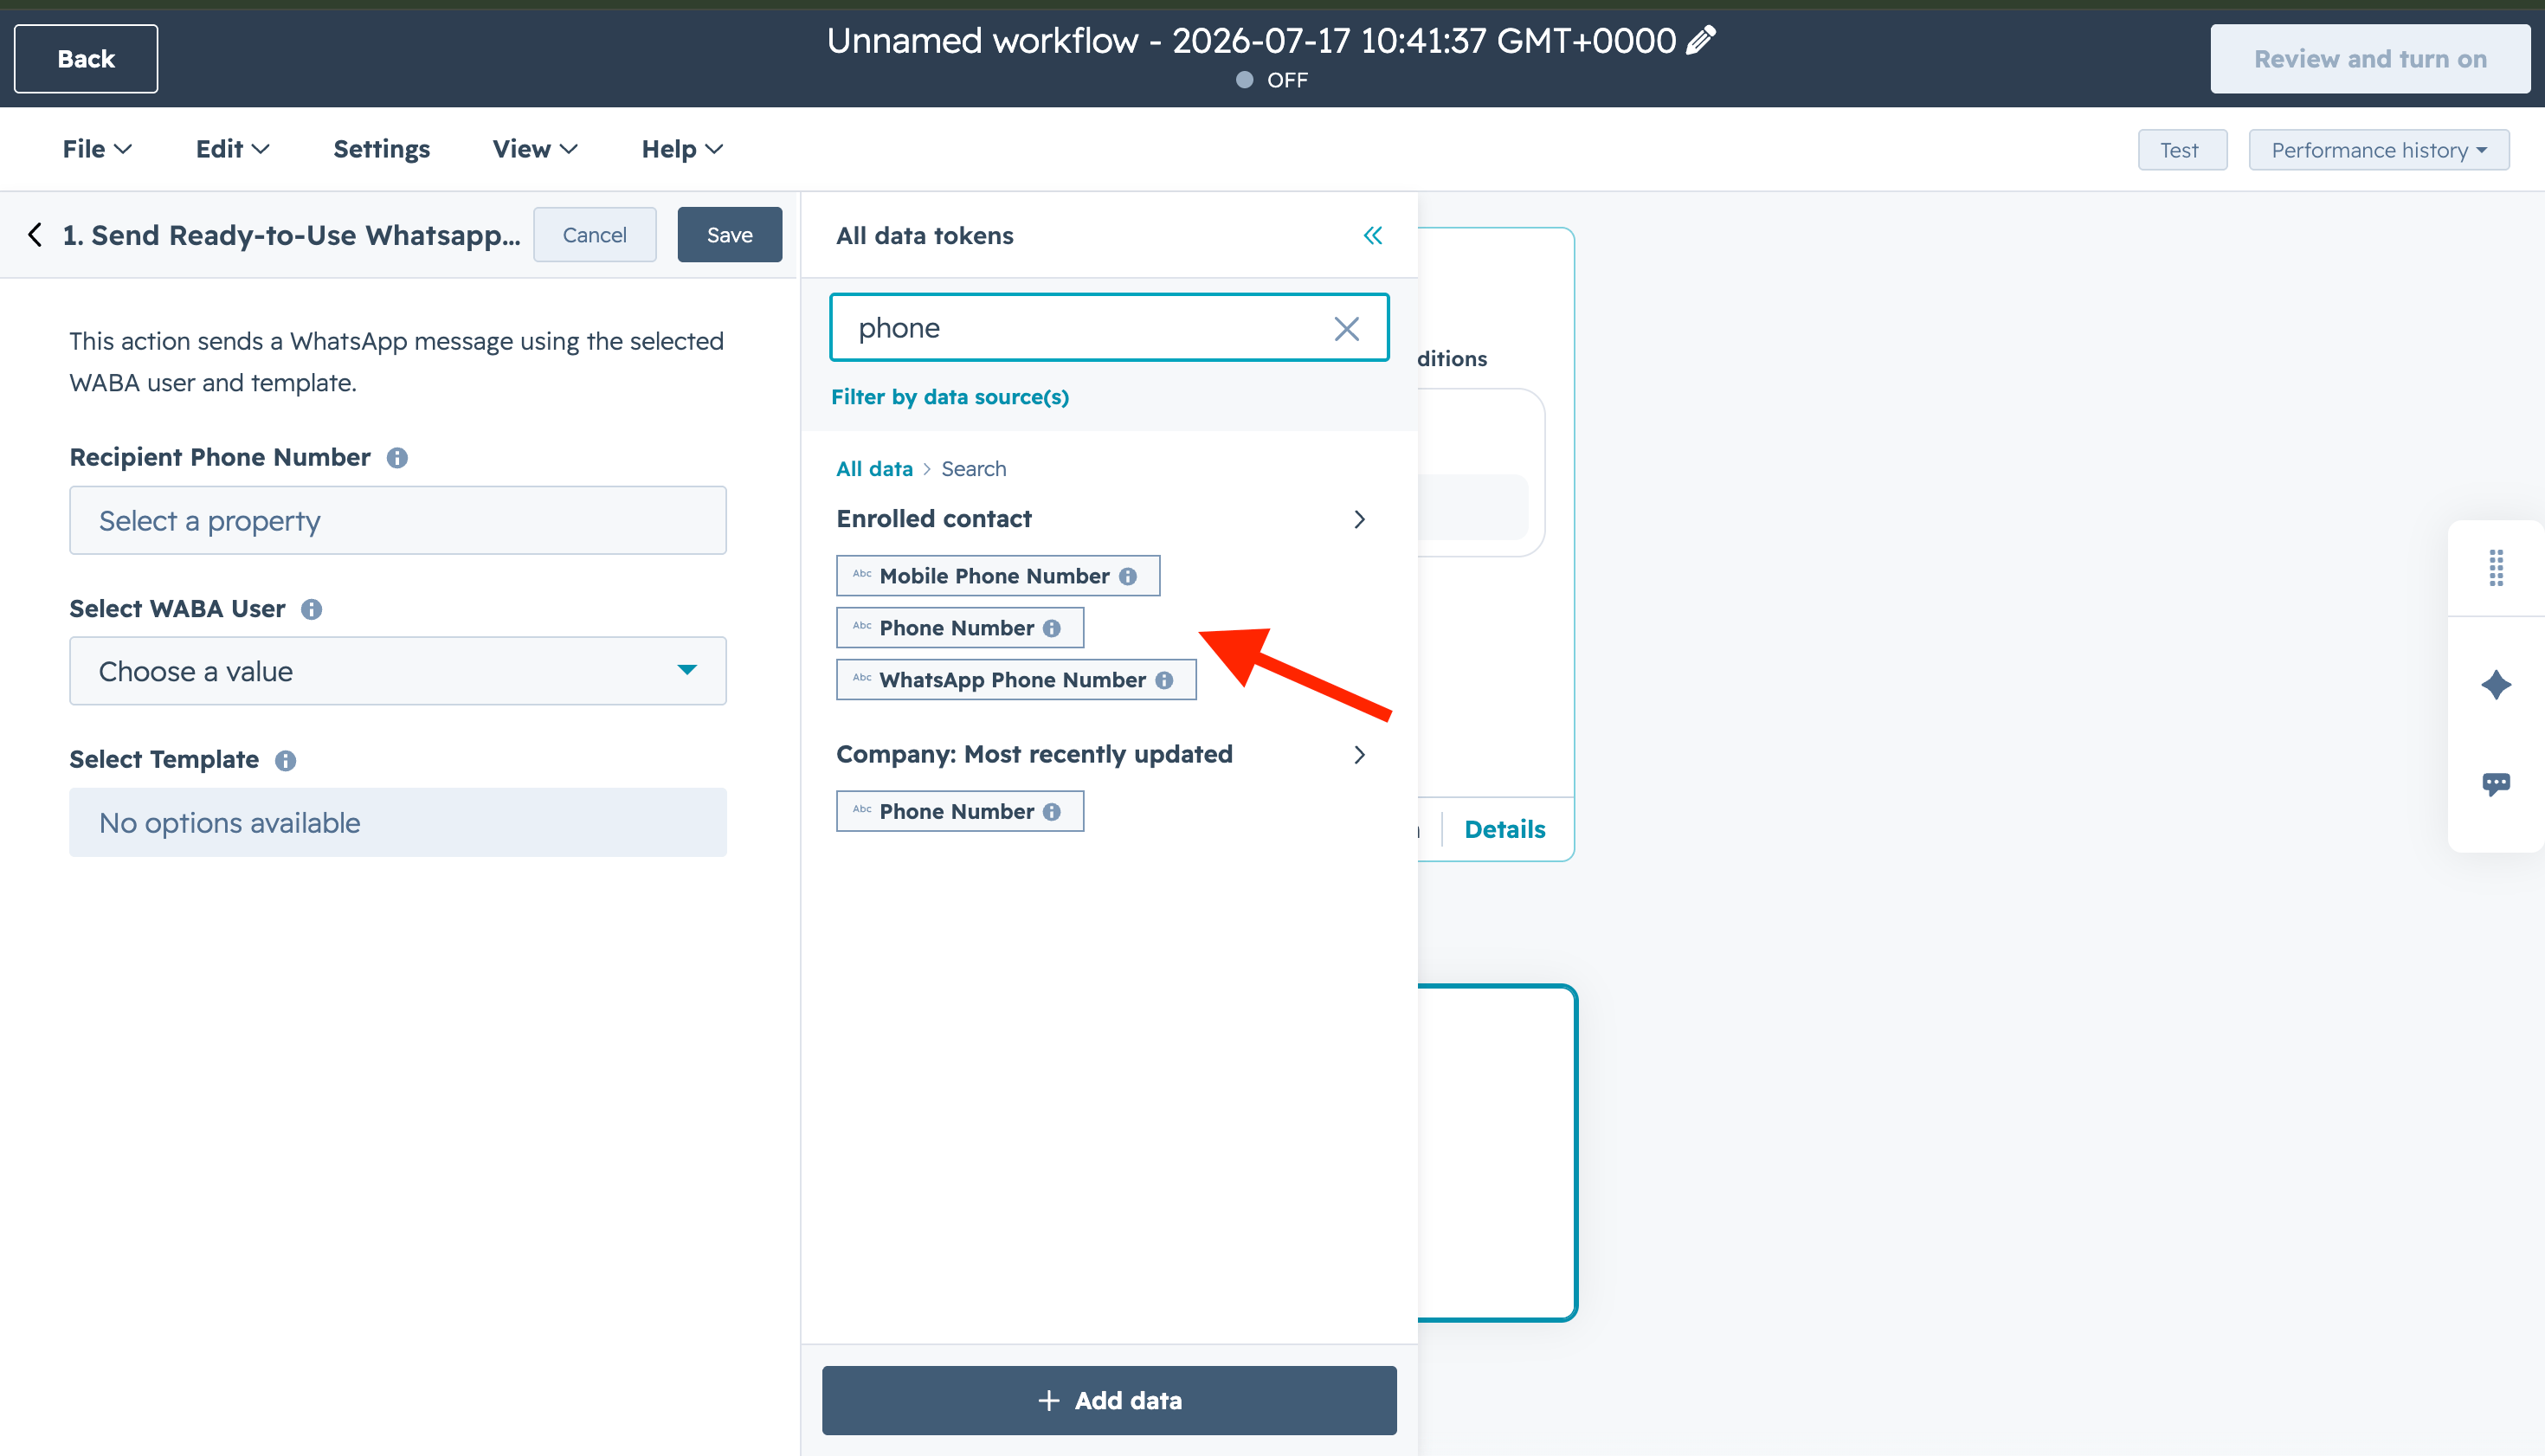
18
Select WABA User
Select the WABA User whose WhatsApp number you want to use to send the template.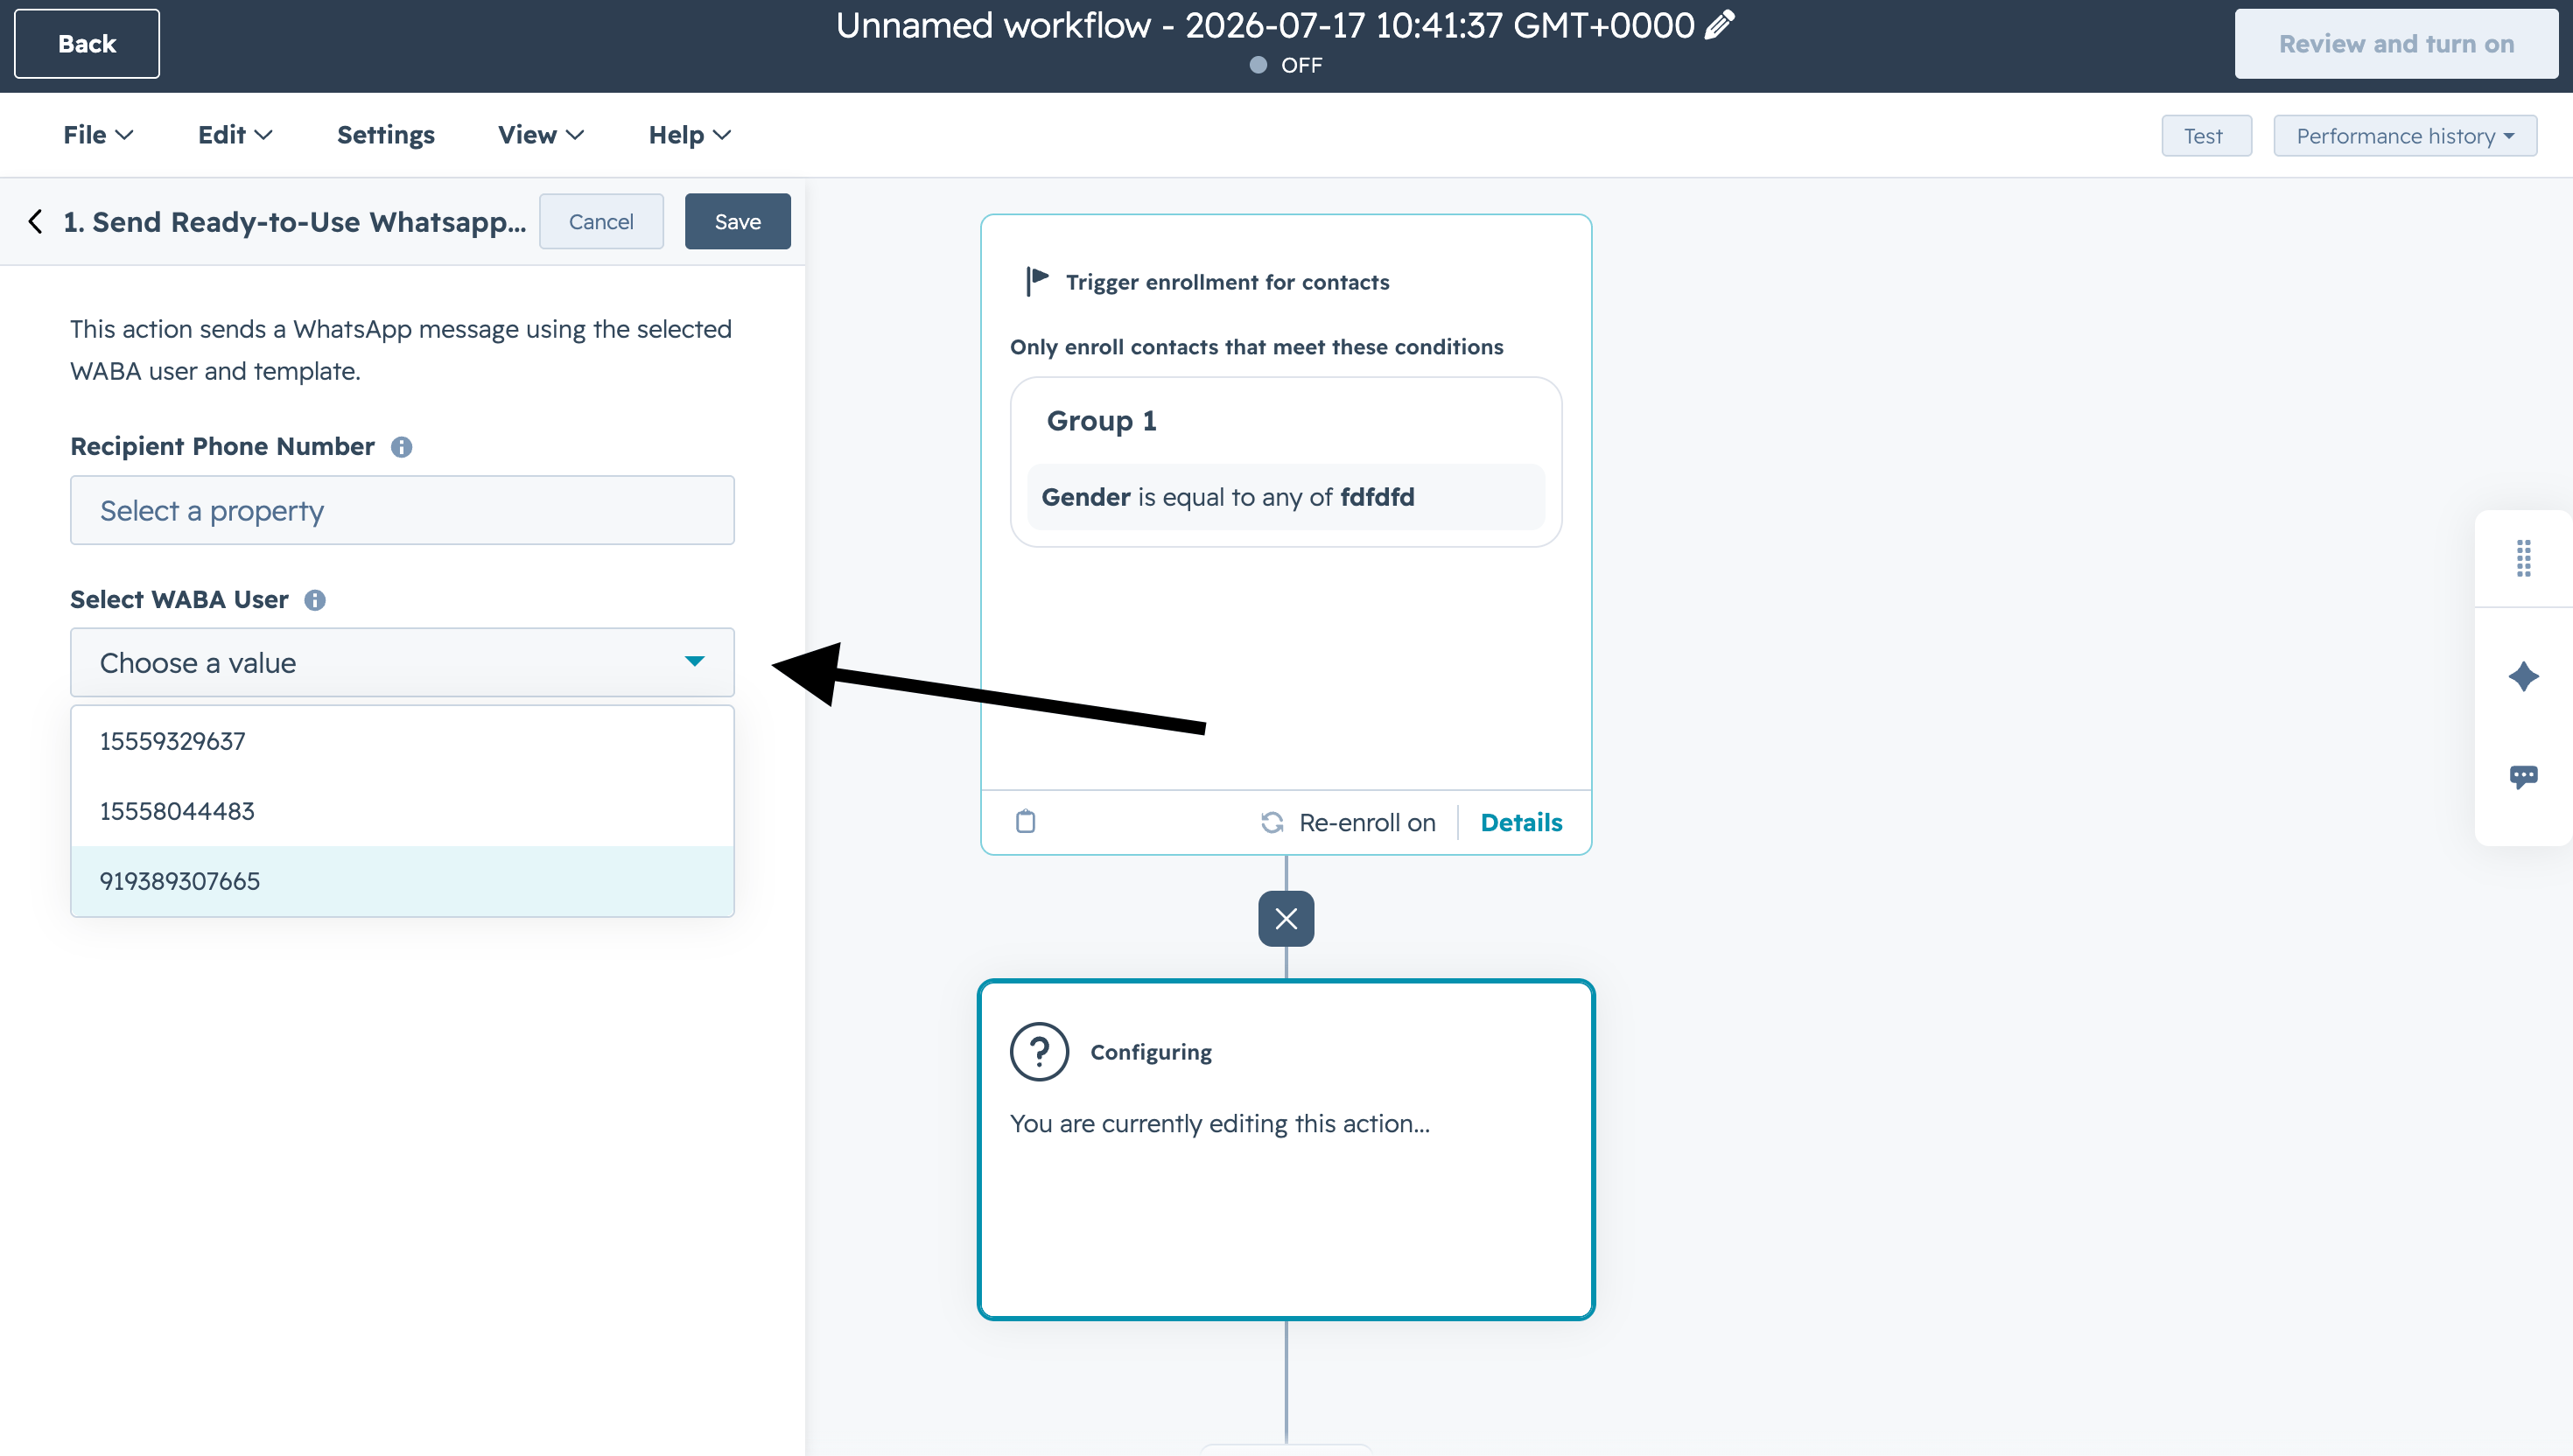
19
Select Template Action
Click the Select Template field to choose a pre-approved message template.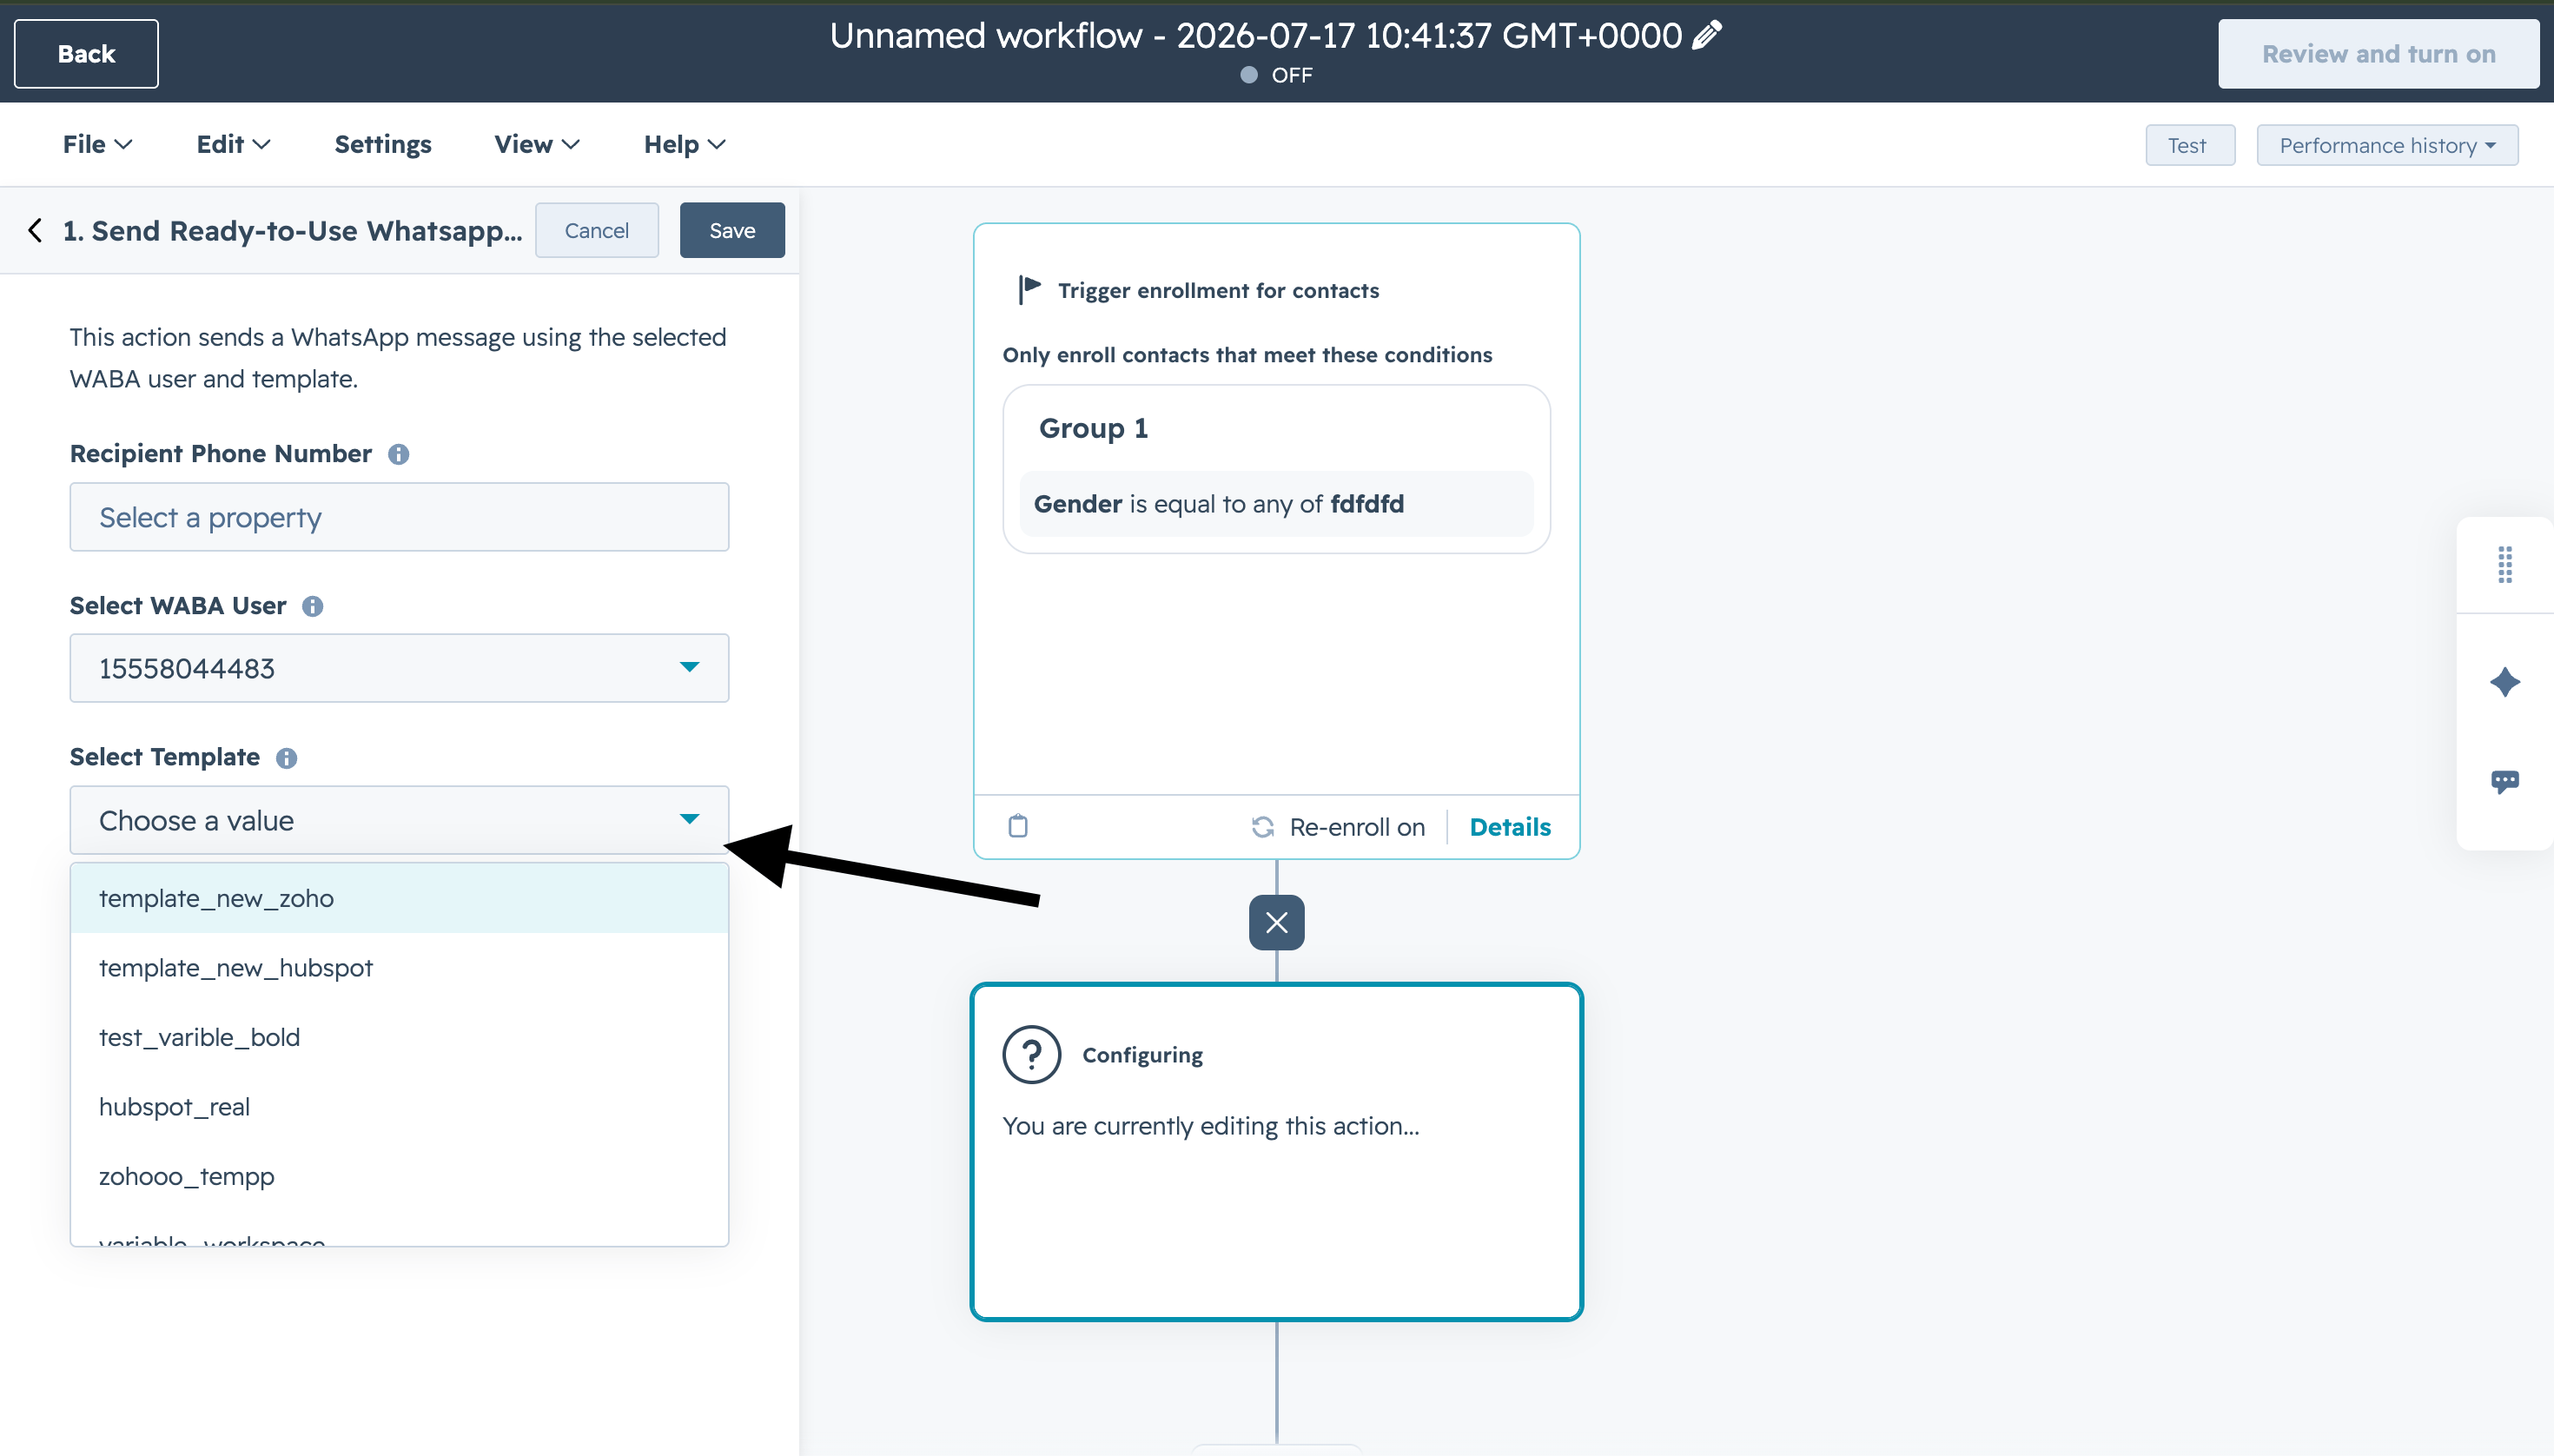
20
Choose Save Option
Click Save to save the action details.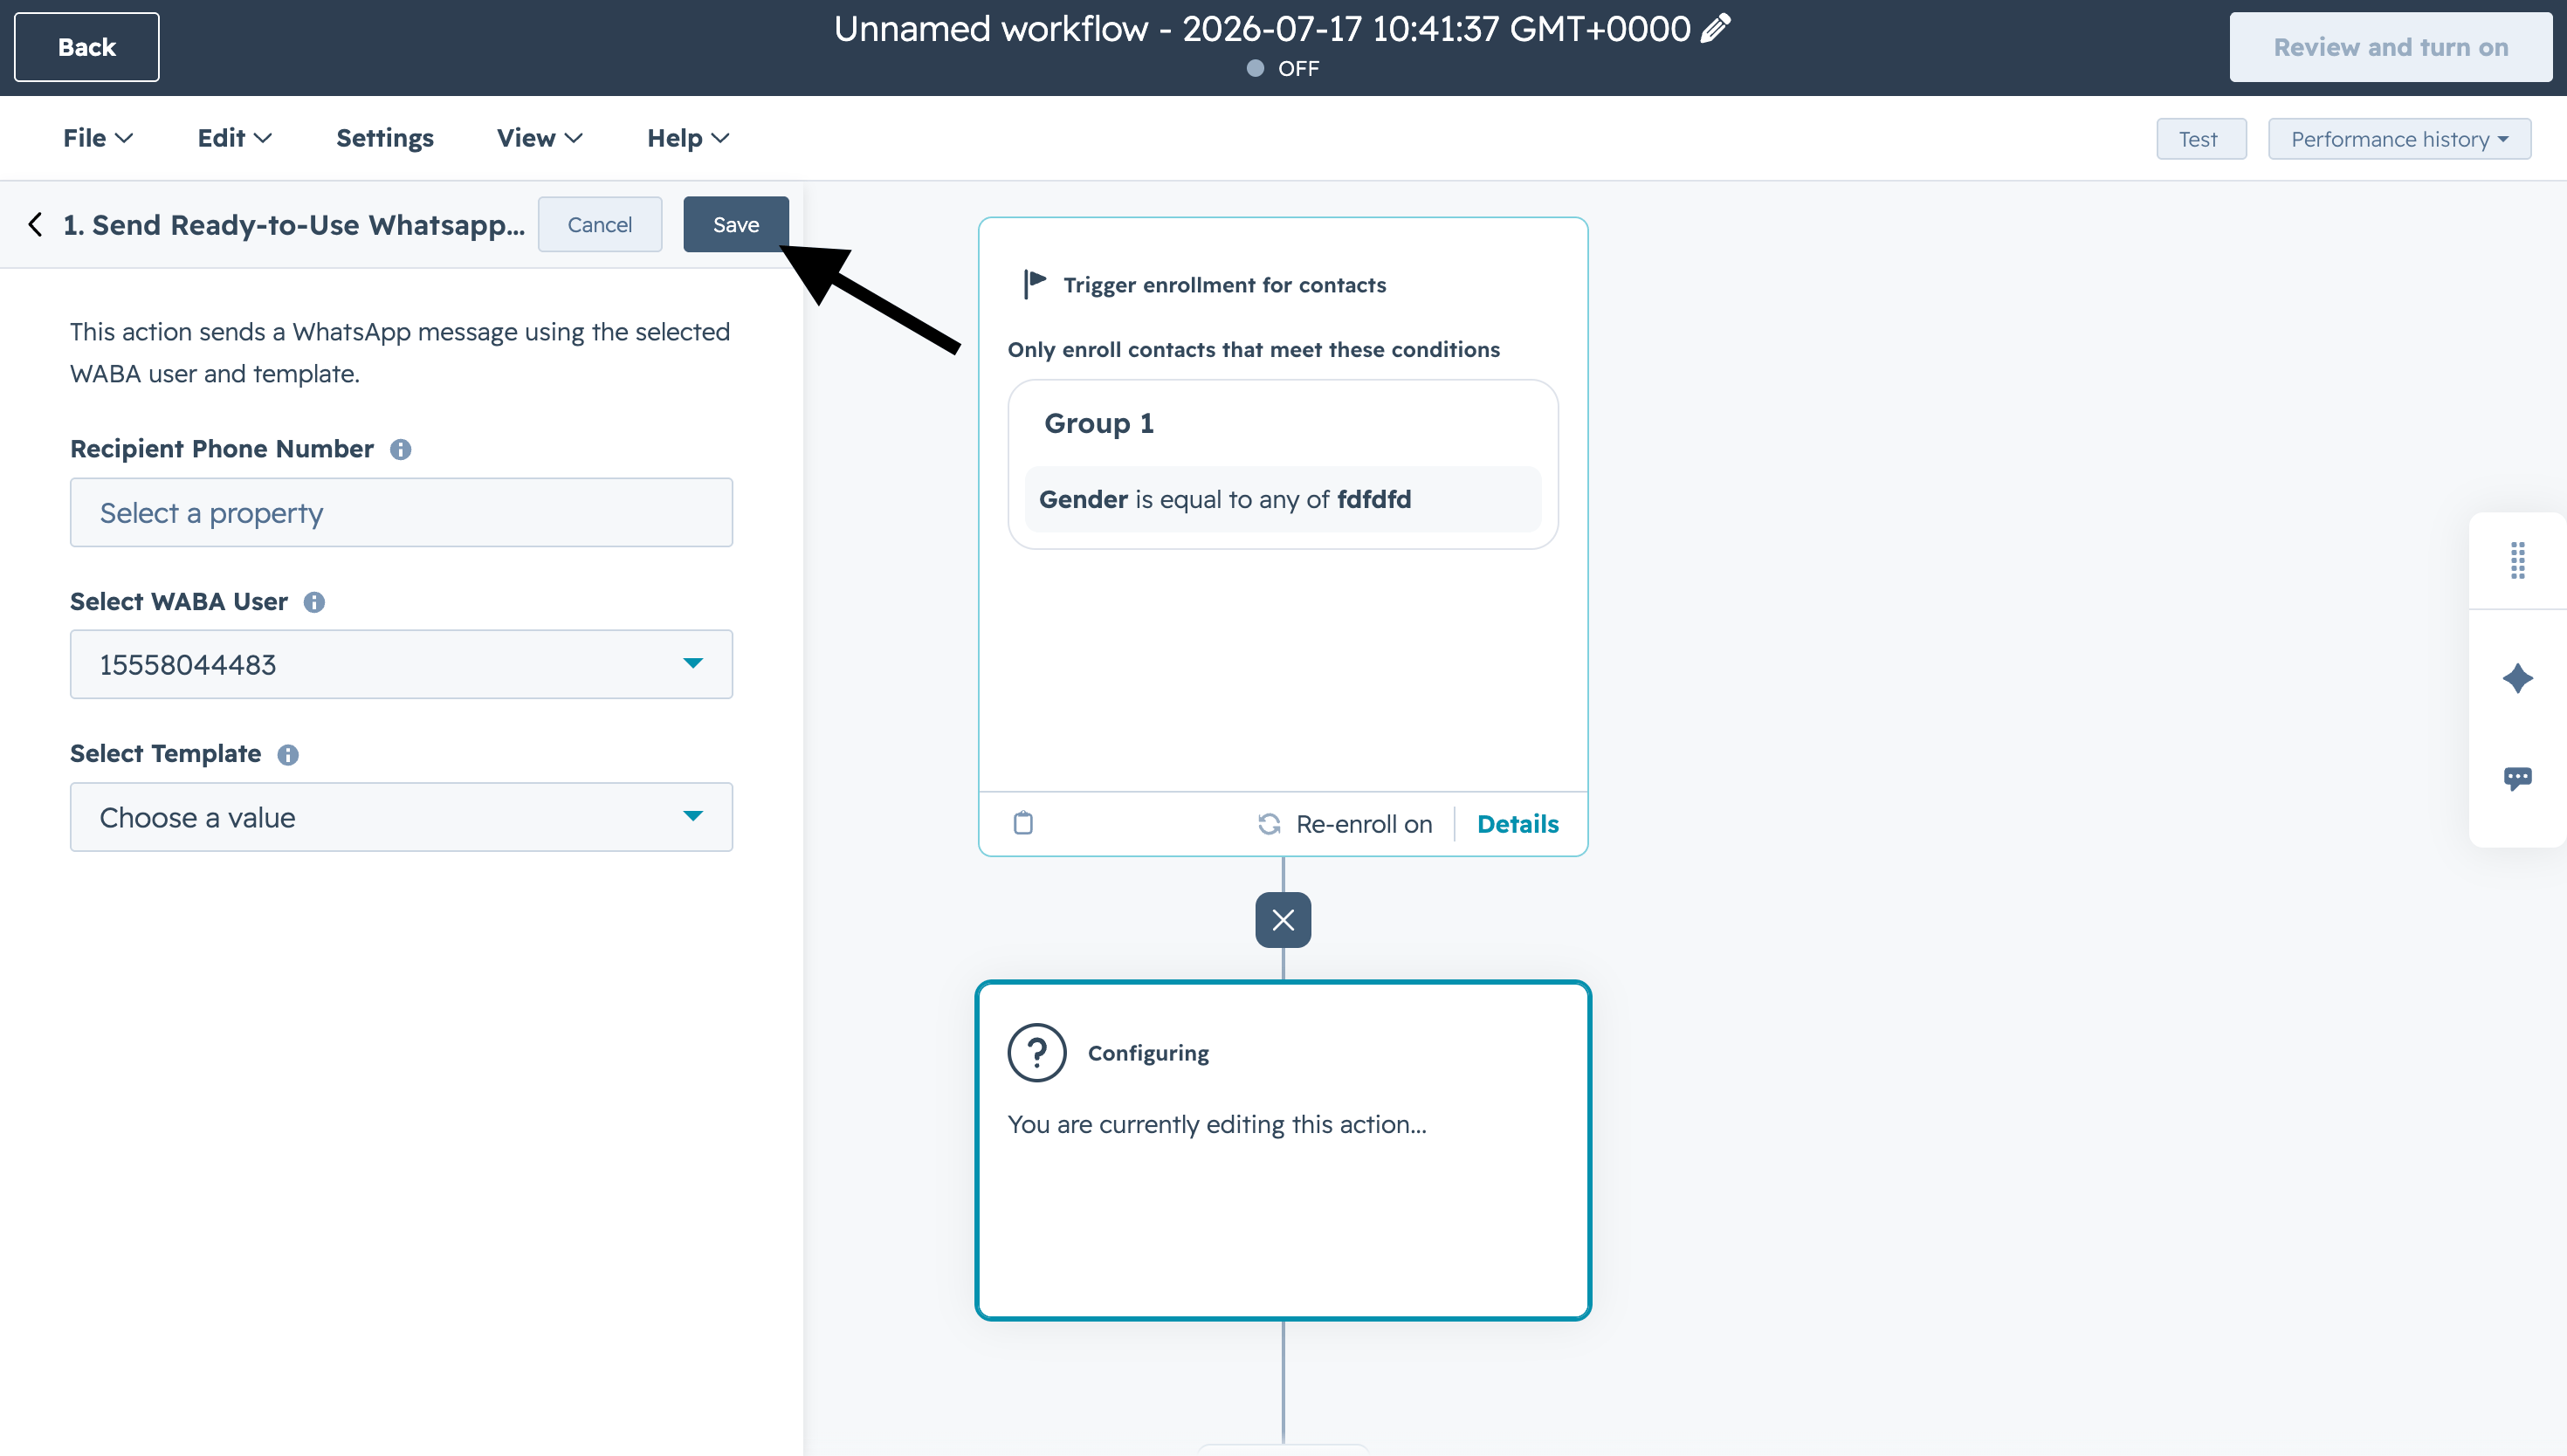
21
Review and Turn On
Click Review and turn on to access the final review screen.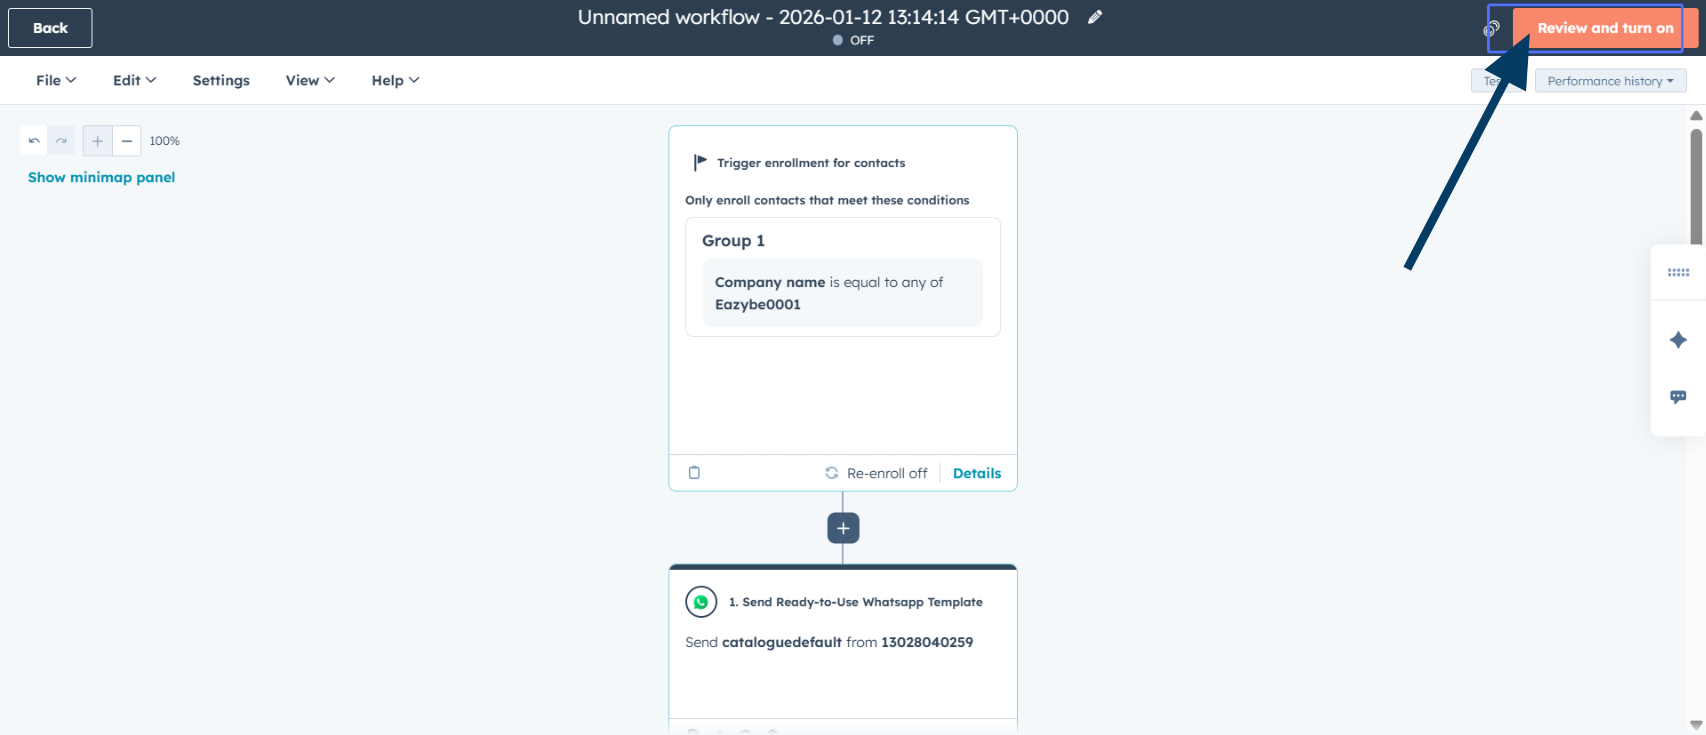
22
Set Enrollment Preferences
Configure your enrollment preference settings based on your campaign requirements.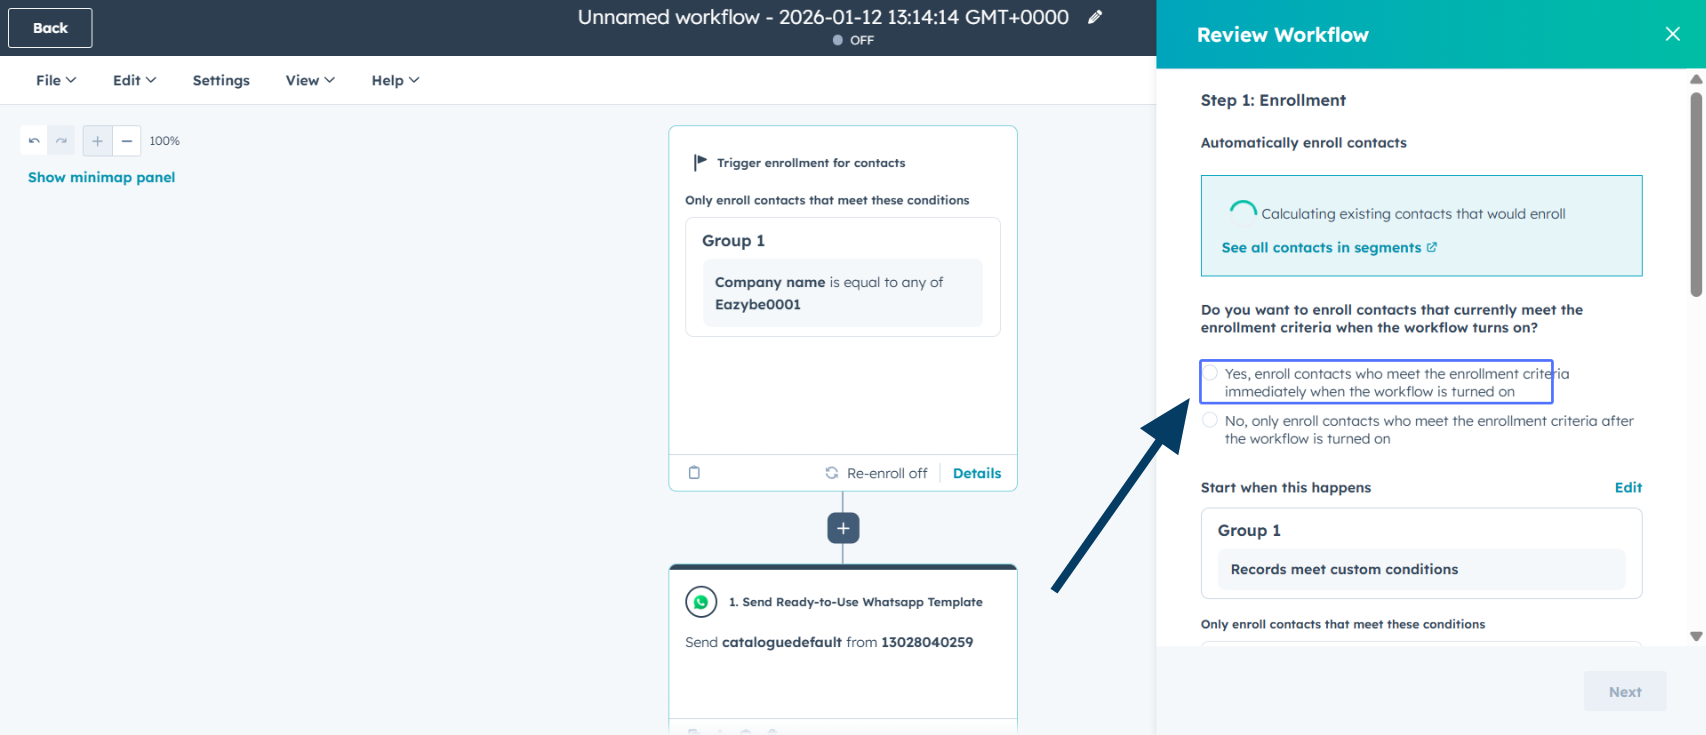
23
Final Review
Either click Skip to turn on or click Next to perform additional validation checks.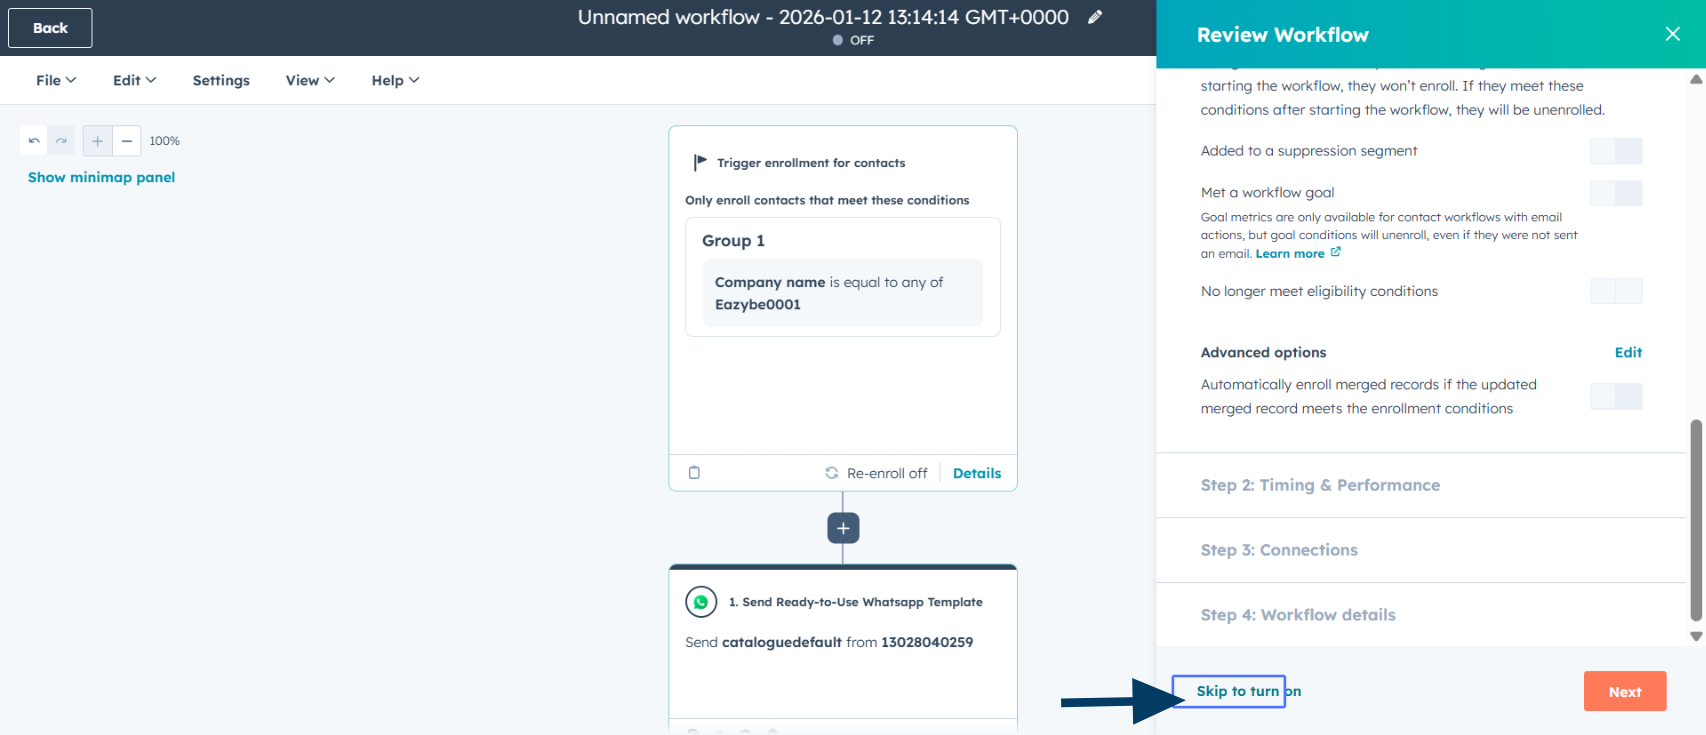
24
Activate Workflow
Click Turn on workflow to activate your WhatsApp campaign automation.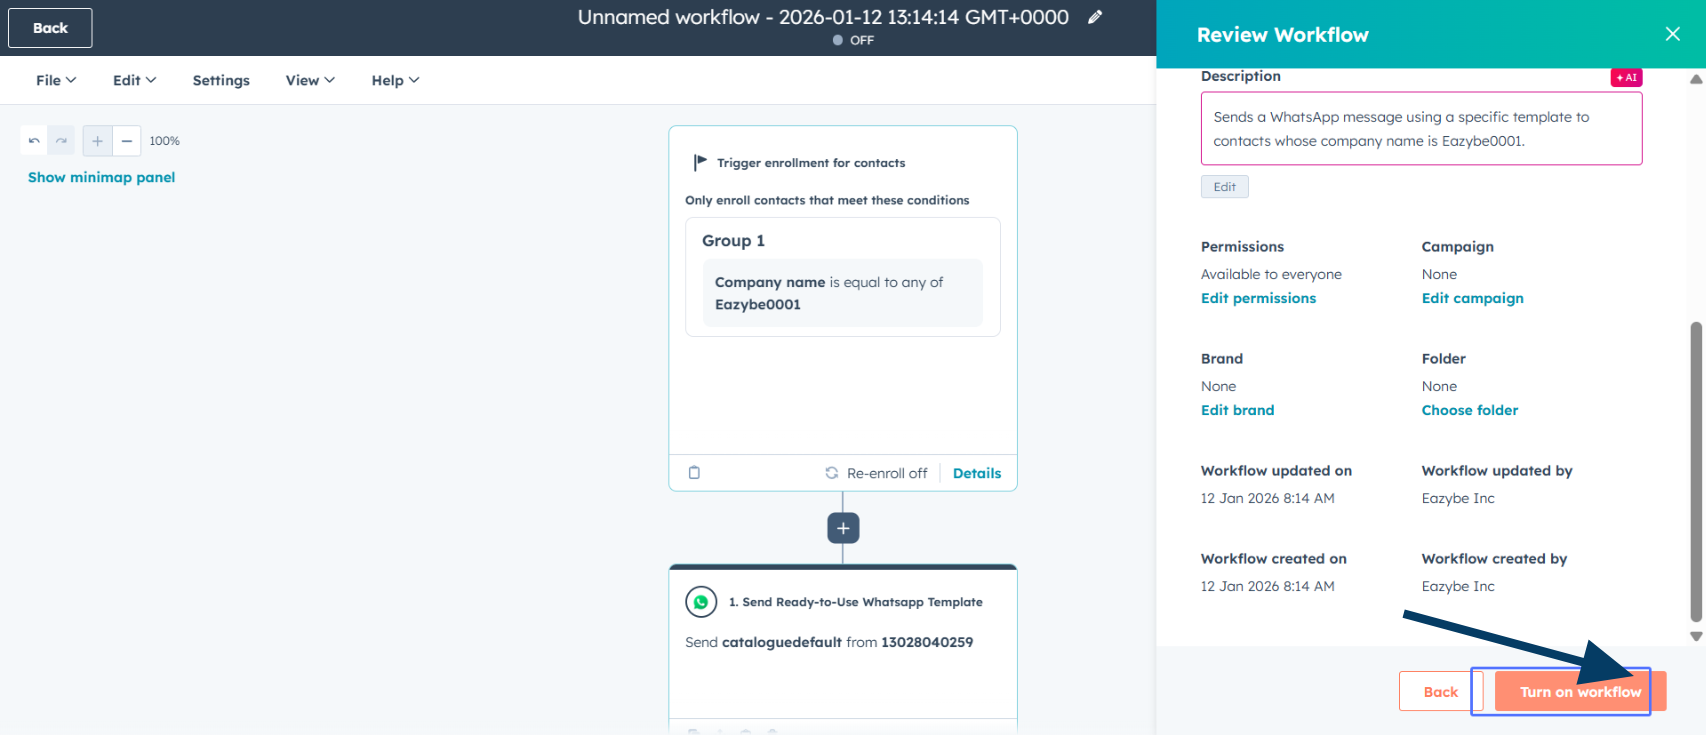
Your Workflow is Ready
Congratulations! Your HubSpot workflow is now configured to automatically send WhatsApp messages to contacts who meet your specified criteria.Your workflow will now automatically trigger WhatsApp messages whenever a contact meets the enrollment criteria you defined.
Related Resources
Send WhatsApp via Workflows
Learn more about sending WhatsApp messages through HubSpot workflows
Troubleshoot Workflow Issues
Common issues and solutions for HubSpot workflow problems
Create Templates with HubSpot Variables
Use HubSpot contact properties in your WhatsApp templates
Broadcast Campaigns
Send bulk WhatsApp messages to multiple recipients