

1
Open Auto Dialer
Open Auto Dialer under CALLS. The page shows Upload list, Review contacts, and Start calling.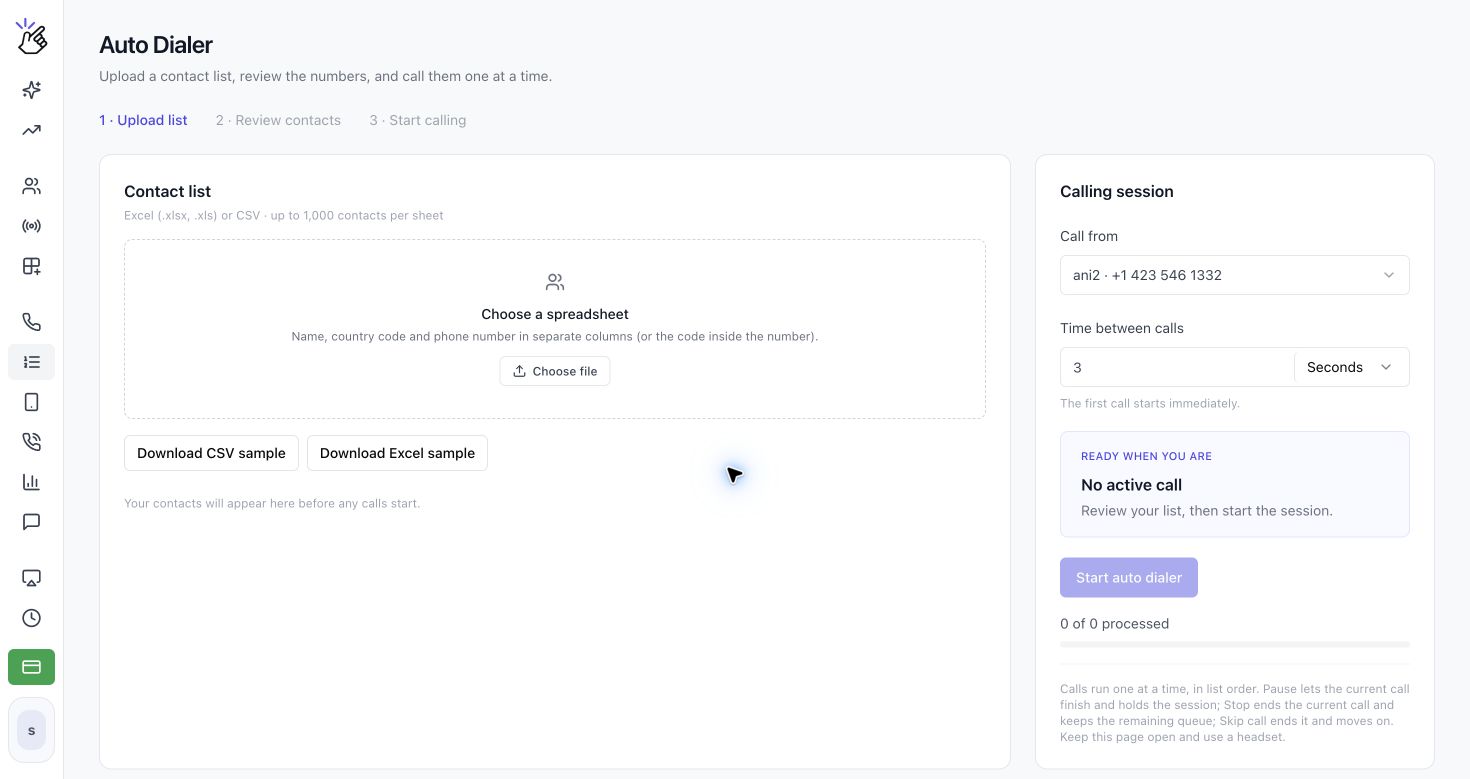
2
Upload your contact file
In Contact list, click Choose file and select a
.csv, .xlsx, or .xls file. Each sheet can contain up to 1,000 contacts plus a header, and the file must be smaller than 5 MB.Use separate columns for Name, Country Code, and Phone Number. A phone number may include its country code instead, such as +14155550101.3
Review and correct the contacts
Review the contact table before calling. Eazybe detects the phone, name, and country-code columns. Use Adjust import settings if the detected columns are incorrect. You can also choose a sheet, change Phone column, Name column, or Country code column, and set First row contains column names (e.g. Name, Phone).Contacts with invalid numbers are listed in an amber warning and will not be called. Correct those rows and upload the file again.
4
Set the calling session
Under Calling session, choose Call from and select the voice number that will place the calls. Set Time between calls as a whole number and choose Seconds or Minutes. The first call starts immediately; the delay applies between subsequent calls.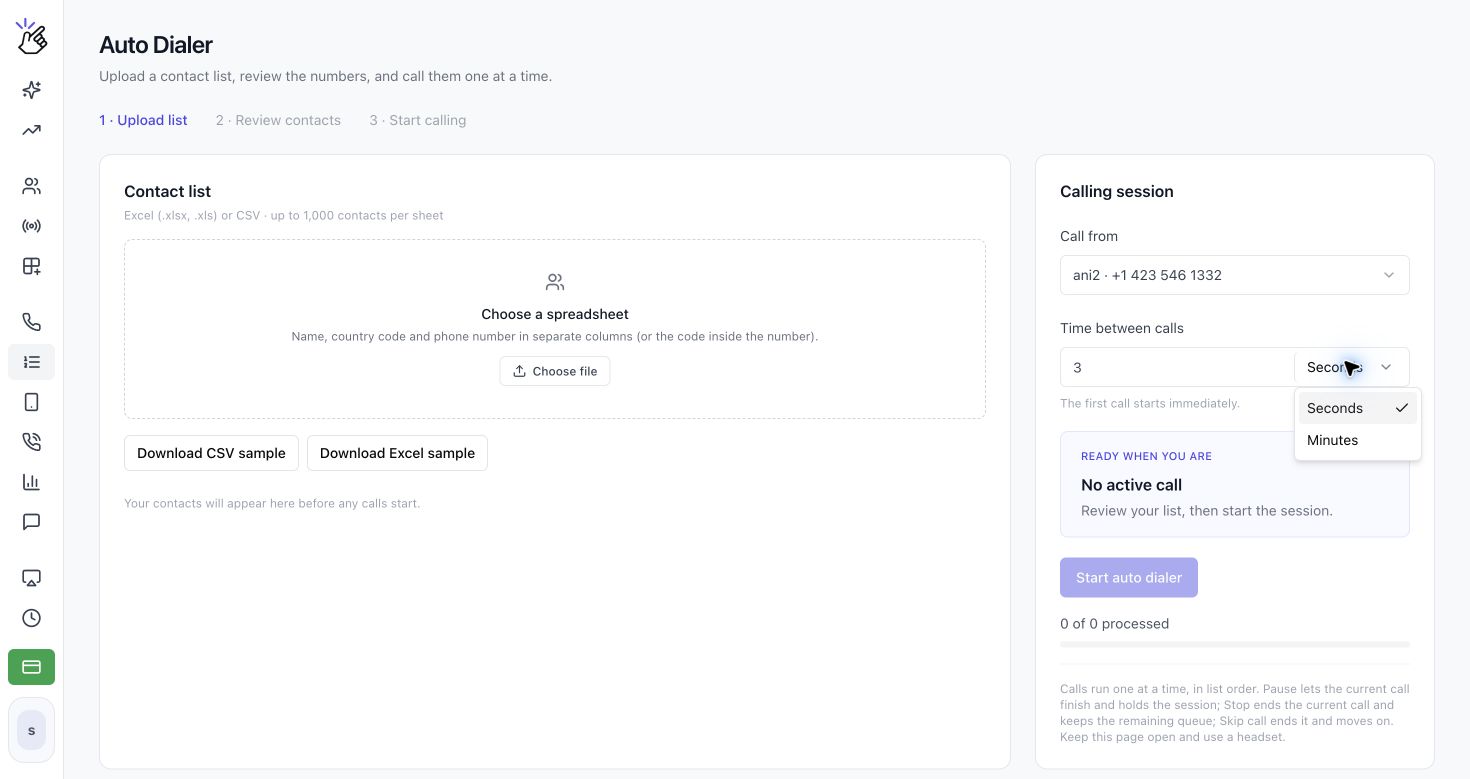
5
Start and control the session
Click Start auto dialer. Contacts are called in list order. The table shows Calling, On call, Done, and each outcome.While the session is running, the Calling session panel shows SESSION IN PROGRESS, the current contact, the phone number, and the Dialling… status. The current contact is marked Calling in the contact table. Use Pause, Stop, Skip call, or Mute to control the active call.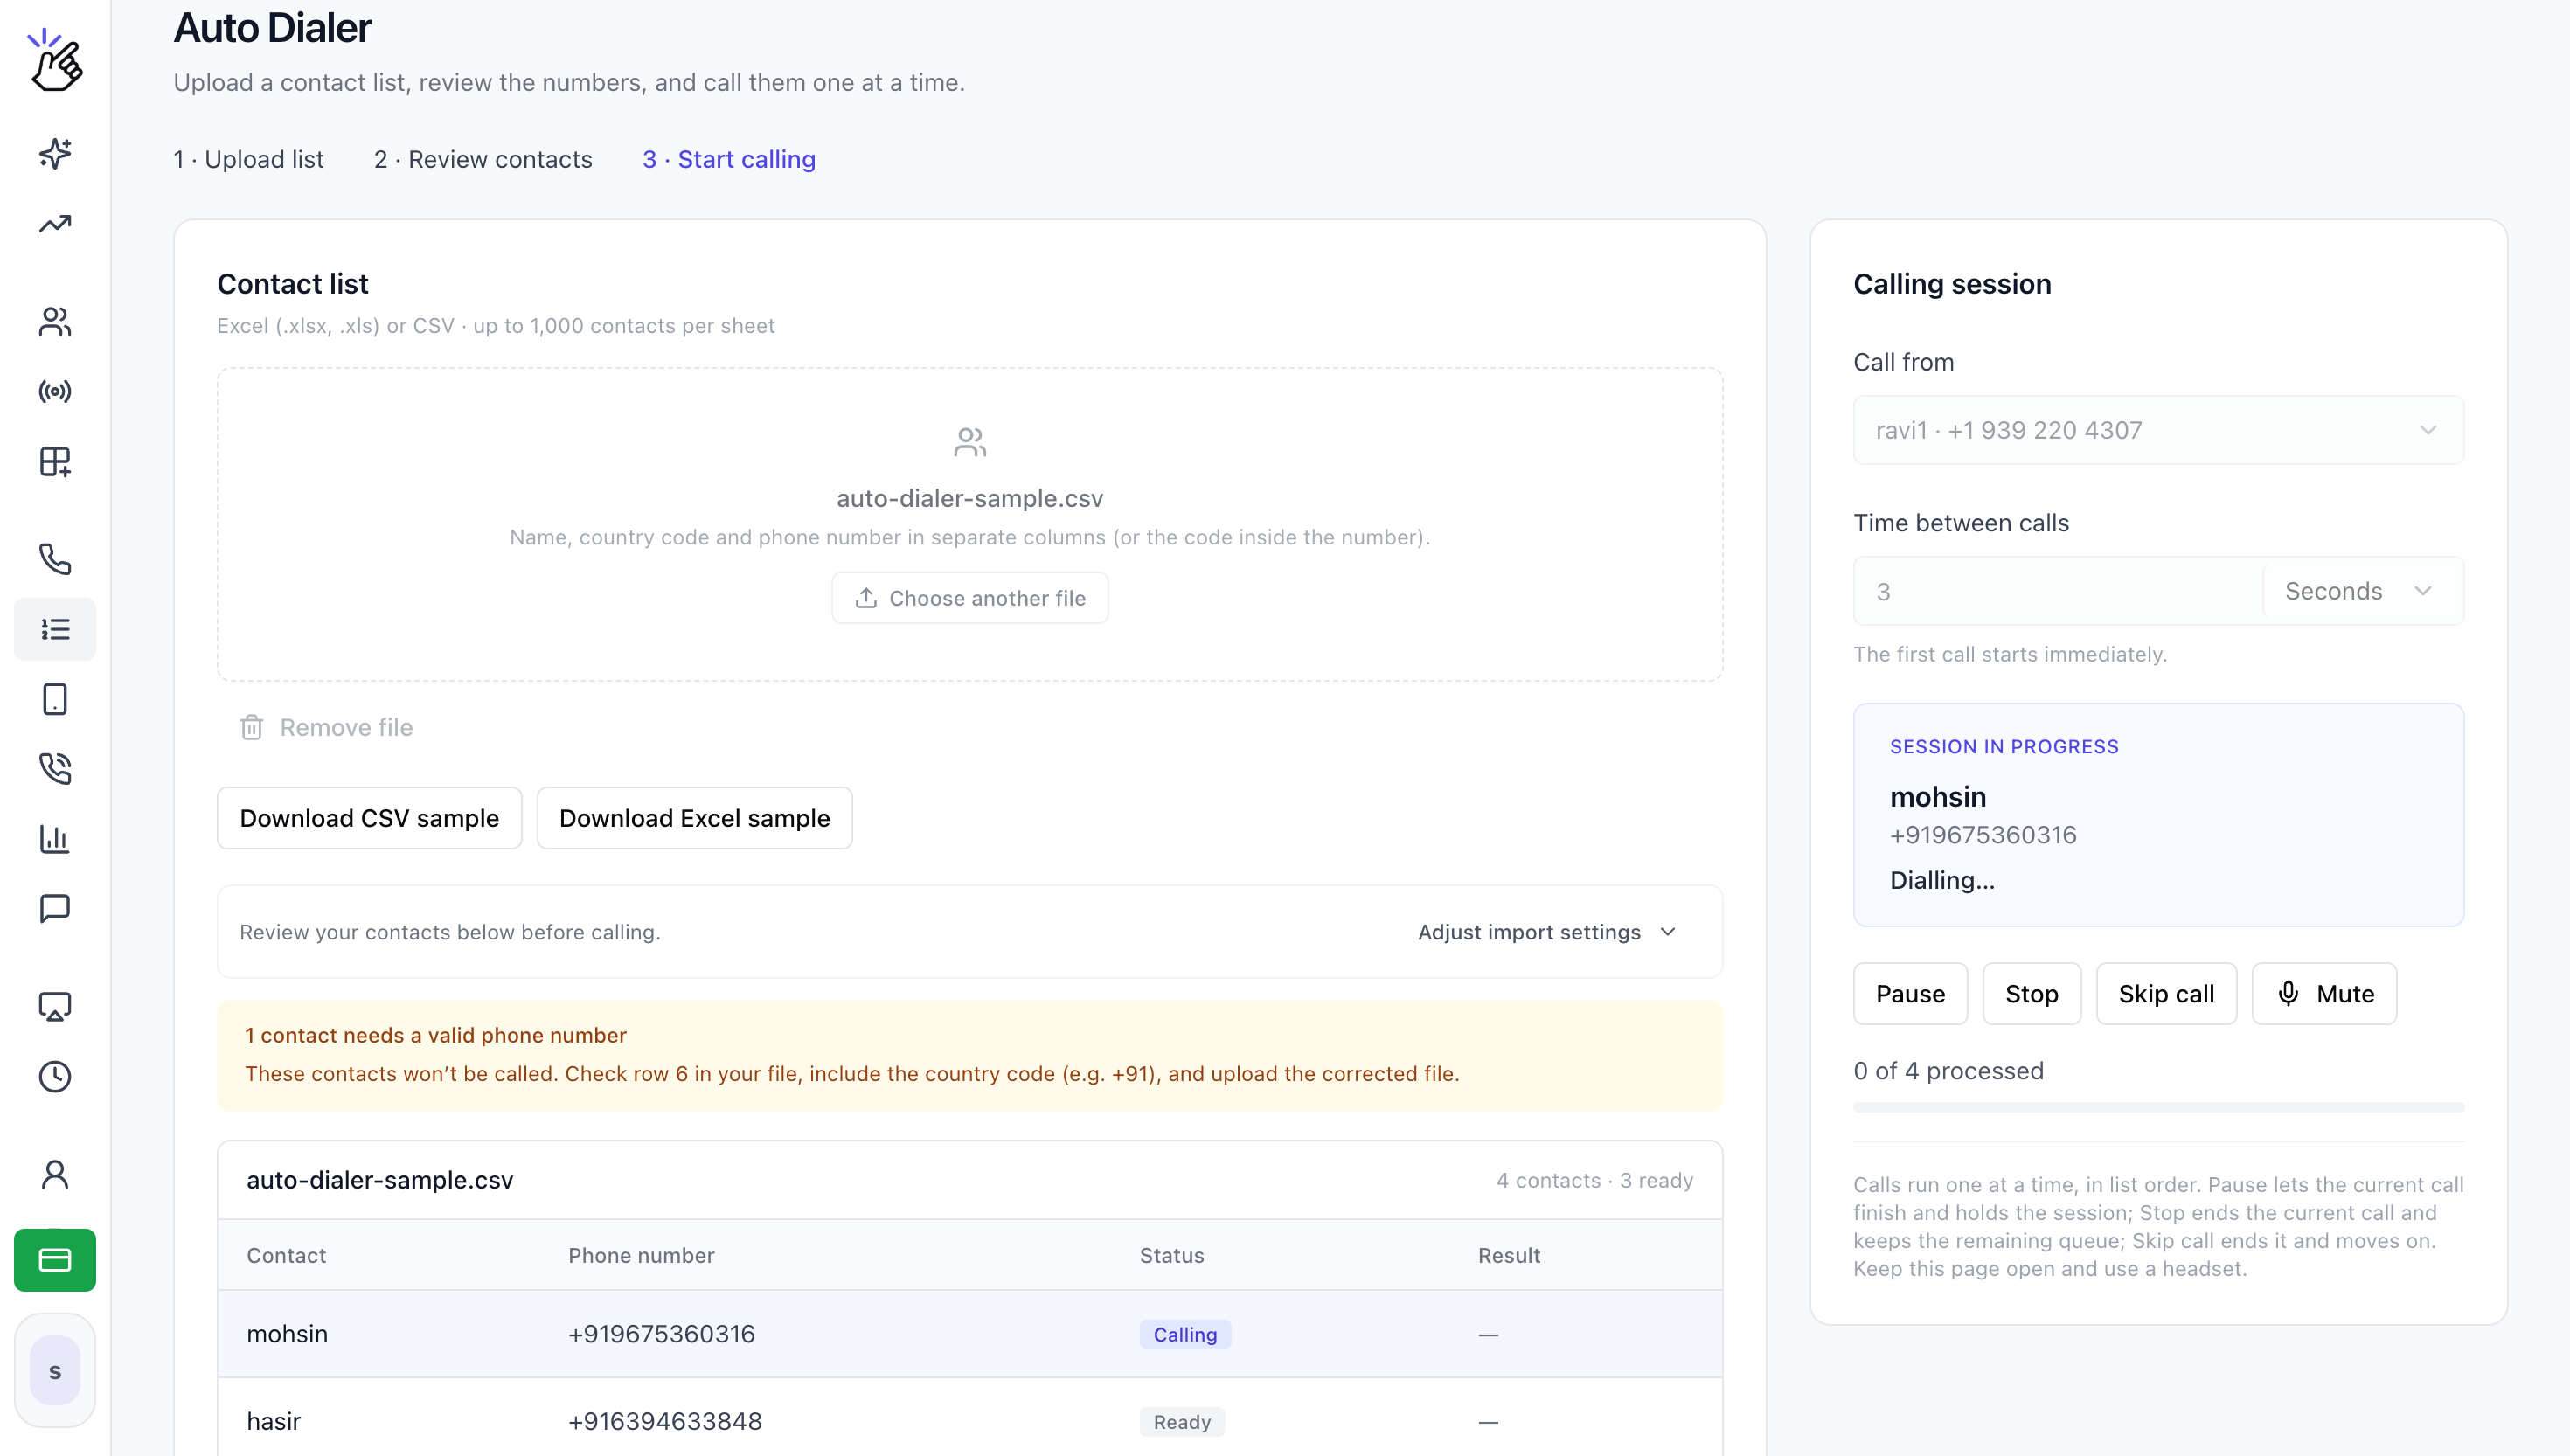
- Pause lets the current call finish and holds the session.
- Stop ends the current call and keeps the remaining queue.
- Skip call ends the current call and moves to the next contact.
- Resume continues a paused session.