

How to Schedule a Message
1
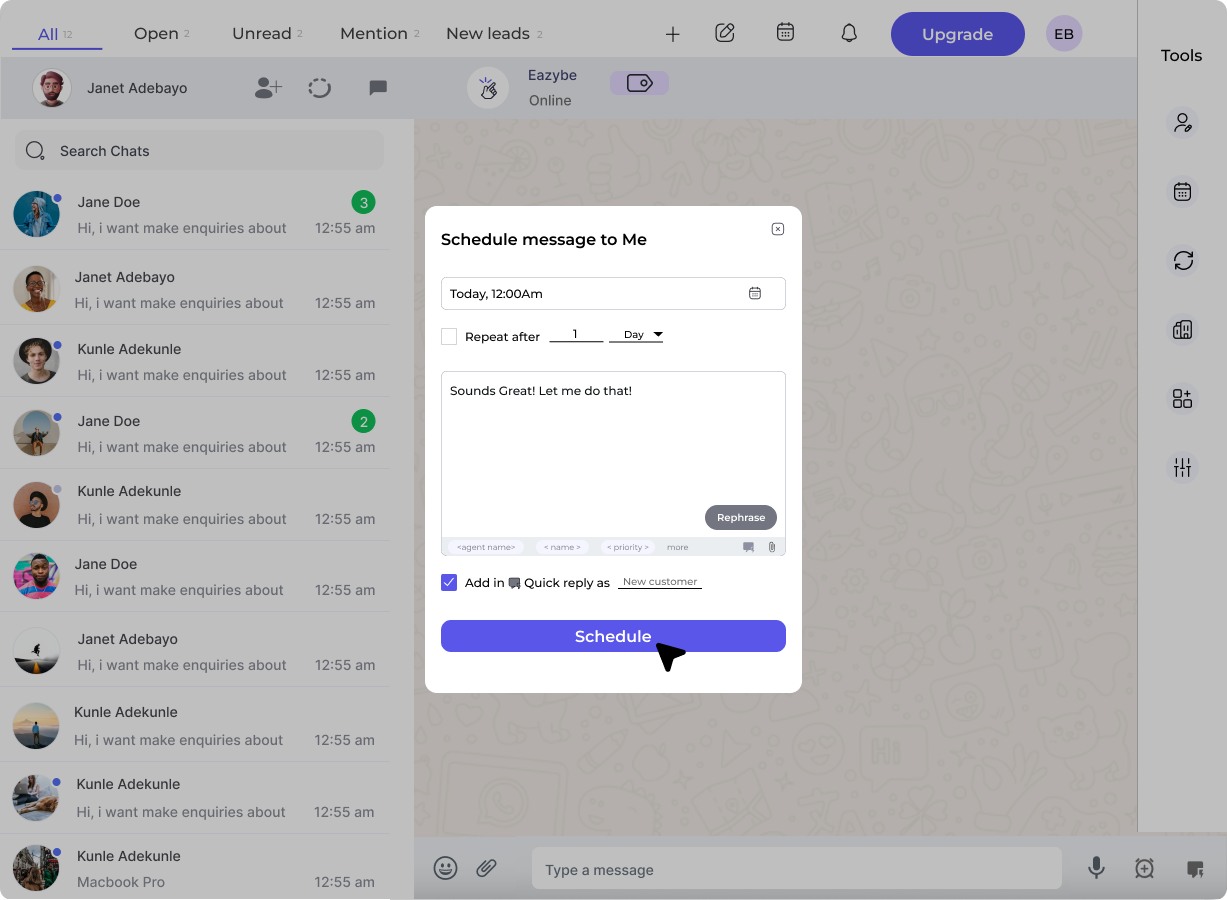
Click on the Scheduler Button
Click on the Scheduler button to open the scheduling interface.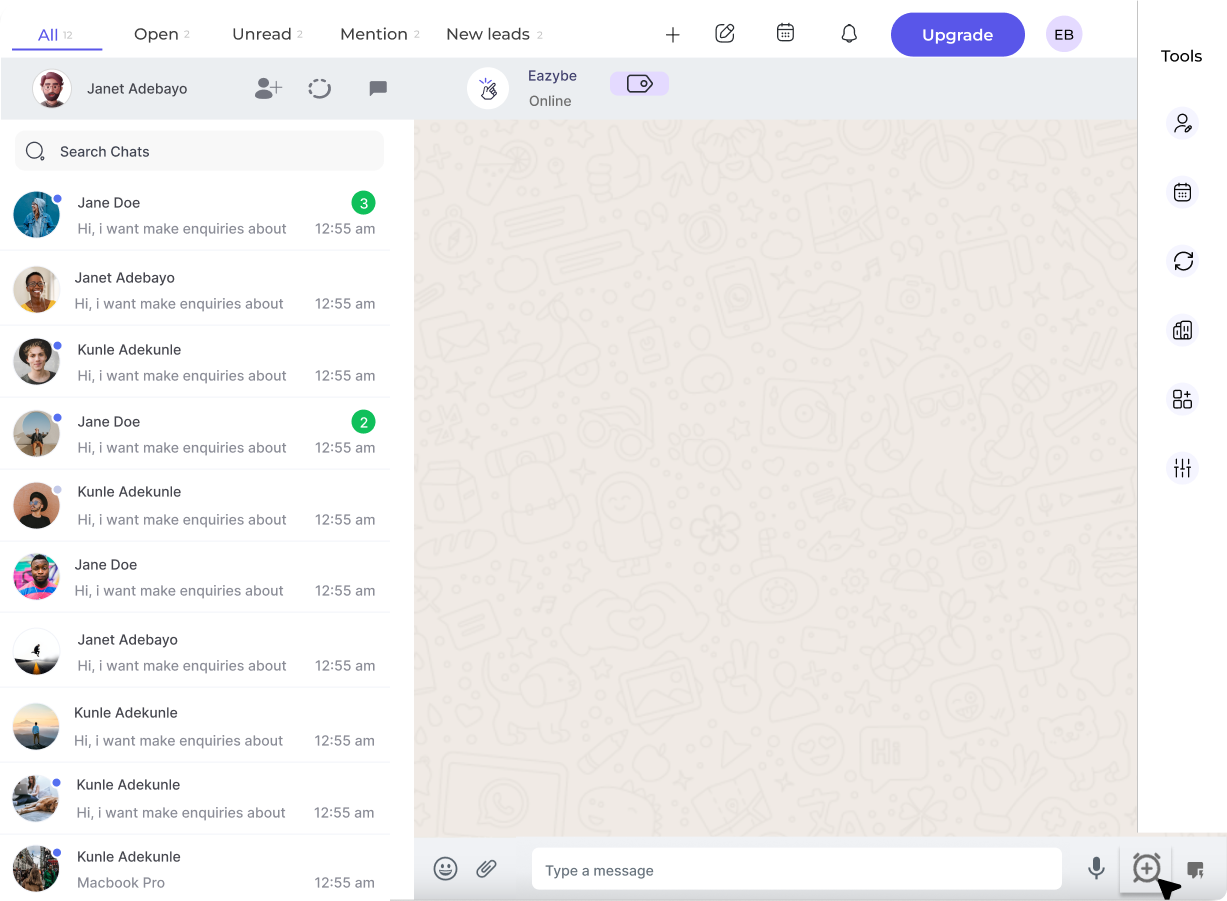
2
Select Date and Time
Choose the date and time when you want your message to be sent.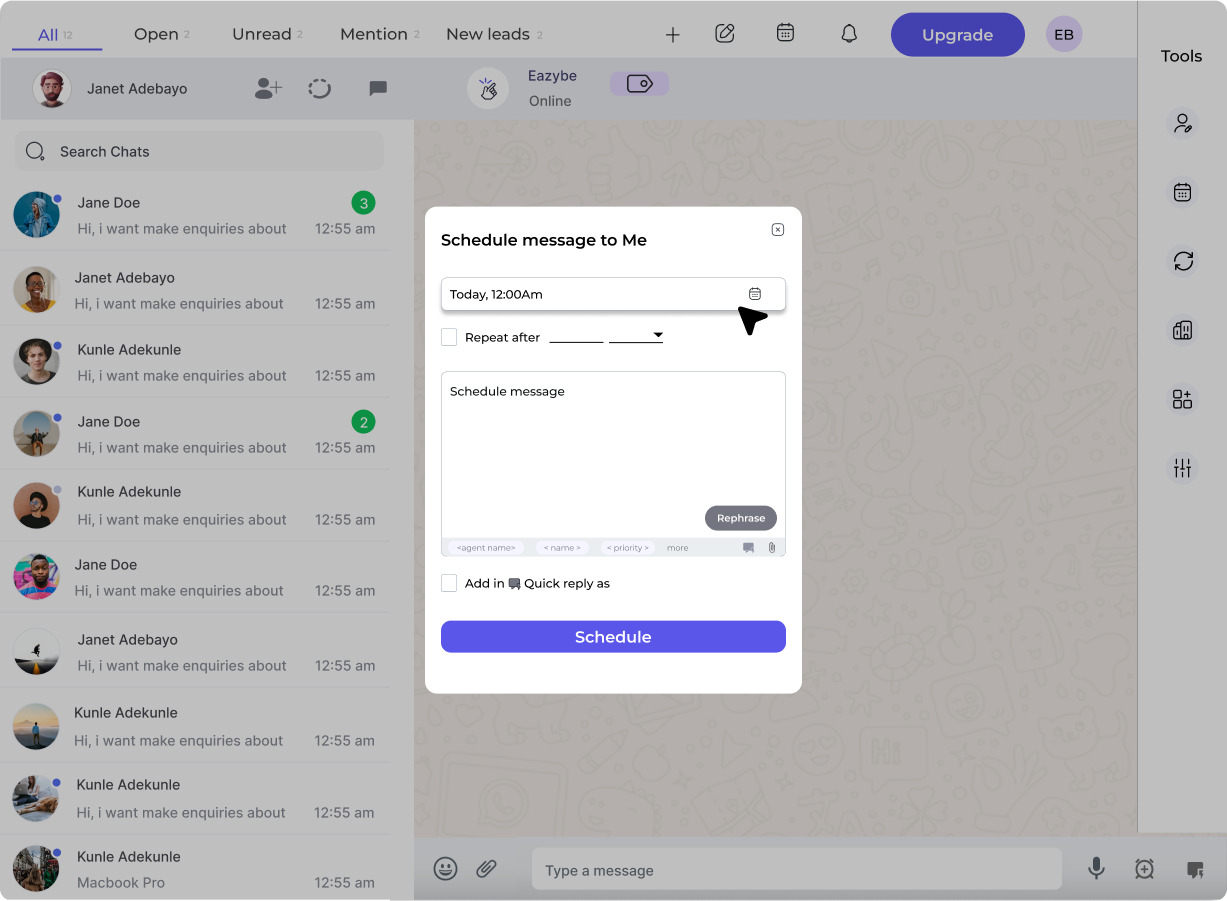
3
Configure Message Repetition
You can choose to repeat the message after a specified time interval for recurring communications.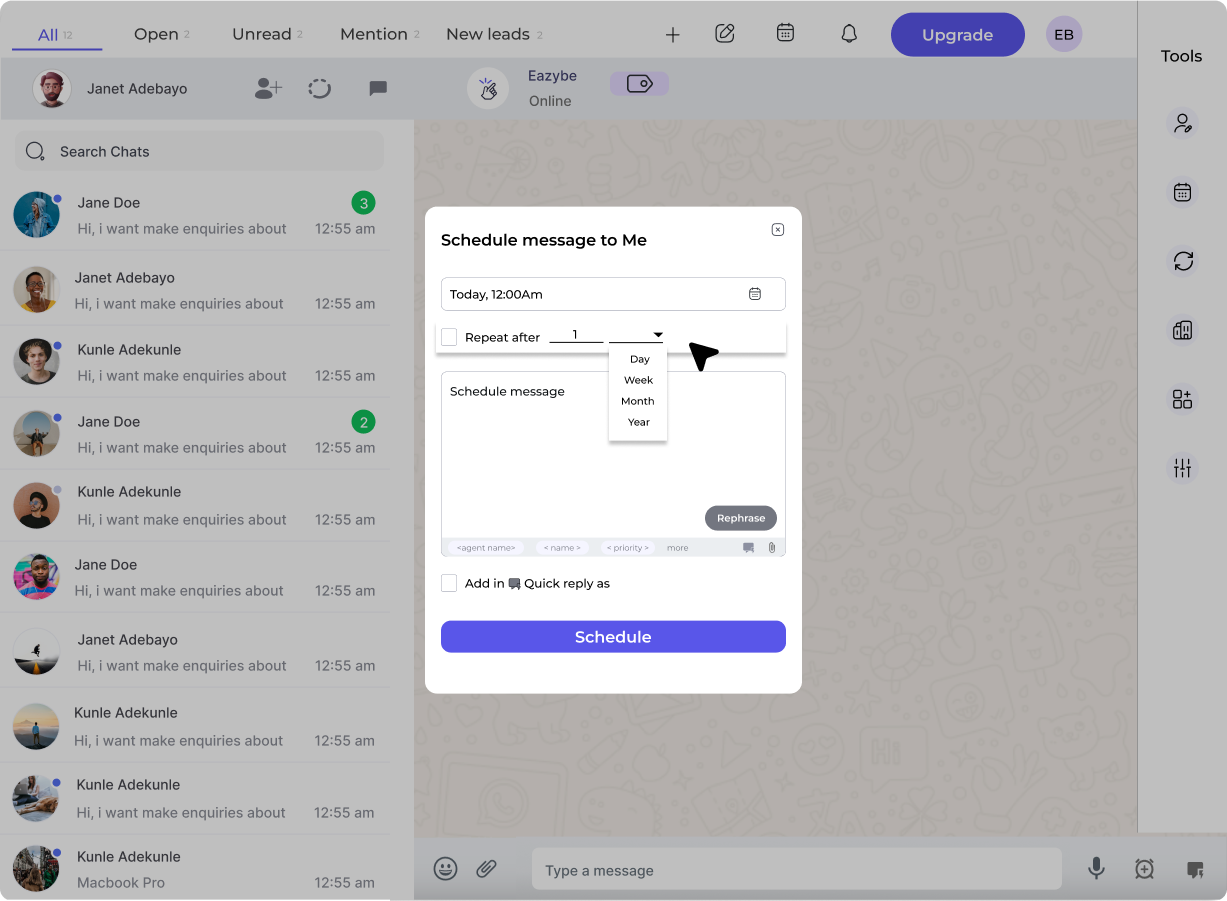
4
Add to Quick Reply (Optional)
Select the fields from the bottom and check the Add to Quick Reply checkbox if you want to save this message for future use.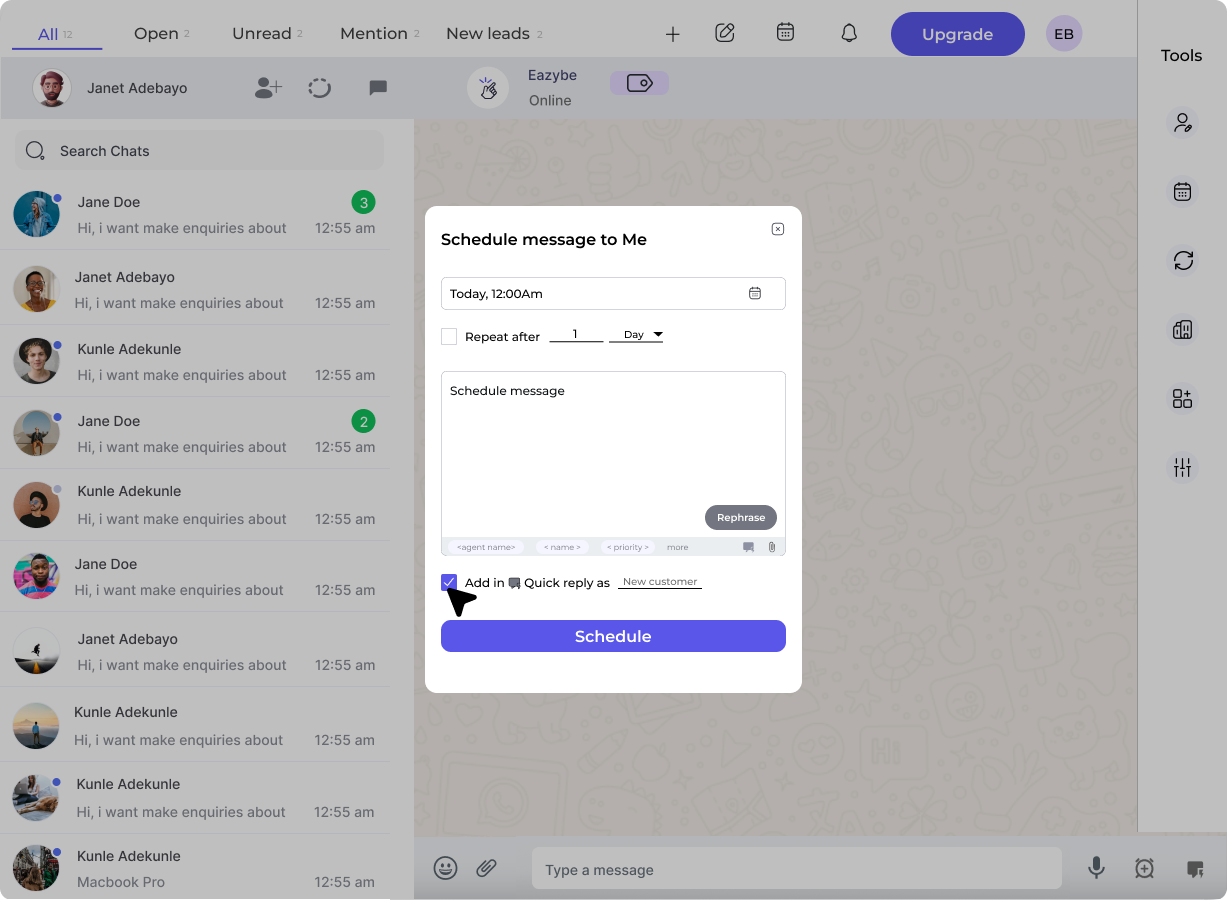
5
Schedule and Send
The message will be scheduled and will be sent to the contact at the specified time.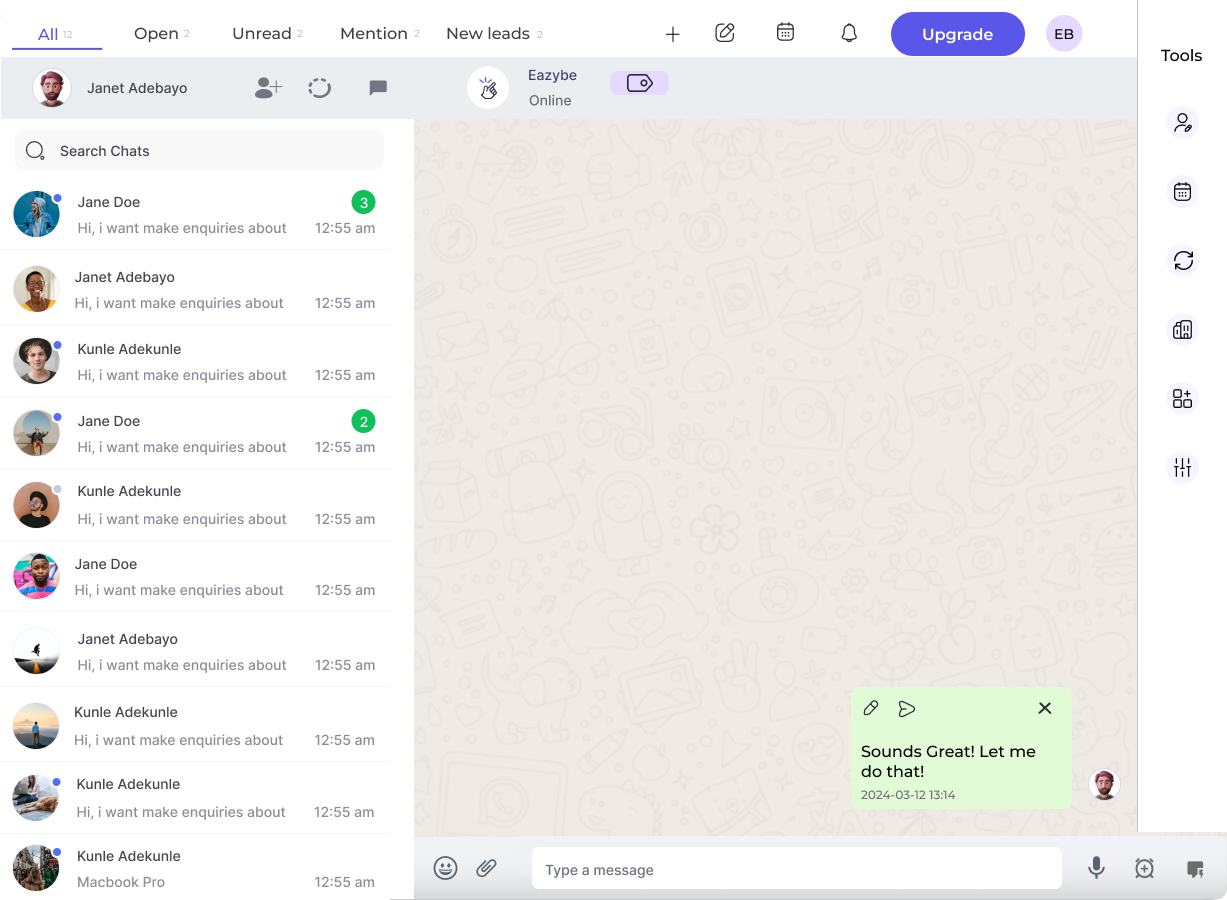
Frequently Asked Questions
Is adding the message to Quick Reply mandatory?
Is adding the message to Quick Reply mandatory?
No, adding the message to Quick Replies is optional. It is provided for ease of access to frequently sent messages.
What are the file attachment limits?
What are the file attachment limits?
The file size for attachments in scheduled messages cannot exceed 20MB, and only one file can be attached per message.
Can I edit a scheduled message before it's sent?
Can I edit a scheduled message before it's sent?
Yes, you can edit the scheduled message before sending it. Additionally, you have the option to send it immediately if needed.
Can I view or edit scheduled messages after setting them?
Can I view or edit scheduled messages after setting them?
Yes, you can view and edit scheduled messages. The interface allows you to manage and make changes to your scheduled messages at any time.
How do I set up recurring messages?
How do I set up recurring messages?
In Step 4, you have the option to set the message as a Recurring Message. Choose the frequency - Days, Weeks, Months, or Years - based on your needs.