Open a campaign to see its message preview and what happened to each recipient’s message. Use Delivery activity to review statuses, find failure reasons, search the recipient list, and download an Excel report.
These screenshots show a local workspace used for this guide. Full phone numbers are covered with solid bars. Your campaign names, dates, and totals will differ.
1

Open the campaign

On Broadcasts, select Broadcast and choose the sender number. Find the campaign and select its name with the ↗ icon. Wait for the campaign details and message preview to finish loading.Broadcasts page with clickable campaign names under Campaign performance
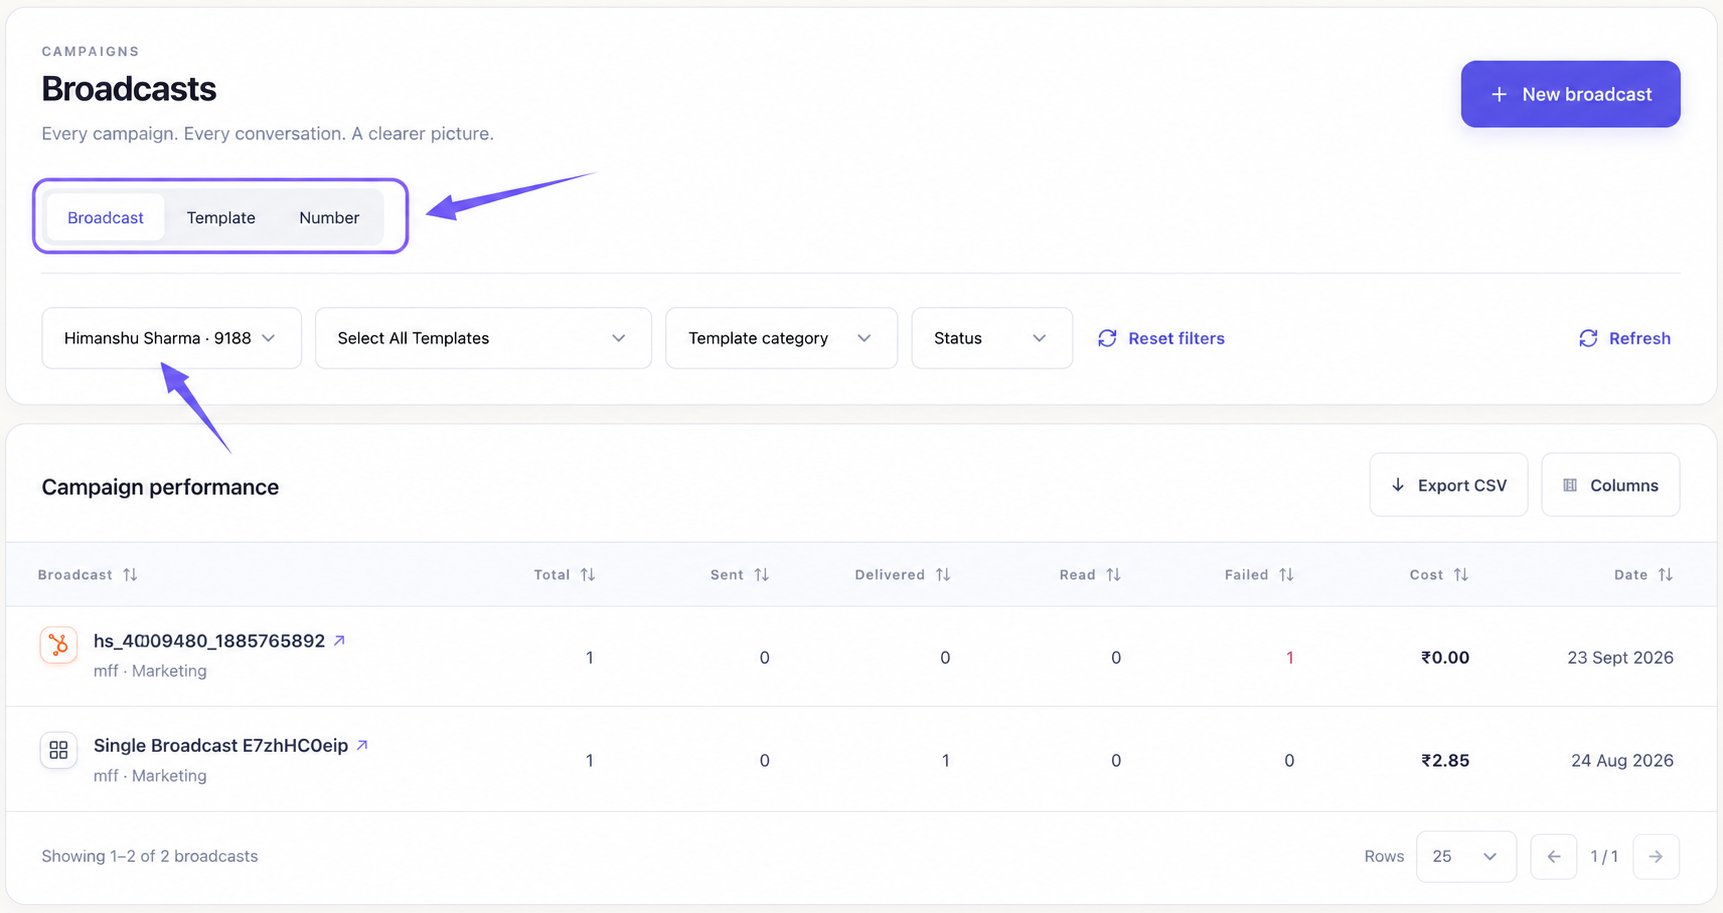
Template and Number rows are summaries. Switch to Broadcast to open an individual campaign.
2

Review the summary and message

Check the campaign name and status at the top. The summary helps you confirm the sender, campaign source, contact total, and recorded credit usage.Campaign summary and message preview, with search and export controls highlighted and phone numbers redactedThe Message panel shows the template name, message body, and any available header, footer, media, and button labels. Preview identifies it as a template preview. It can show placeholders such as {{firstname}} instead of a particular recipient’s details.
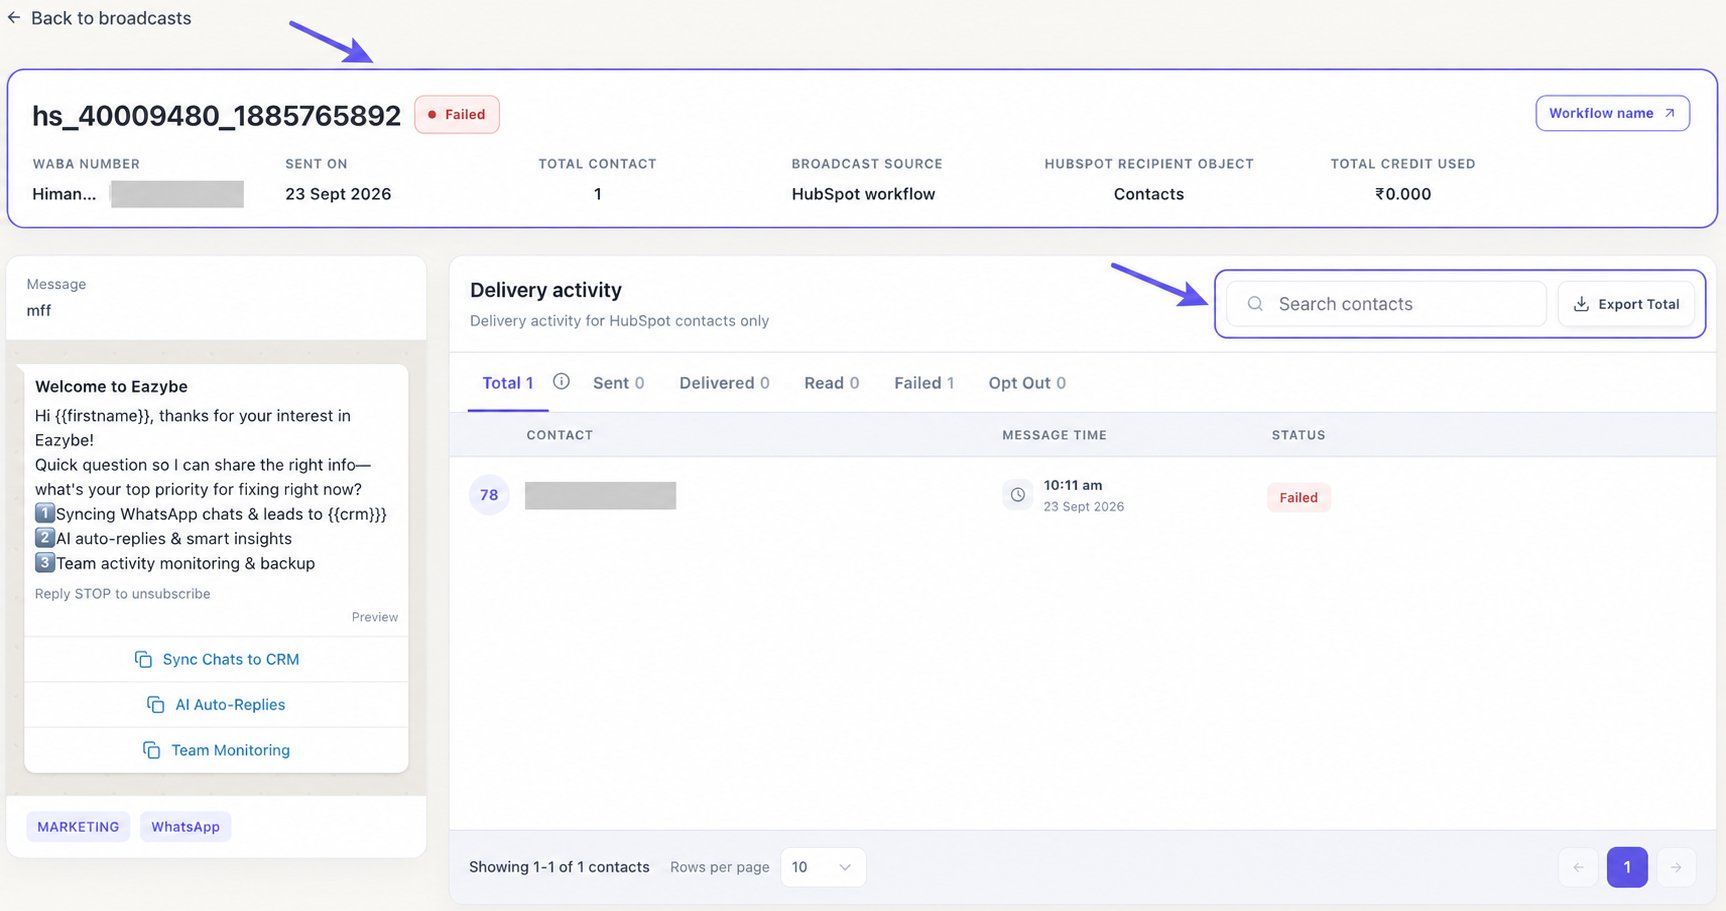
Button labels inside the message card are part of the preview. When media is available, an image is displayed, a video has playback controls, or a document can show Open document. If the panel says Message content is not available for this broadcast., you can still review its delivery activity.
HubSpot campaigns can also show Workflow name in the header. This version does not open a workflow from that control; use HubSpot itself to inspect the workflow.
3

Choose the delivery group to review

In Delivery activity, select Total, Sent, Delivered, Read, Failed, or Opt Out. The selected tab is underlined, and the list changes to that group.Delivery activity showing all six delivery groups and a recipient rowEach row shows CONTACT, MESSAGE TIME, and STATUS. The message time includes a time and date when available. For HubSpot campaigns, the line under Delivery activity identifies the recipient type being reported.
A contact can appear in both Failed and Opt Out, but is counted once in Total. Do not add the Opt Out count to Total. The information icon beside Total explains this overlap.
4

Read the failure reason

Select Failed to show the FAILURE REASON column. Read the reason beside each recipient to understand why that message failed. Hover over a shortened reason to read its full text.Failed selected and the failure reason highlighted in violetIf the service did not provide a reason, the row says No failure reason provided. Use Export Failed when you need the listed recipients and their reasons in a file.
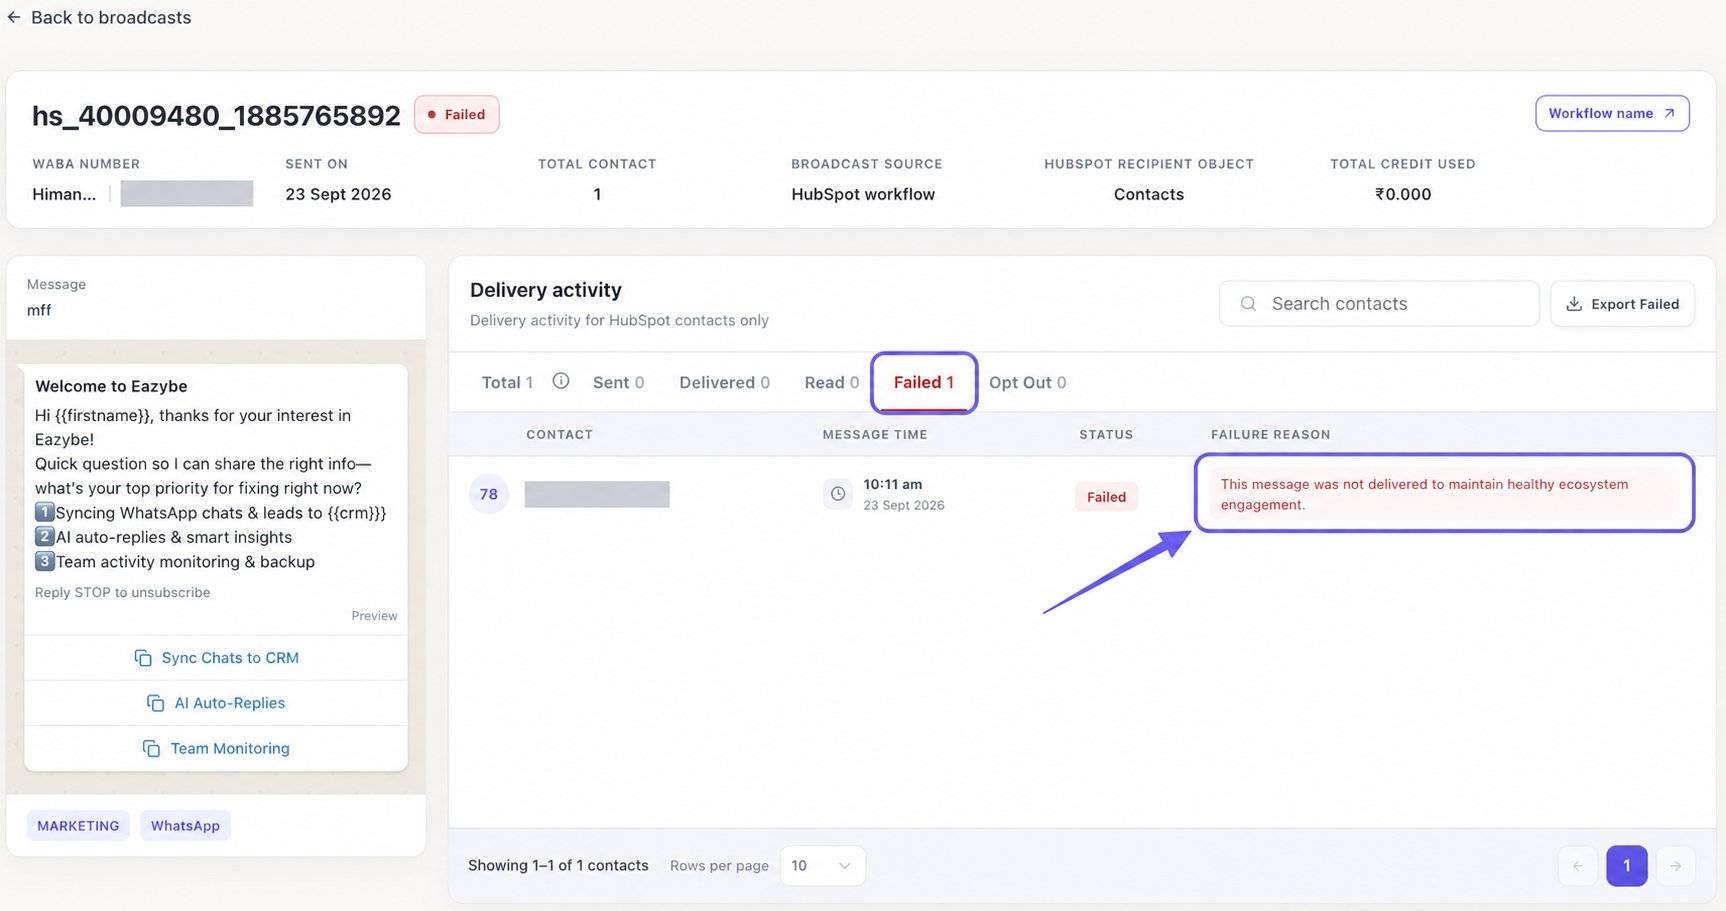
The reason in this screenshot applies to that example message. Other failed messages can have different causes. Reviewing or exporting this list does not retry a message.
5

Check opted-out contacts

Select Opt Out. When contacts are present, their rows can show the opt-out reason, the source of the preference update, its date and time, and an Opt Out status.Opt Out selected with zero contacts and Export Opt Out disabled
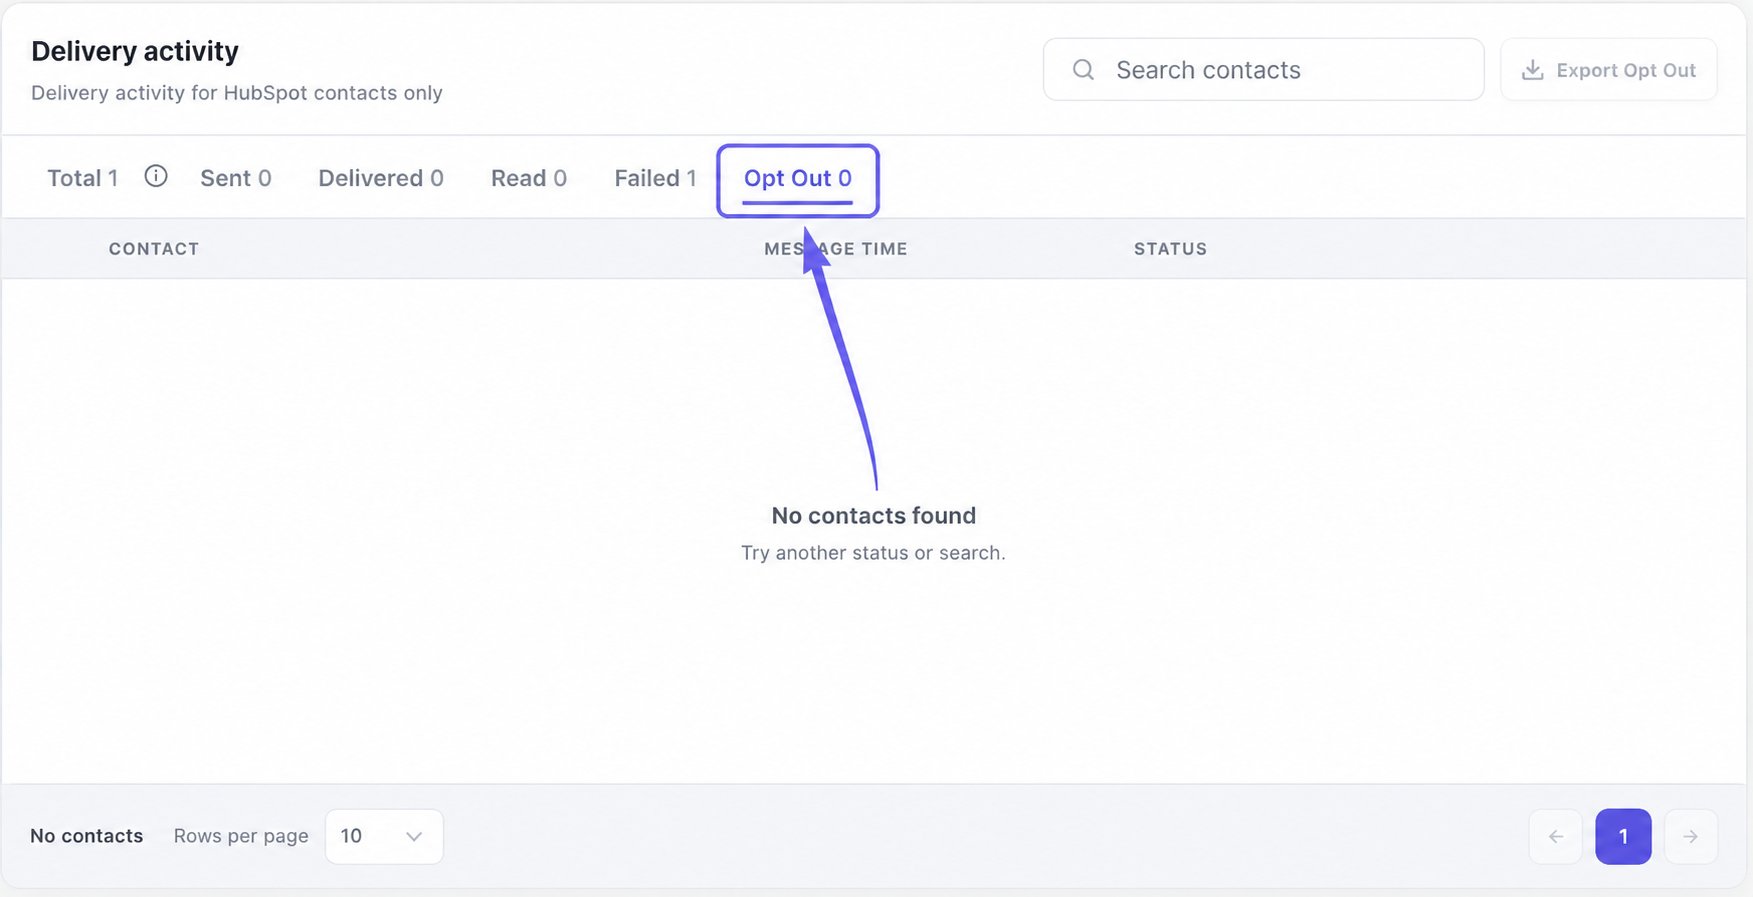
Opt-out rows show No wallet deduction for the suppressed message. This describes that message; it does not mean the entire campaign had no cost. Check TOTAL CREDIT USED for the campaign’s recorded credit usage.
This screenshot shows Opt Out 0, so No contacts found and a disabled Export Opt Out button are expected. This page reports preferences; it does not change a contact’s opt-out choice.
6

Search and export the selected group

Enter a phone number or part of it in Search contacts. Search also matches available delivery-status text, CRM object types, and failure-reason text. It searches within the delivery tab you have selected.Search contacts and Export Total highlighted above the recipient listSelect Export Total, Export Failed, Export Opt Out, or the export button for your current tab. The download is an Excel .xlsx file containing all matching rows from that tab, including results beyond the visible page.The file includes Recipient Phone Number, Delivery Status, Message Timestamp, Failure Reason, and CRM Object. It does not export the message preview or every piece of opt-out metadata shown on screen.
Your search stays in place when you switch tabs and also narrows the export. Clear Search contacts before exporting the whole group. The tab’s count is the group total; the footer shows how many contacts match your search.

Move Through the Recipient List

Choose 10, 25, or 50 under Rows per page, then use the left and right arrows. Changing the tab, search text, or page size returns you to page 1. The page arrows are disabled when there is no previous or next page. Select Back to broadcasts above the campaign when you are finished. Recheck the view and filters when you return; your column choices remain remembered in the browser.

Why Are No Contacts Shown?

Wait for Loading campaign details… to finish. If No contacts found remains, clear Search contacts or select another tab. Export is disabled whenever the selected group and search have no rows to download. Summary counts can come from the campaign summary while the list shows the recipient details available to the report, so a count does not always guarantee that every matching detail row has loaded. If you expected contacts and none appear, return to Broadcasts, select Refresh, and reopen the campaign. For campaign, template, or number totals instead of recipient records, use Customize and Export Reports.