1
Select the numbers to compare
On Broadcasts, select Number. Open the number dropdown and check each sender you want to include. Choose Select All Numbers to include every number listed; when all are selected, the option becomes Unselect All Numbers.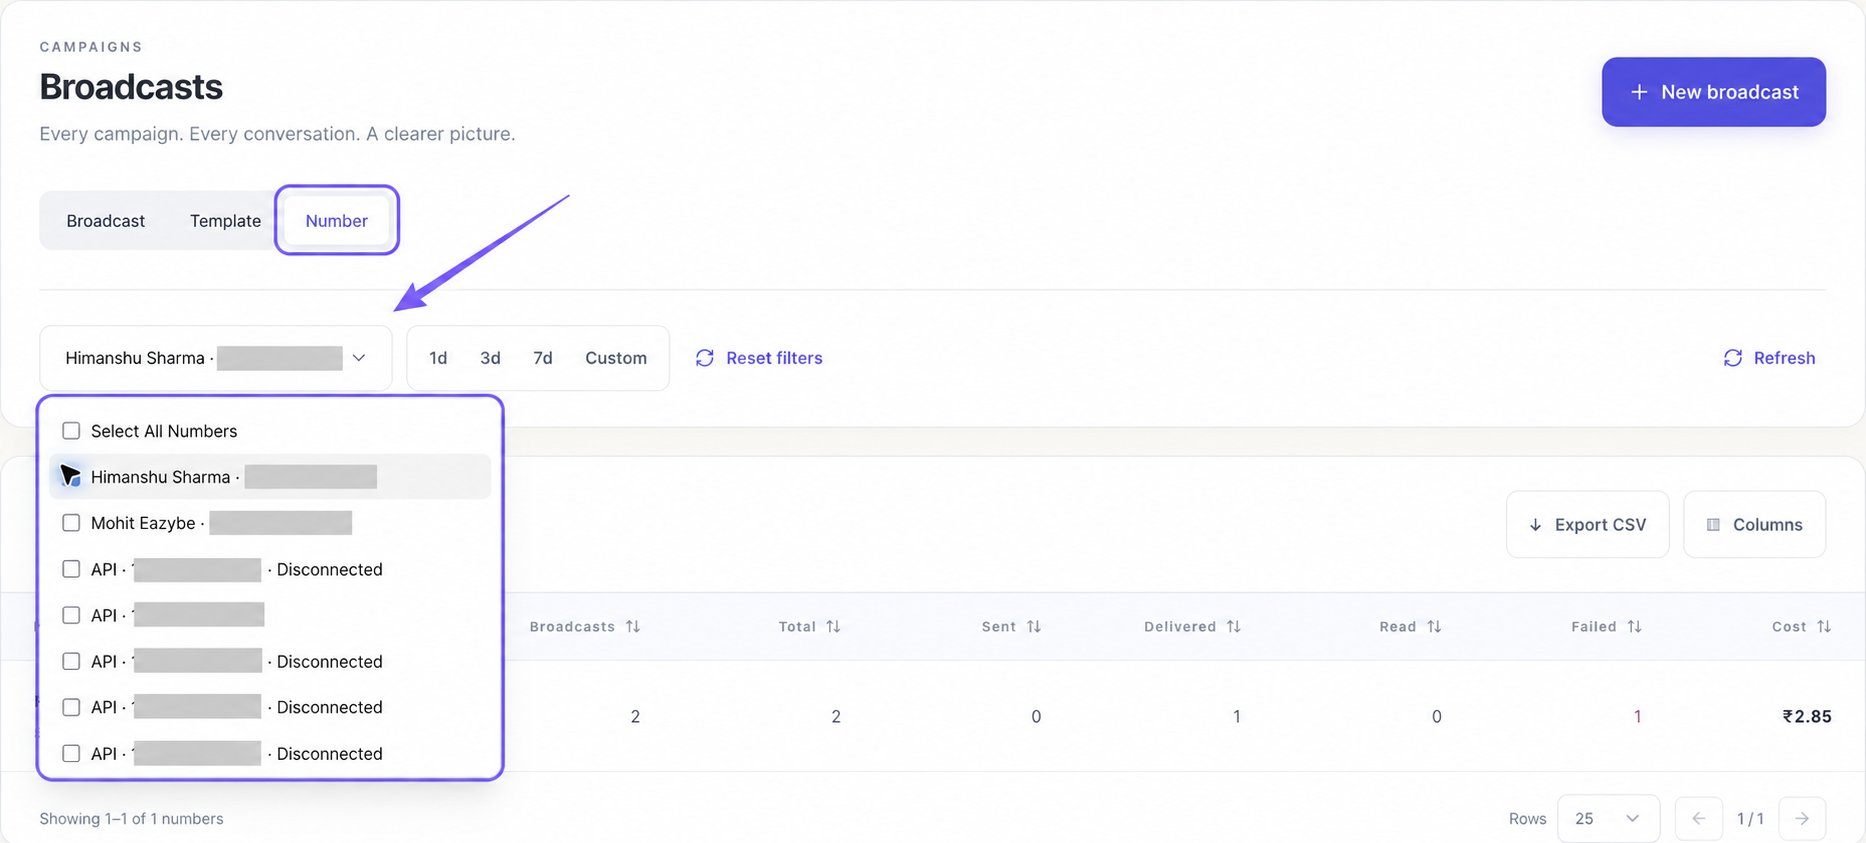
Select numbers means no numbers are selected. Select at least one to load a report. A Disconnected label describes that number’s connection status; selecting it here does not reconnect it.
2
Choose a recent date range
Select 1d, 3d, or 7d. The selected preset is highlighted, and the number summaries reload for that period.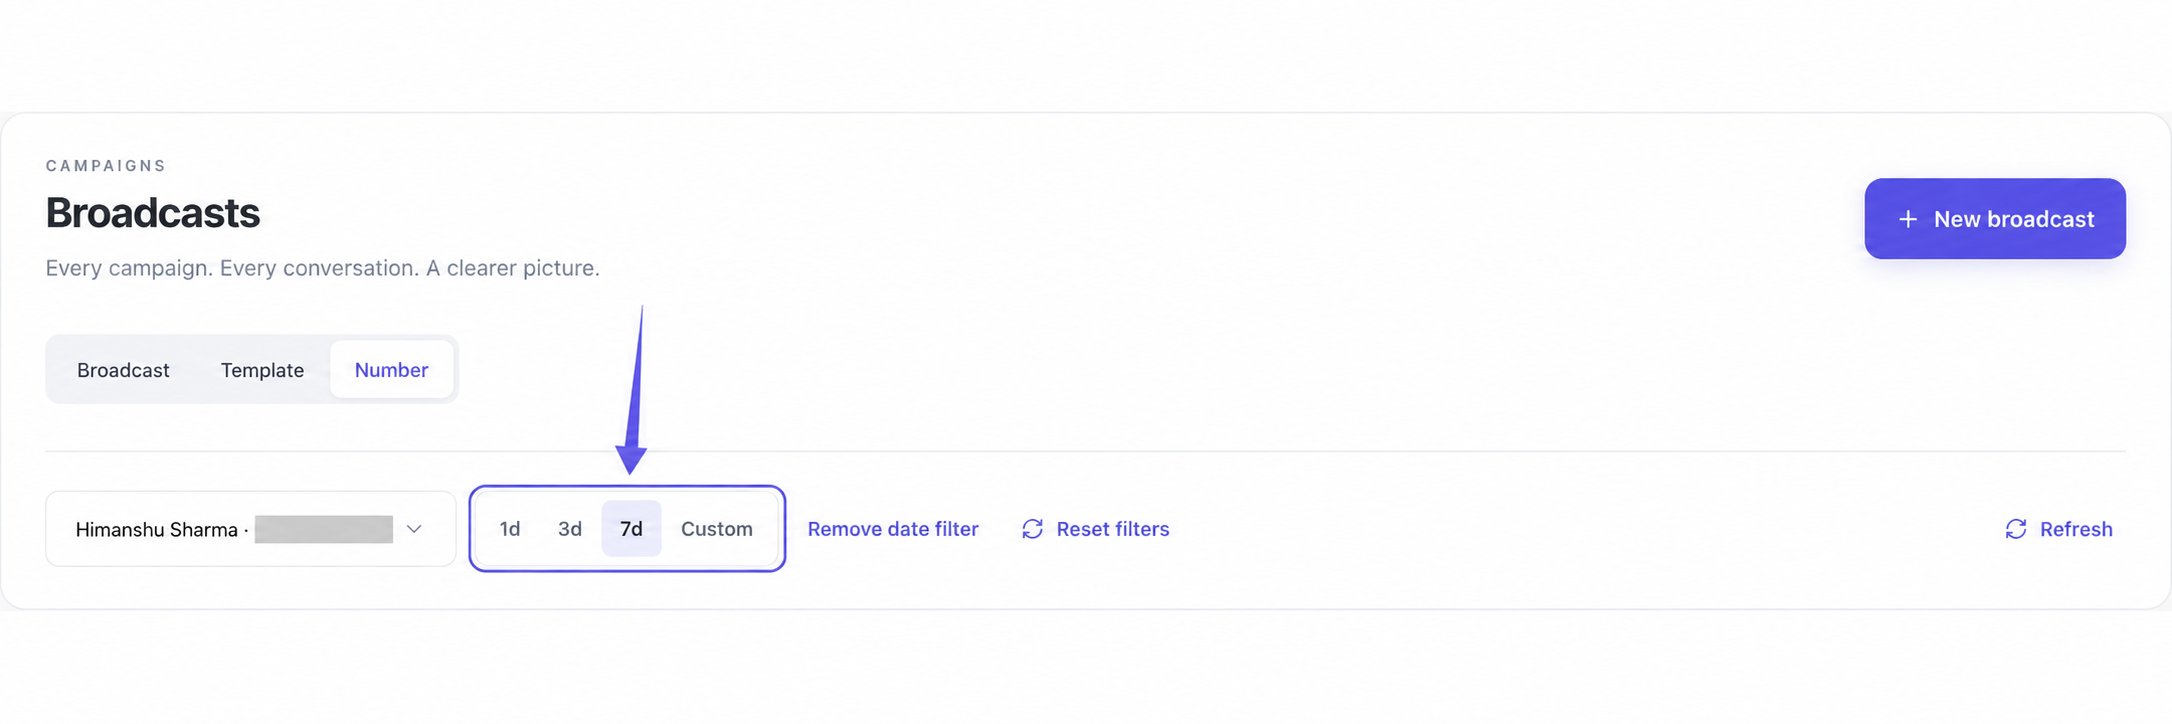
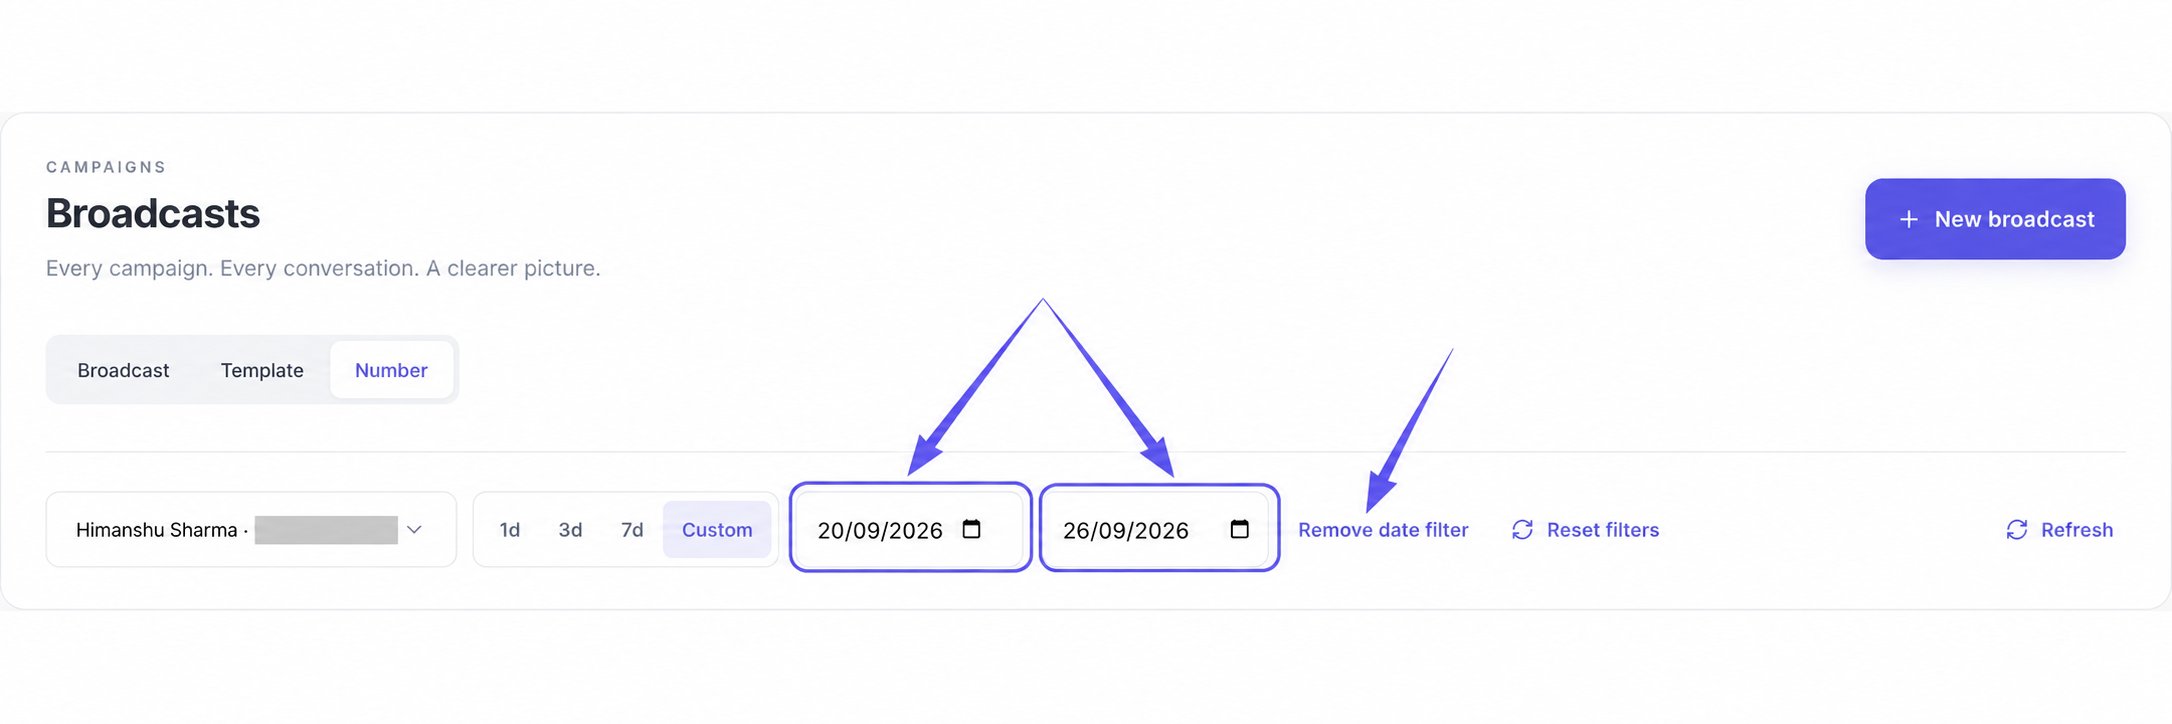
The presets use UTC calendar dates. Around midnight, “today” in UTC can differ from the date in your local time zone. For example, selecting 7d on 26 September sets 20–26 September.
Date filters are available only in Number view. With no date filter selected, the report does not restrict results to a chosen date range.
3
Set a custom start and end date
Select Custom to reveal two date fields. They start with your current range, or today when no range is set. Set the start date in the left field and the end date in the right field, using the calendar controls or typing the dates. Keep the start date on or before the end date. The summaries reload as you change the range; there is no Apply button. Follow the date format displayed by your browser.