

Requirements: the Admin role is needed to add, rename, or delete properties and their options. Employees can change a property’s value on a chat, but not the property itself.
Property Types
Every property is one of two types.Auto-Created Properties
BEA Radar studies your conversations, works out which fields your team tracks, and creates them. It then keeps them filled on every chat. The resulting set differs by business:- A real estate team gets fields such as Property Type and Budget.
- A SaaS team gets Plan Interest and Seat Count.
- A travel team gets Destination and Travel Dates.
Editing a Property or Its Options
1
Open the Property Options
Properties and their options can be renamed, added to, or deleted. Click the three dots next to a property to view the available options.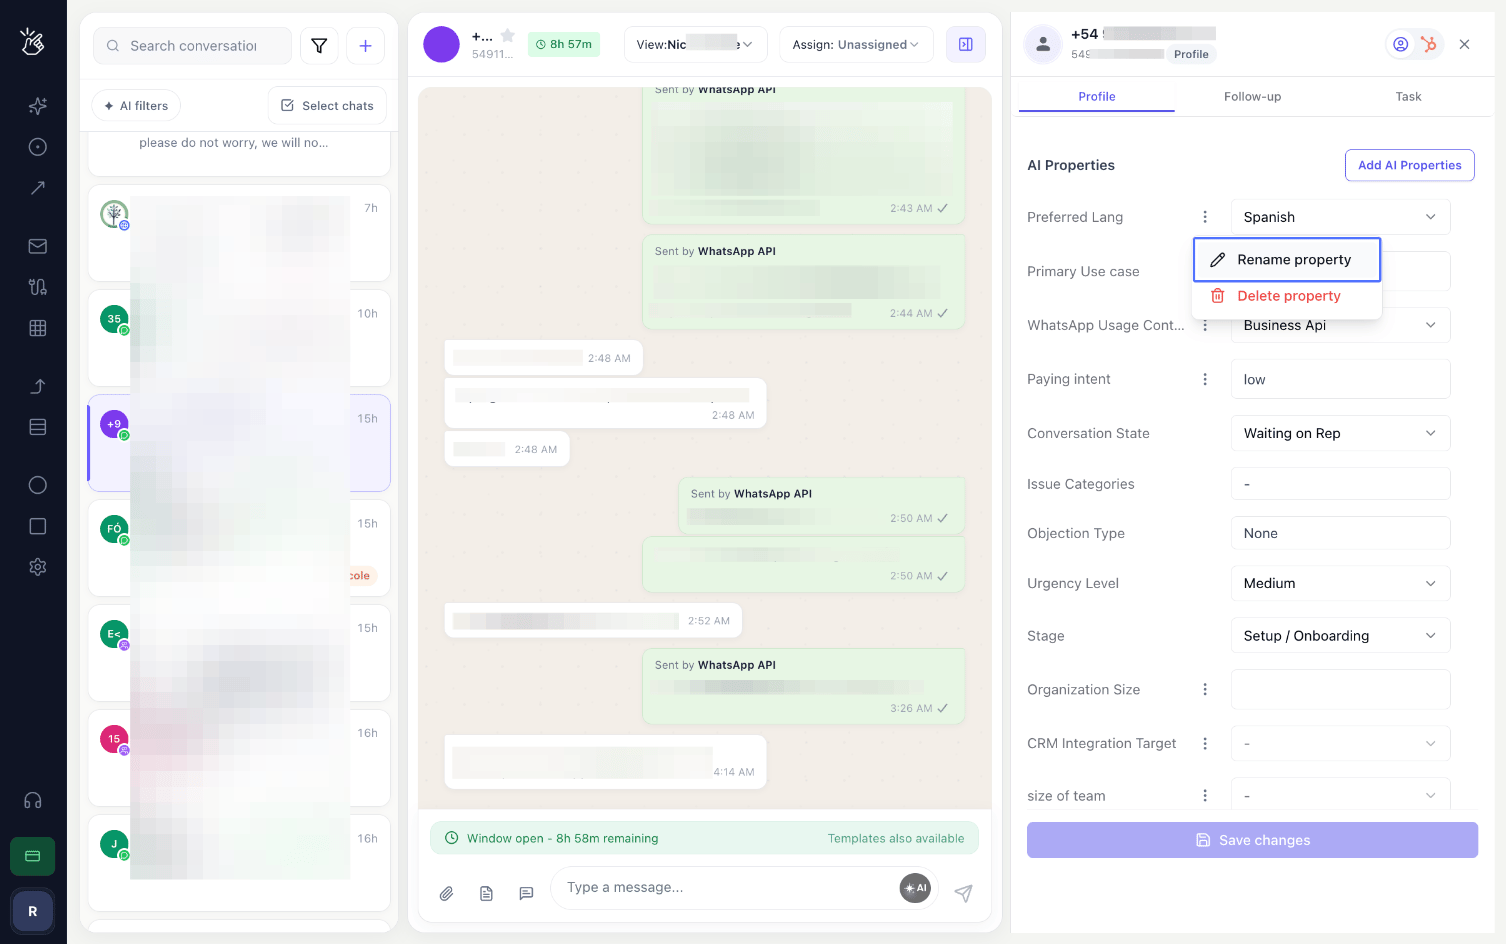
2
Change a Value or Add an Option
Open the option drop-down to change the property value or add a new option to the list. Click Save changes to apply.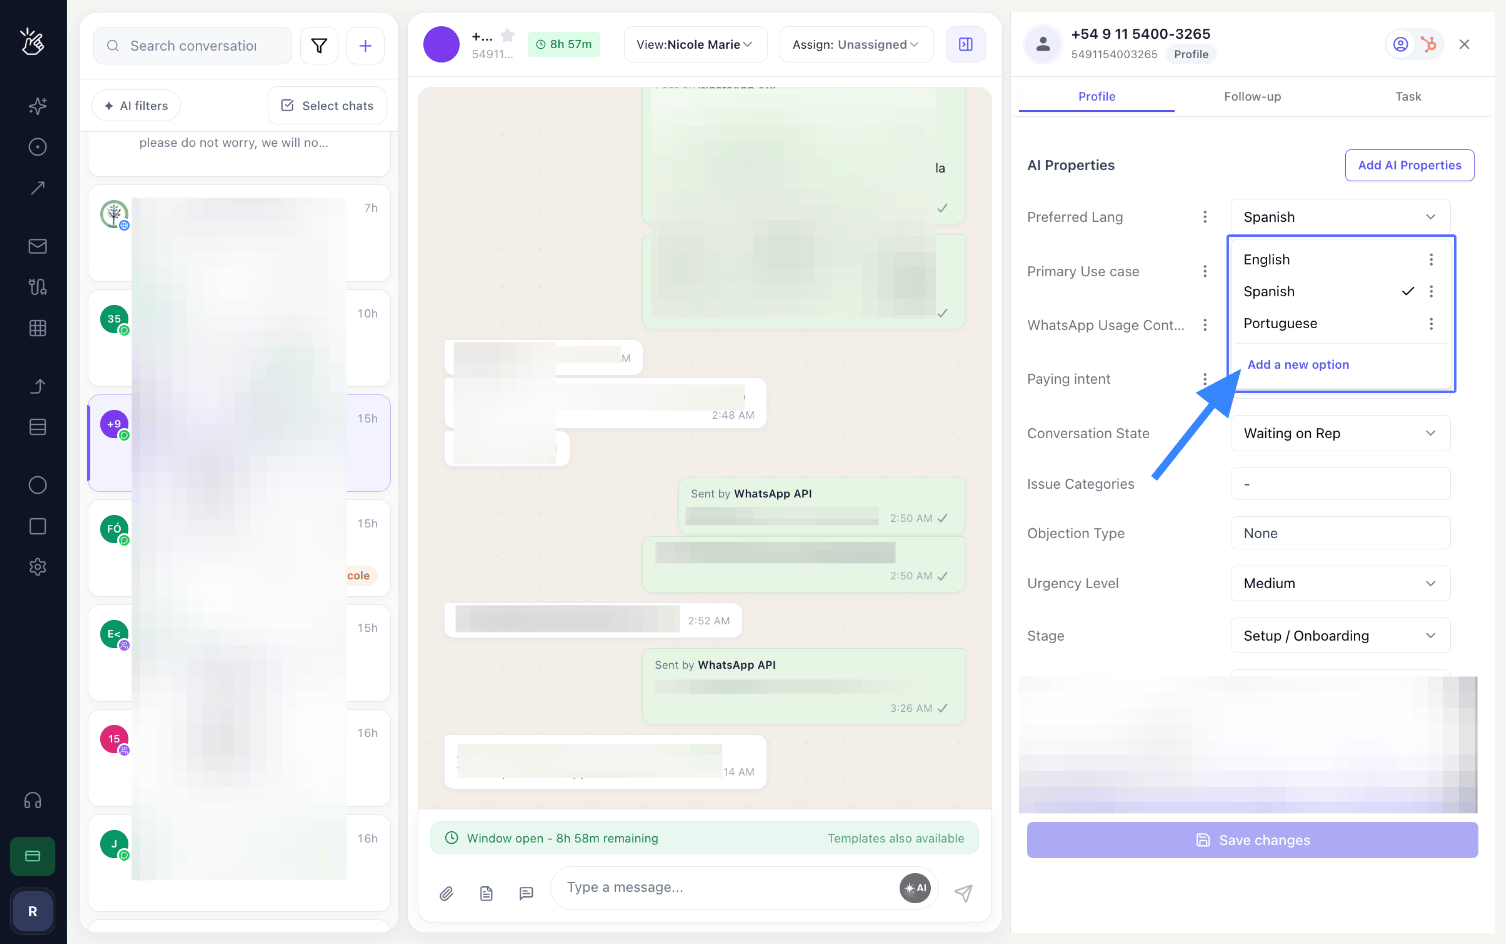
Adding a Property
Add a property when you want a specific field captured that has not been created for you. The same dialog is reachable from the AI Properties panel on a chat and from Team Inbox → Settings using + Add Property.1
Click 'Add AI Properties'
Click on the “Add AI Properties” button at the top of the AI Properties panel.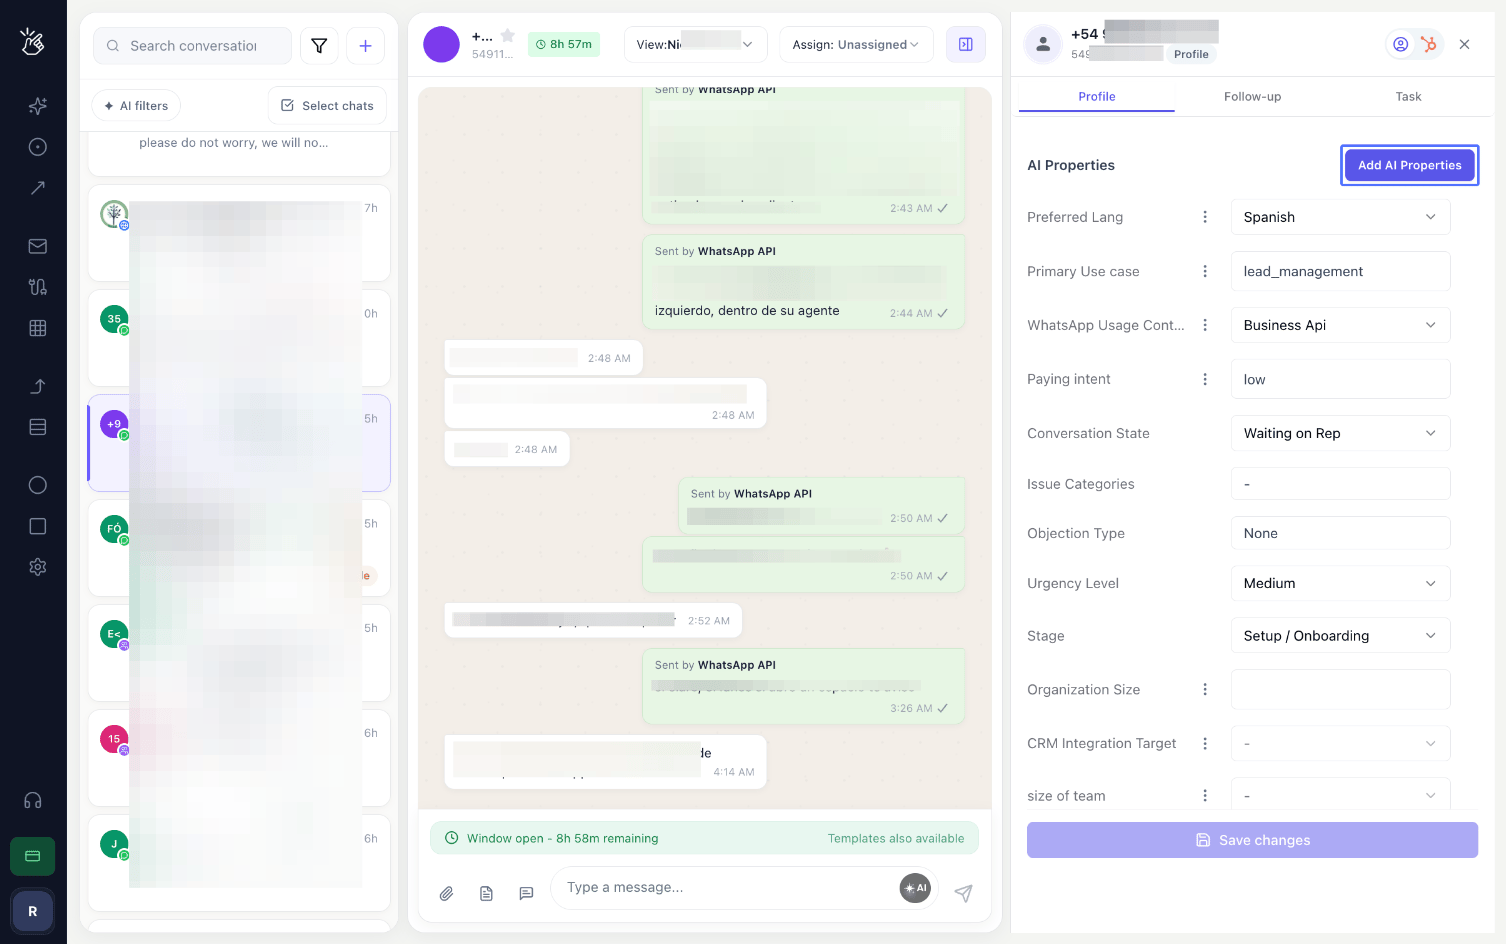
2
Define the Property
Enter the Property name, choose the Property type, either Text/Number or Dropdown, and then write a short description of the property. The description is what the AI reads to decide what to capture, so state exactly what the field represents.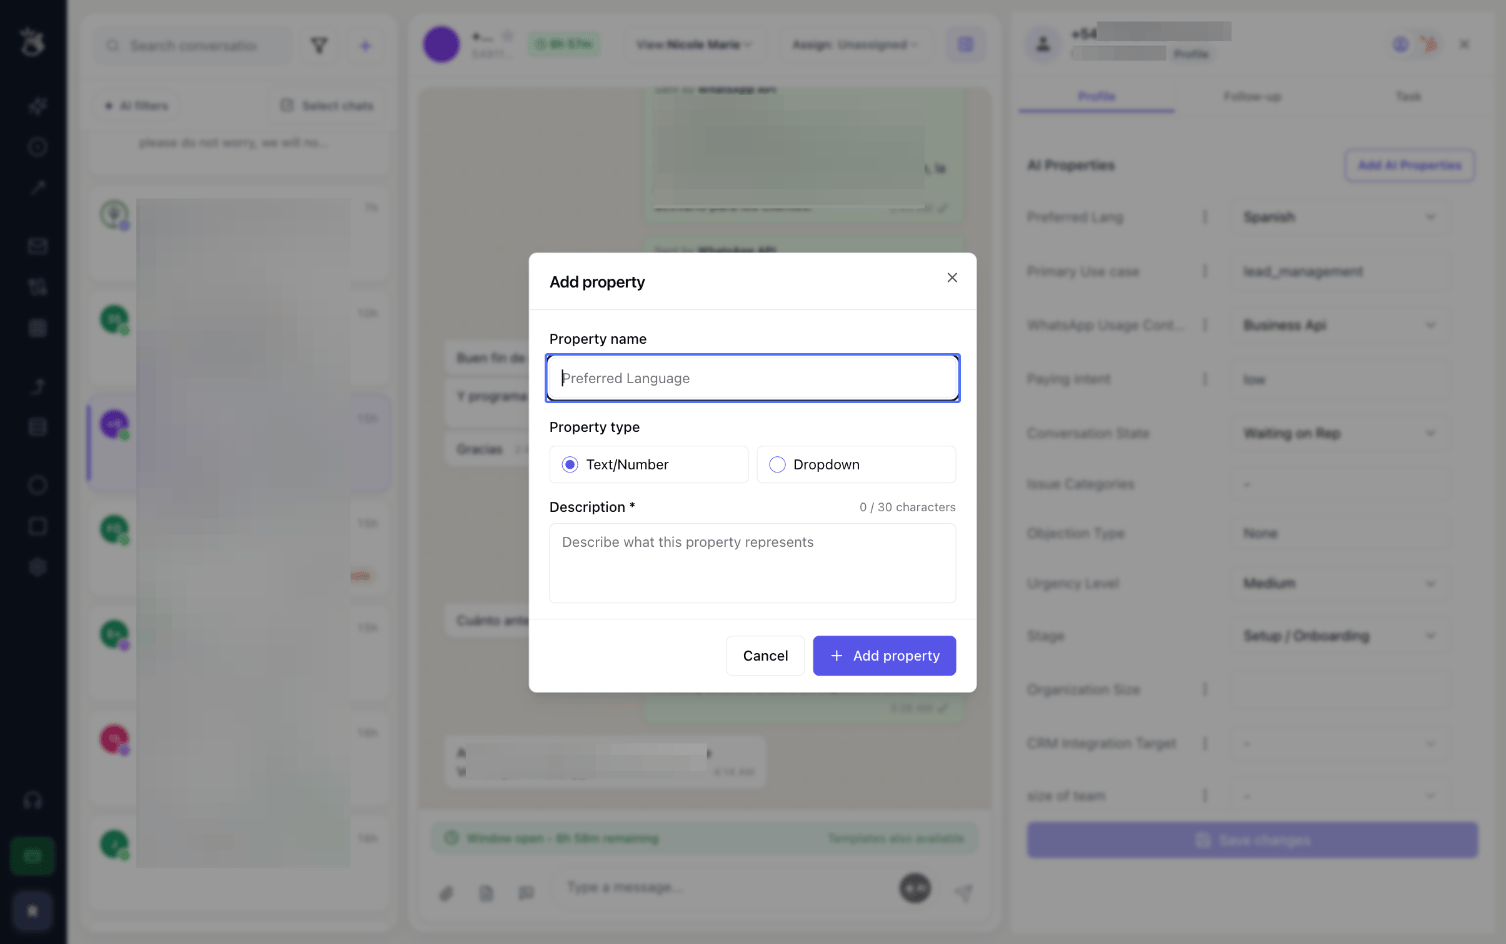
Writing a Good Property Description
The description is the most important part of a property — it’s the instruction the AI follows to decide what to capture. A vague description produces vague values. Brief it like a new team member, not a data dictionary. A good description:- Says what to capture in one sentence. Don’t repeat the property name — “The type of insurance” teaches nothing.
- Defines your business terms. The AI doesn’t know what qualified or hot means at your company. Spell out the criteria.
- Says who must have said it — customer or agent. Without this, the AI records prices and dates your own agent quoted.
- Specifies the format, with one example. Otherwise you get
12/09/2026,next month, and12th Septin the same column. - Defines every dropdown option — one short gloss each, e.g. fee_pending = documents in, payment not.
- Gives a tie-break rule. If two values could apply, say which wins — “pick the furthest along”.
- Writes the exclusions — what looks like a match but isn’t: “not a CRM they’re asking whether we support”.
- Says when to leave it blank. The AI will guess rather than look unhelpful unless you tell it not to.
- Does one job. If the description has an “and” in it, it’s probably two properties.
- Distinguishes it from its neighbours. If another property could accept the same answer, say how they differ.
- Uses real values as examples, not explanations — “July”, “December”, “March”, not “a month or a range”. Only the first three are used.
Shape to follow
Configuring from Team Inbox Settings
Properties can also be managed outside an individual chat, from the Team Inbox settings.1
Open the Integration Page
Open the Integration page in the Team Inbox settings.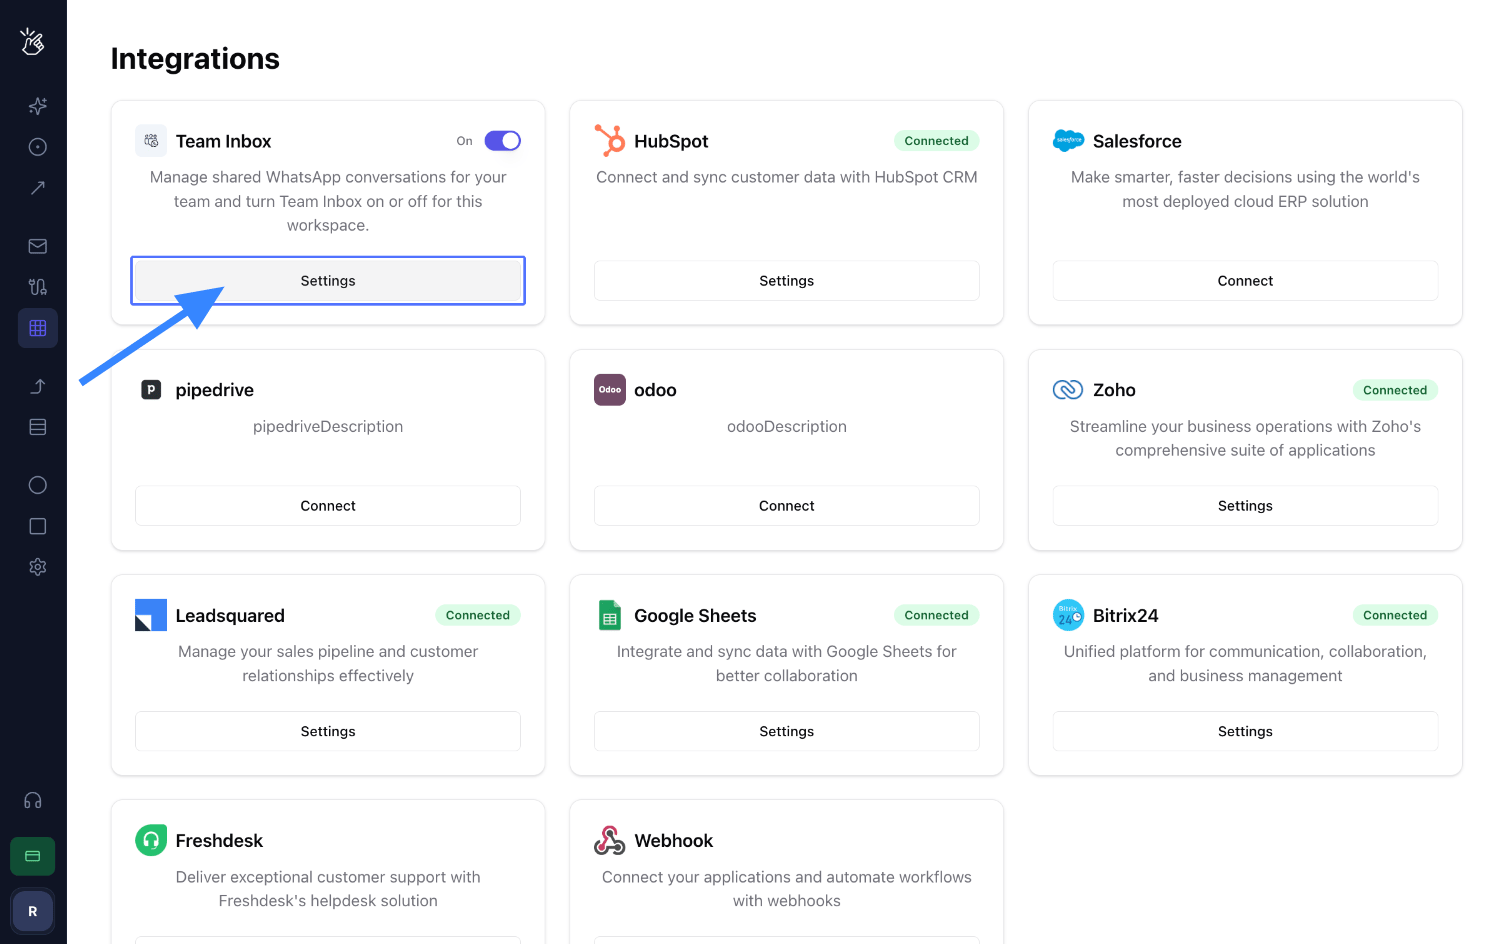
2
Open AI Property Configuration
Click on “AI Property Configuration” to configure your AI Properties.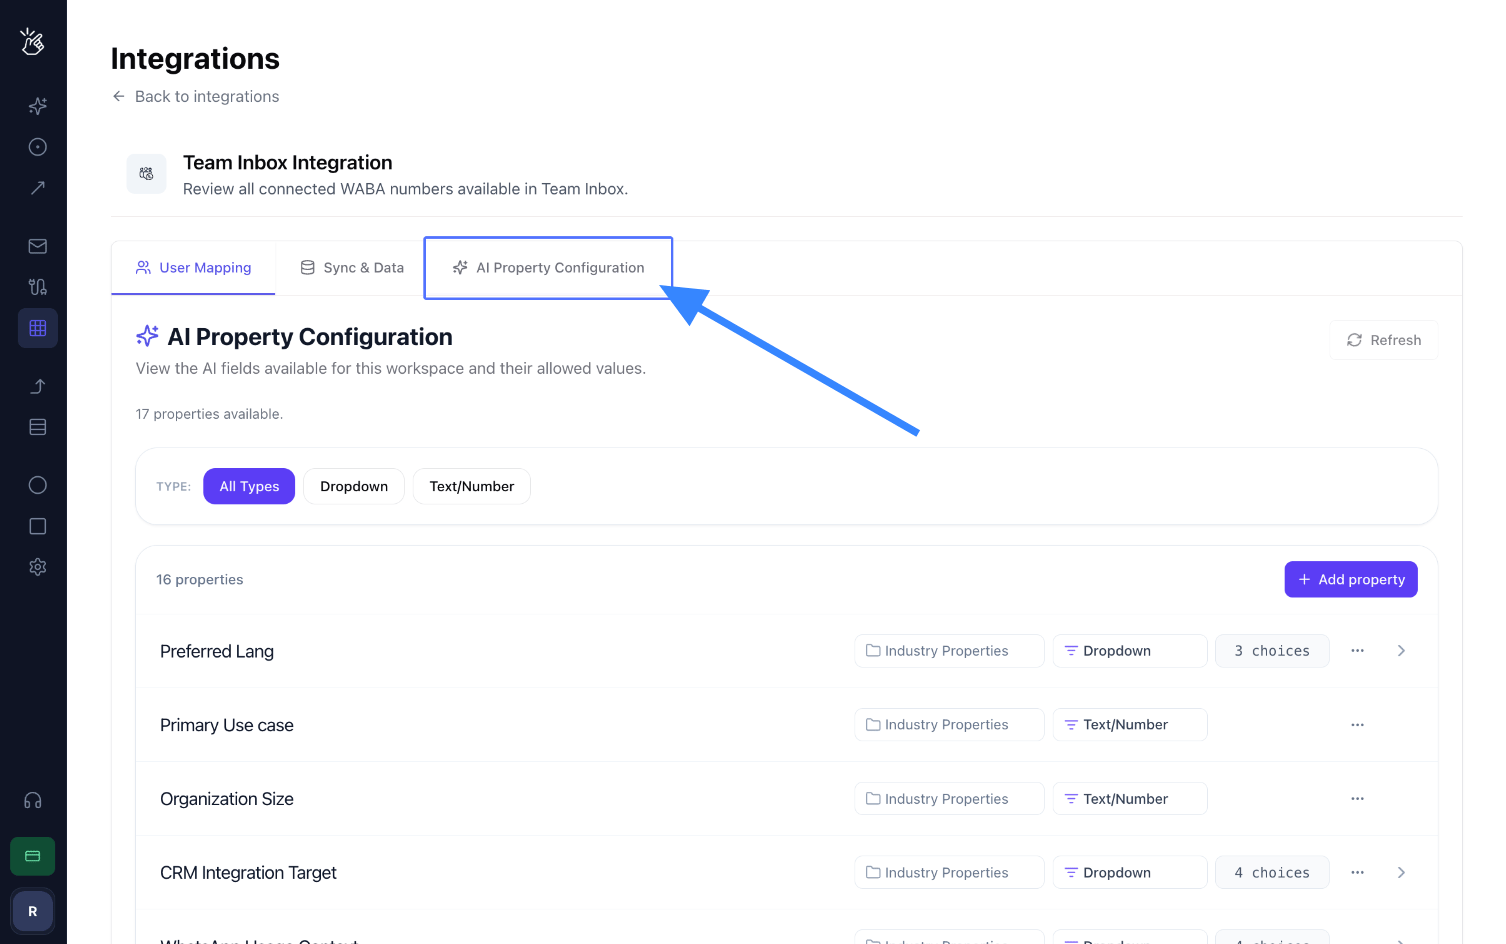
Behaviour to Be Aware Of
- A new property fills going forward. After you add a property, it is filled on relevant chats from that point on.
- The description defines what is captured. The AI reads the description to decide what to look for, so a vague description produces vague values. Write one short, specific sentence.
- The auto-created set differs per workspace. Properties are derived from your own conversations, so another business on BEA Radar sees a different set of fields.
- Editing options is Admin-only. Employees can select a different value from a dropdown, but cannot add or remove the options in it.
Related
AI Filters
Filter the inbox by any of these properties
AI Insights on a Chat
The sales brief written beside every conversation