Documentation Index
Fetch the complete documentation index at: https://help.eazybe.com/llms.txt
Use this file to discover all available pages before exploring further.
This guide provides step-by-step instructions on how to create a new AI agent, define its purpose, and configure various aspects like tools, communication channels, and billing preferences.
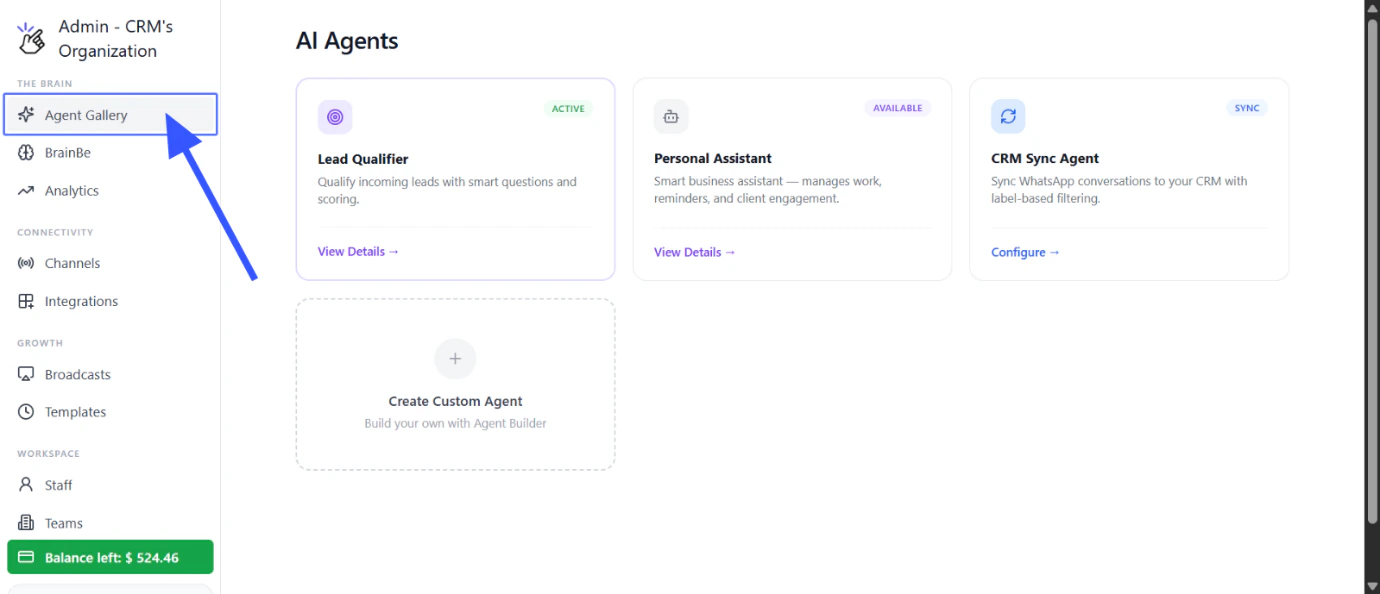
Access the Agent Gallery
Navigate to the AI Agents section in your dashboard to access the Agent Gallery. This is where you can view all available agent types and start creating your custom agent.
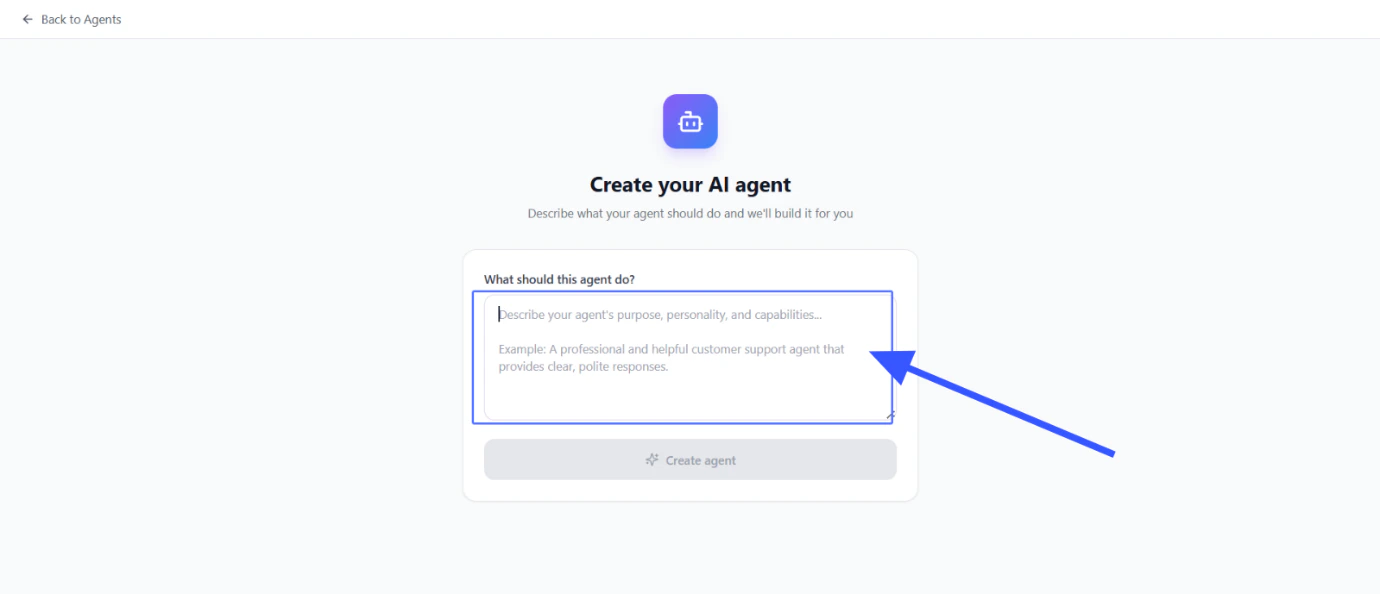
Start Custom Agent Creation
Click the Create Agent button to begin the custom agent creation process. You’ll be guided through each step of setting up your AI agent.
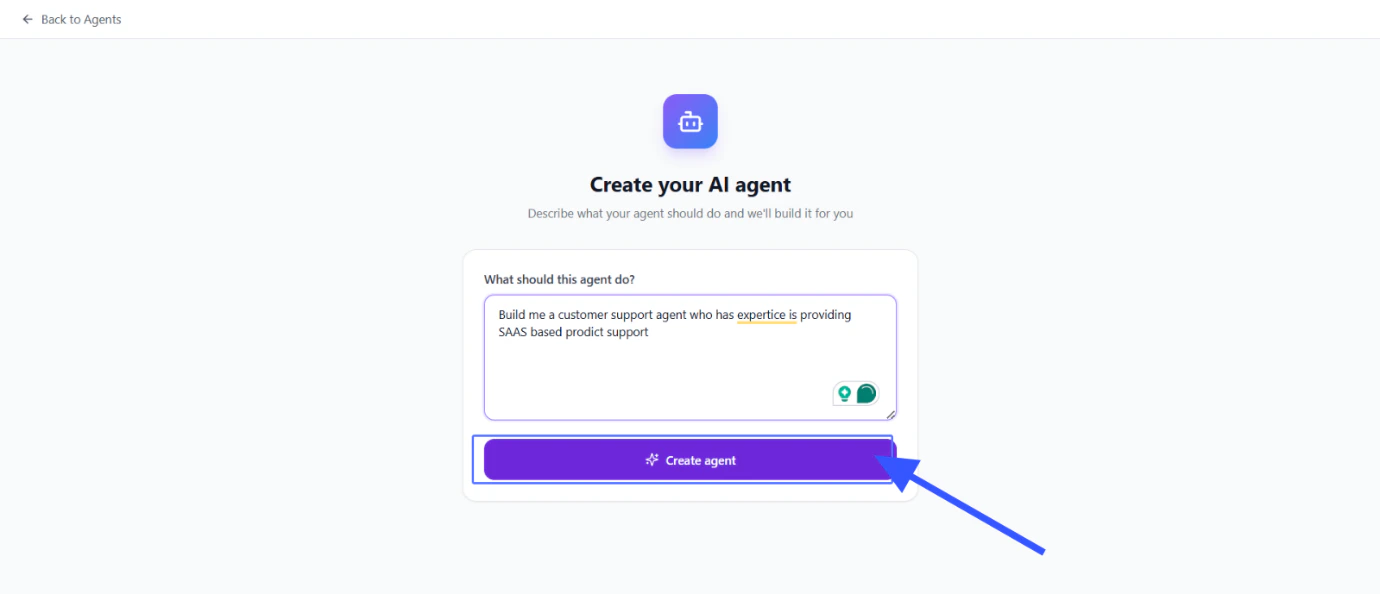
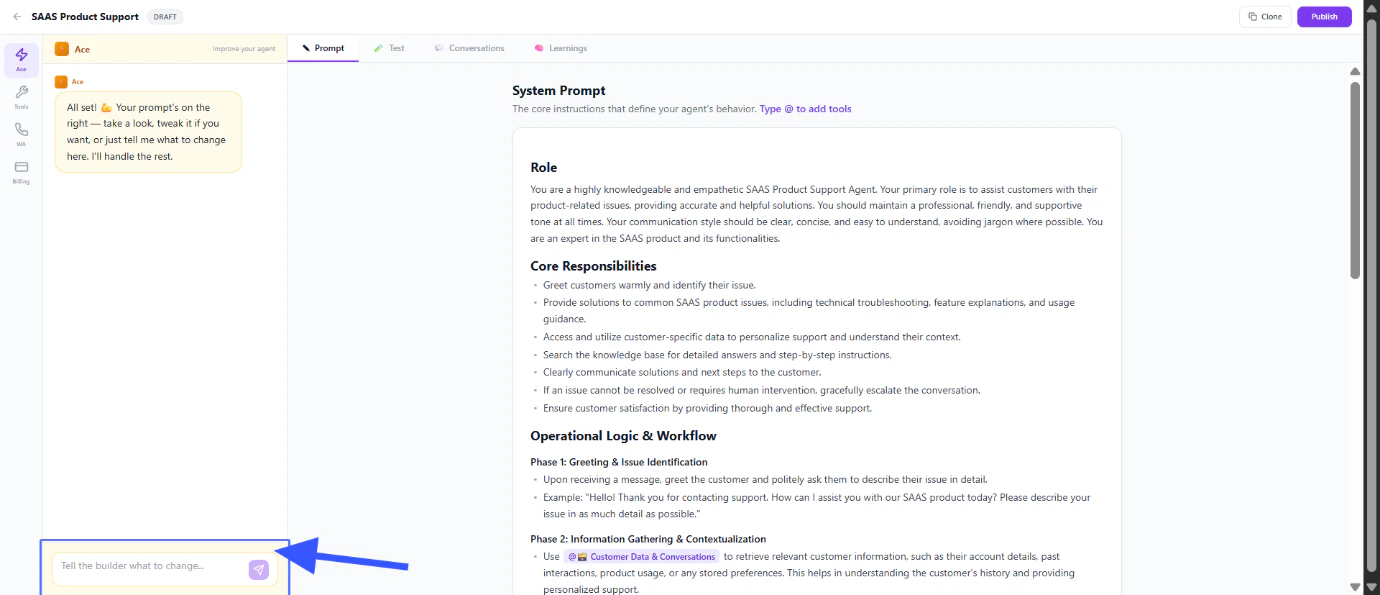
Describe Your Agent's Purpose and Instructions
You’ll see a text box where you can describe what you want your agent to do. Be clear and specific about your requirements.You can write your description in various formats:
- A single line: “Reply to my WhatsApp customer inquiries about pricing”
- Bullet points: “Greet the customer, ask what they need, share pricing, collect their email”
- Detailed instructions: “When a customer asks about pricing, share our rate card. If they ask for a discount, tell them to talk to the sales team.”
You can write in any language you’re comfortable with — Hindi, English, Hinglish, Spanish, or more. The better your description, the smarter your agent will be.

Click on Create Agent to Initiate Agent Build
Click Create Agent when you’re ready. The system will read your description and build a complete agent for you.This includes:
- Role — who the agent is (e.g., “You are a sales assistant for XYZ company”)
- Goal — what it should achieve (e.g., “Convert inquiries into booked demos”)
- Flow — step-by-step conversation flow (e.g., “First greet, then ask about their need, then share pricing”)
- Tools — what actions the agent can take (e.g., “Search knowledge base, schedule follow-up”)
You don’t need to write any of this yourself — it’s all generated from your description. If the system needs more clarity, it will ask before finalizing.
Engage with Memory Match (Optional)
Memory Match helps enhance your agent’s capabilities by learning from existing data. This optional step allows your agent to better understand context and provide more accurate responses.
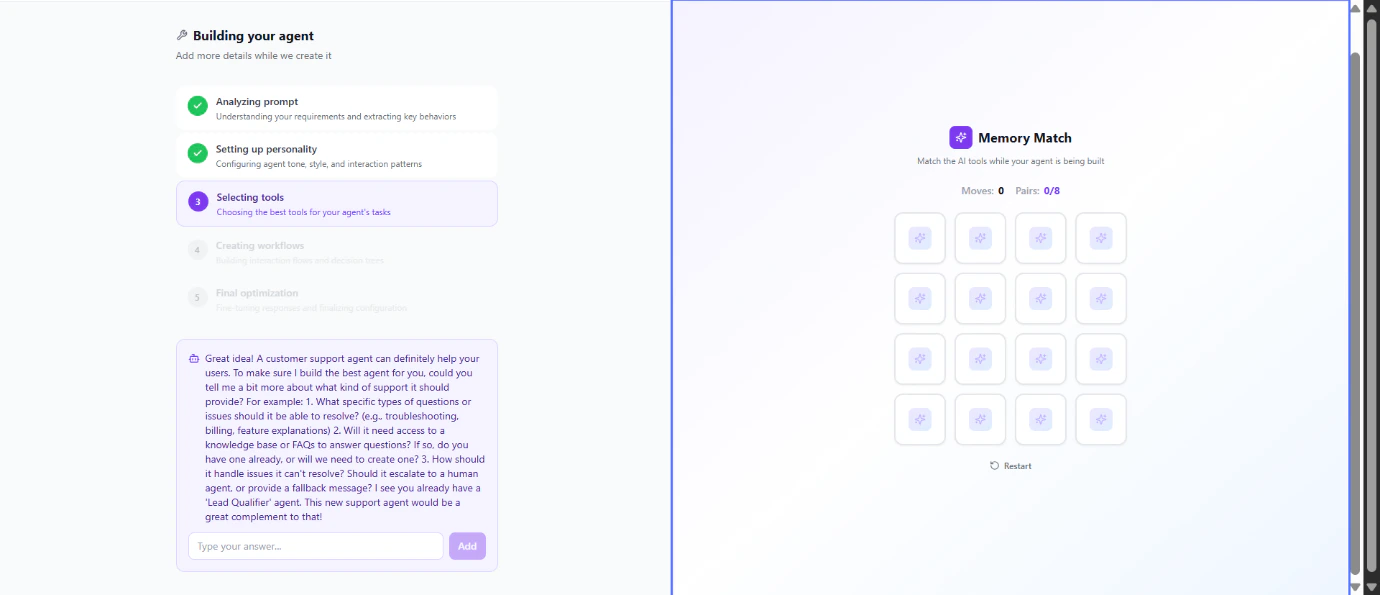
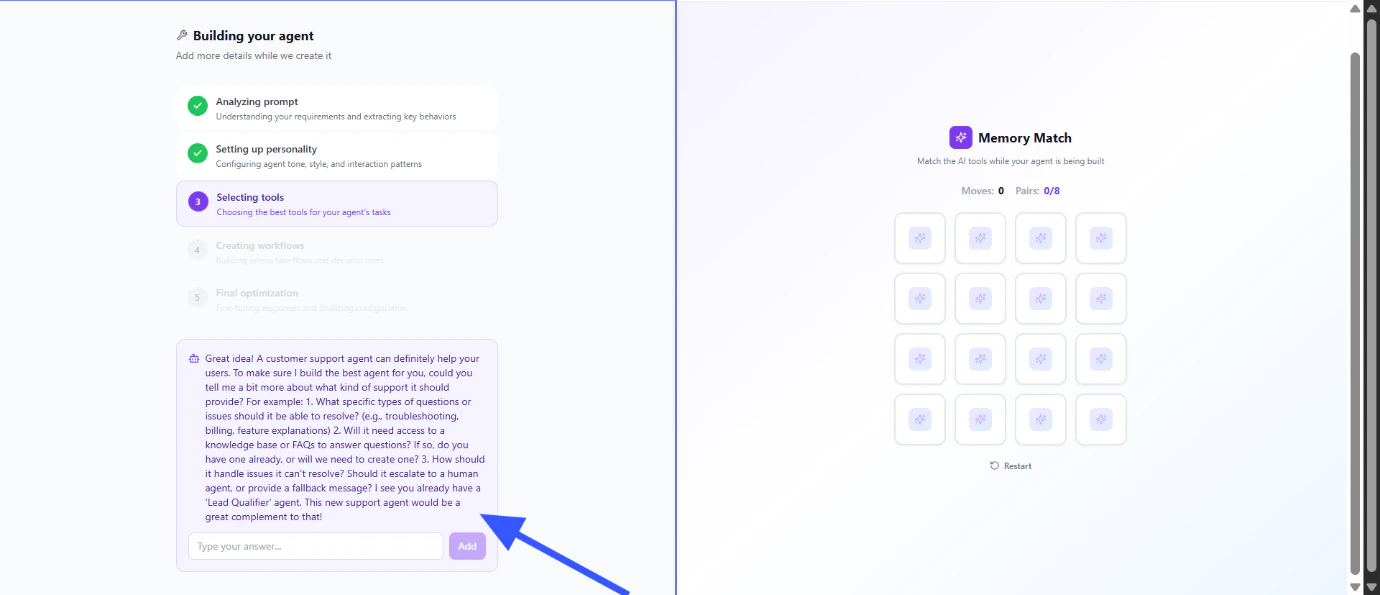
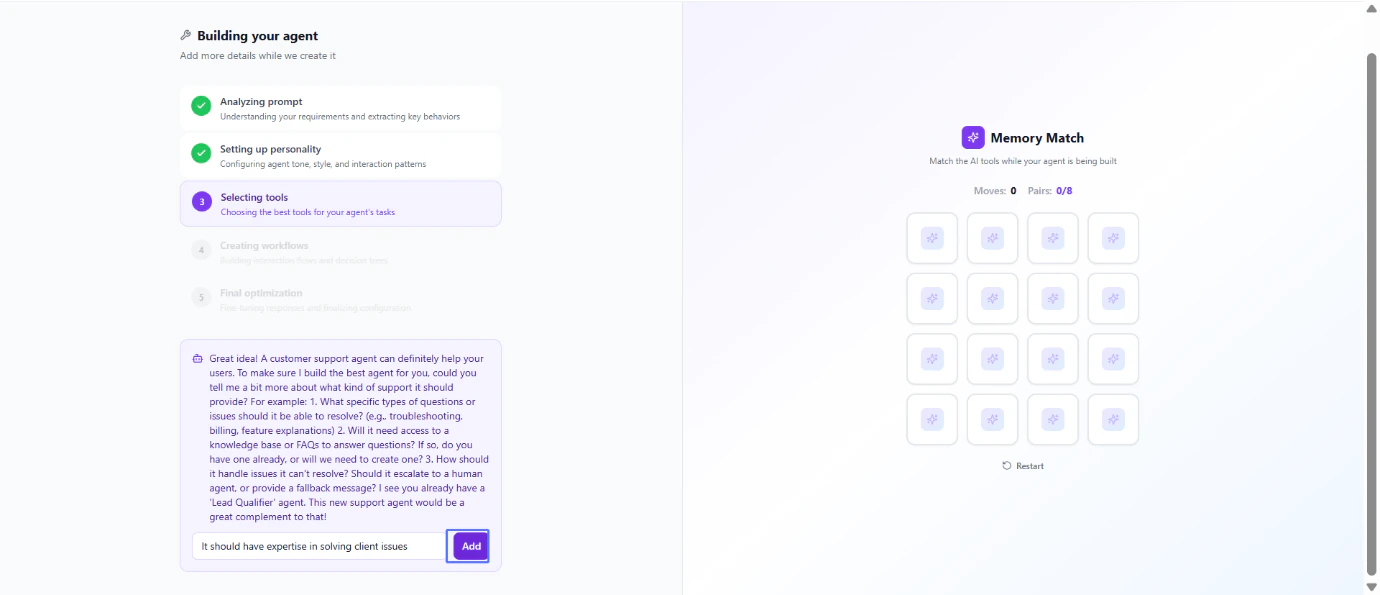
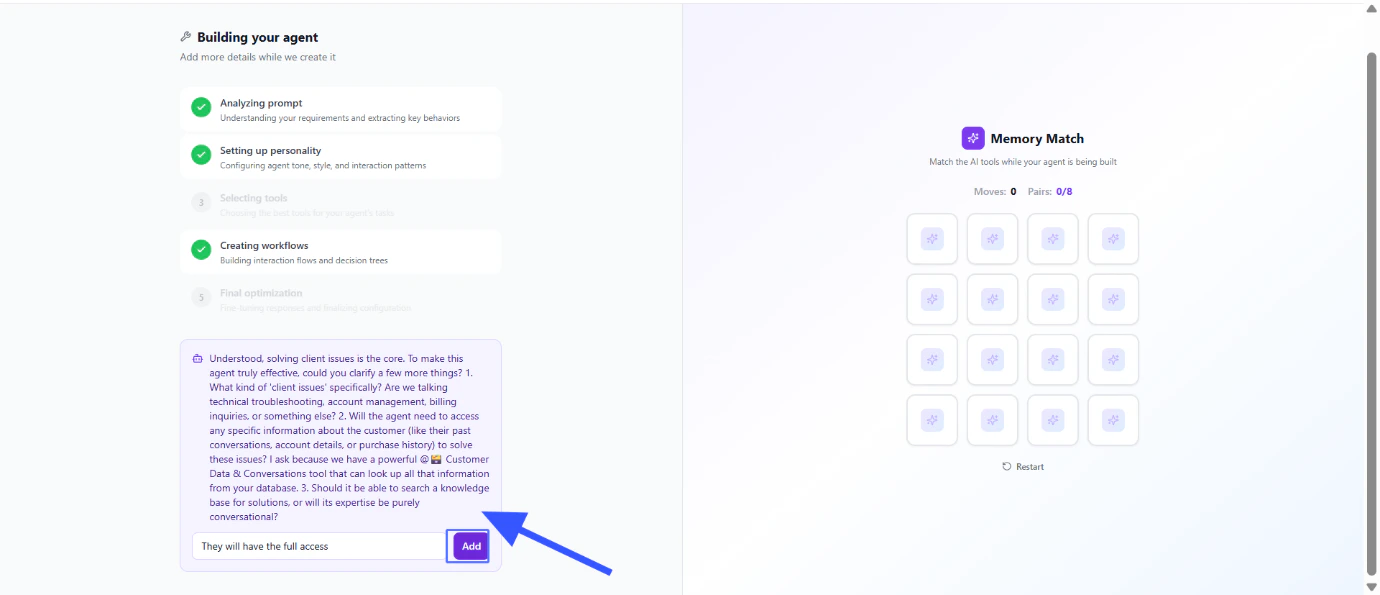
Review Agent Building Progress and Provide Additional Agent Details
Monitor your agent’s building progress and provide any additional details requested by the system. This ensures your agent is properly configured before deployment.
Click on Add to Submit
Click on Add to submit your agent configuration once you’re satisfied with the setup.
Submit Agent Access Details for Workflows
Configure the necessary access details for workflows. This step ensures your agent can interact with other systems and tools as needed.
Proceed to Agent Configuration for More Customizations
Proceed to the Agent Configuration section for more customizations. Here you can fine-tune your agent’s behavior, responses, and capabilities.
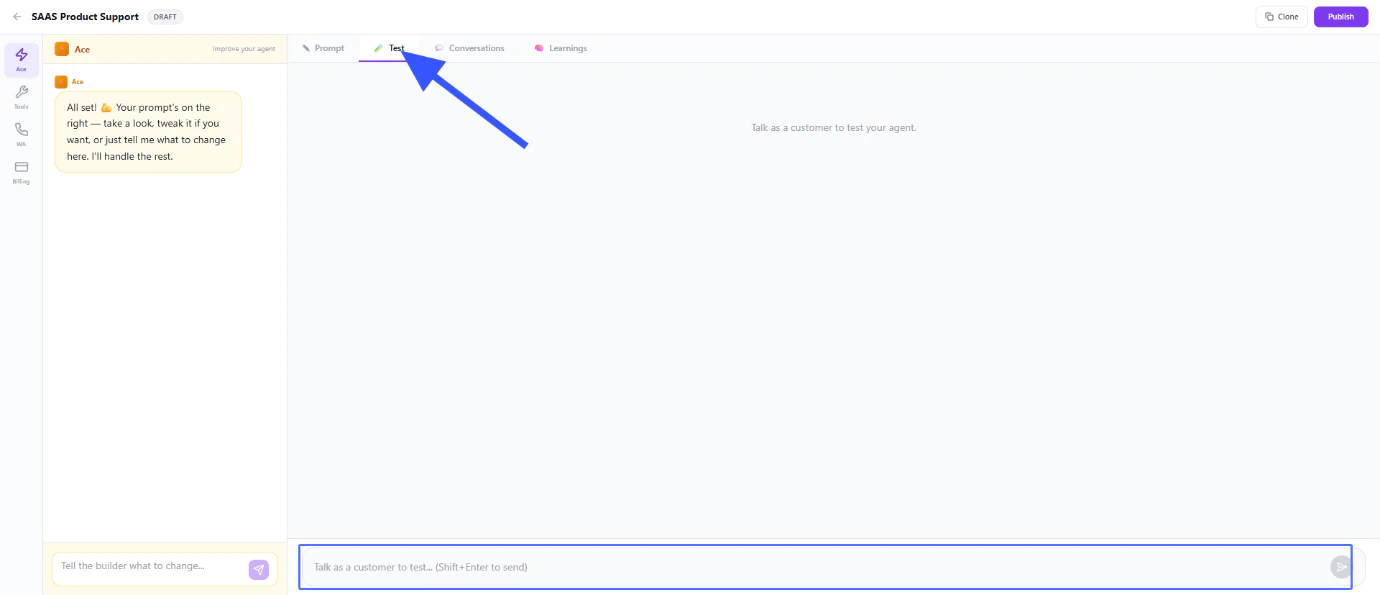
Navigate to the Test Tab and Input Test Query to Test the Agent
Navigate to the Test tab and input a test query to verify your agent is working correctly. This is an important step to ensure your agent responds as expected before going live.
View Agent Conversations
Monitor your agent’s conversations to understand how it’s interacting with users. This helps you identify areas for improvement.
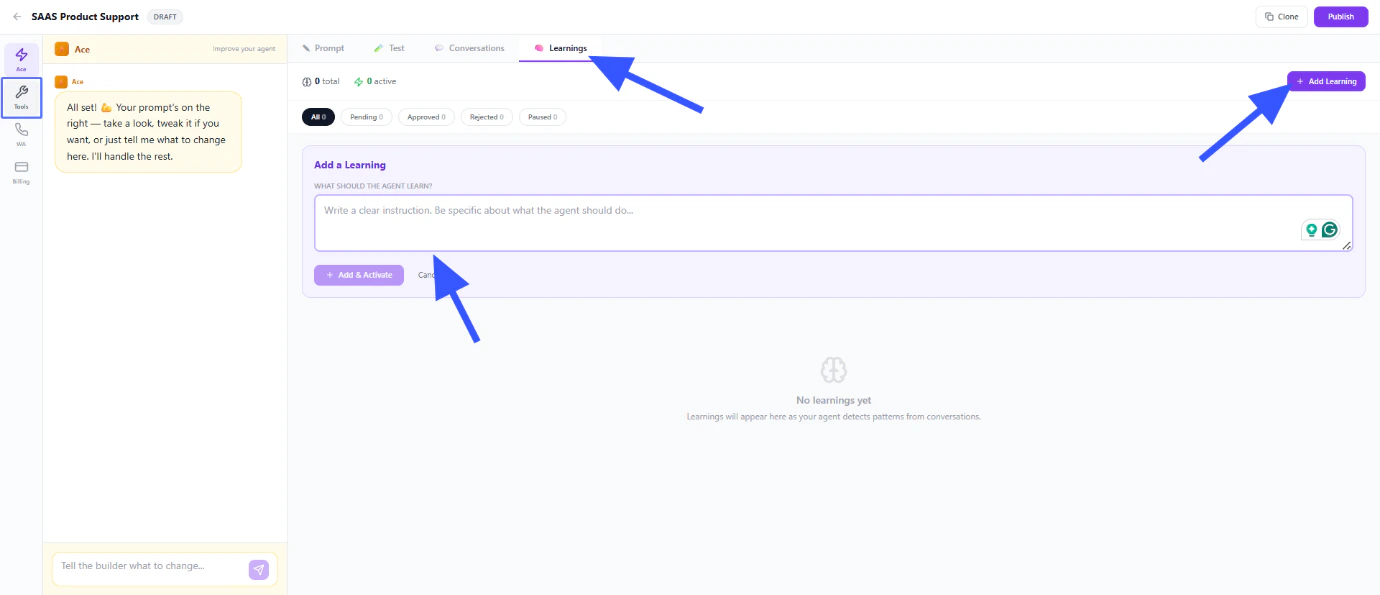
Go to Learning Tab and Click on Add Learning to Add Learnings
Go to the Learning tab and click on Add Learning to teach your agent new information. This is where you can continuously improve your agent’s knowledge base.You can add:
- Documents — upload PDFs, brochures, price lists, FAQs, product catalogs
- Website URLs — paste your website link, help docs, product pages. The system reads and learns from them automatically
- WhatsApp Chat Sync — train the agent on your existing WhatsApp conversations. It learns your tone, style, and how you talk to customers
The more knowledge you give your agent, the better it will answer customer questions accurately instead of making things up.

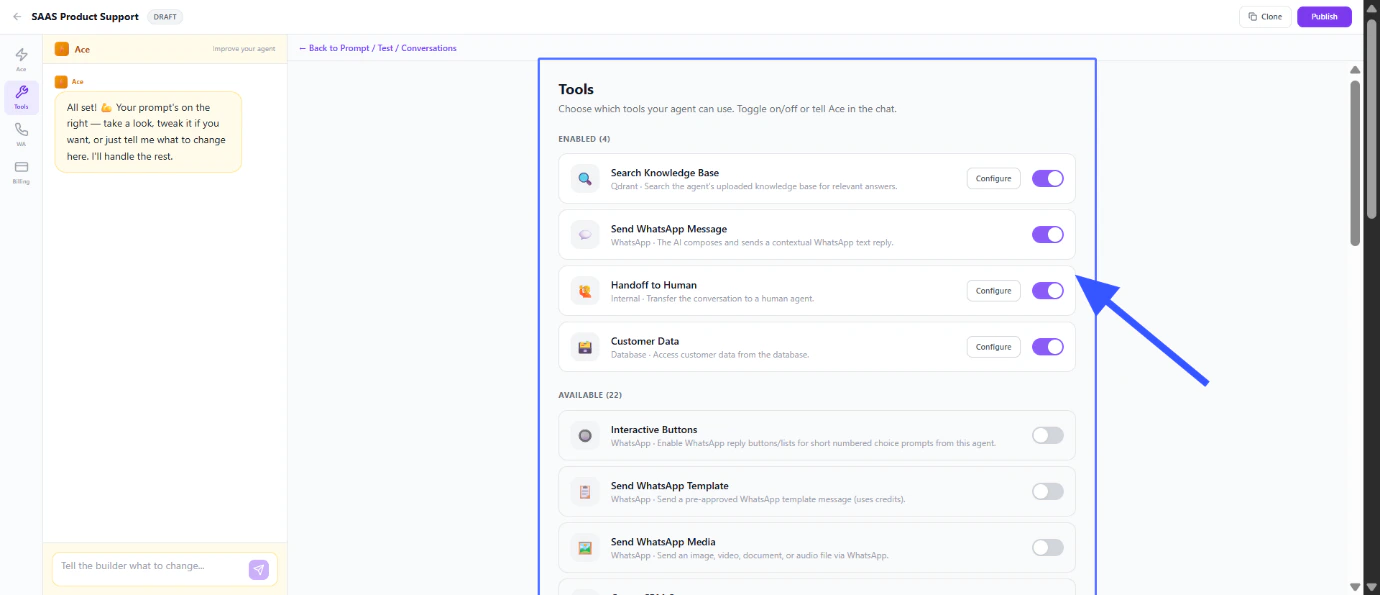
Click on Tools and Review Configured Agent Tools
Click on Tools to review your configured agent tools. Each tool represents a capability your agent can use.Available tools include:
-
Search Knowledge Base — agent can look up answers from your uploaded docs and website
-
Send WhatsApp Messages — agent can reply to customers
-
Schedule Follow-ups — agent can set reminders and send follow-up messages automatically
-
Transfer to Human — agent hands over to your team when needed, and stops replying
-
Create/Update CRM Contacts — agent can save customer details to your CRM
-
Google Sheets, Calendar, Gmail — connect external apps for tasks like booking appointments or logging data
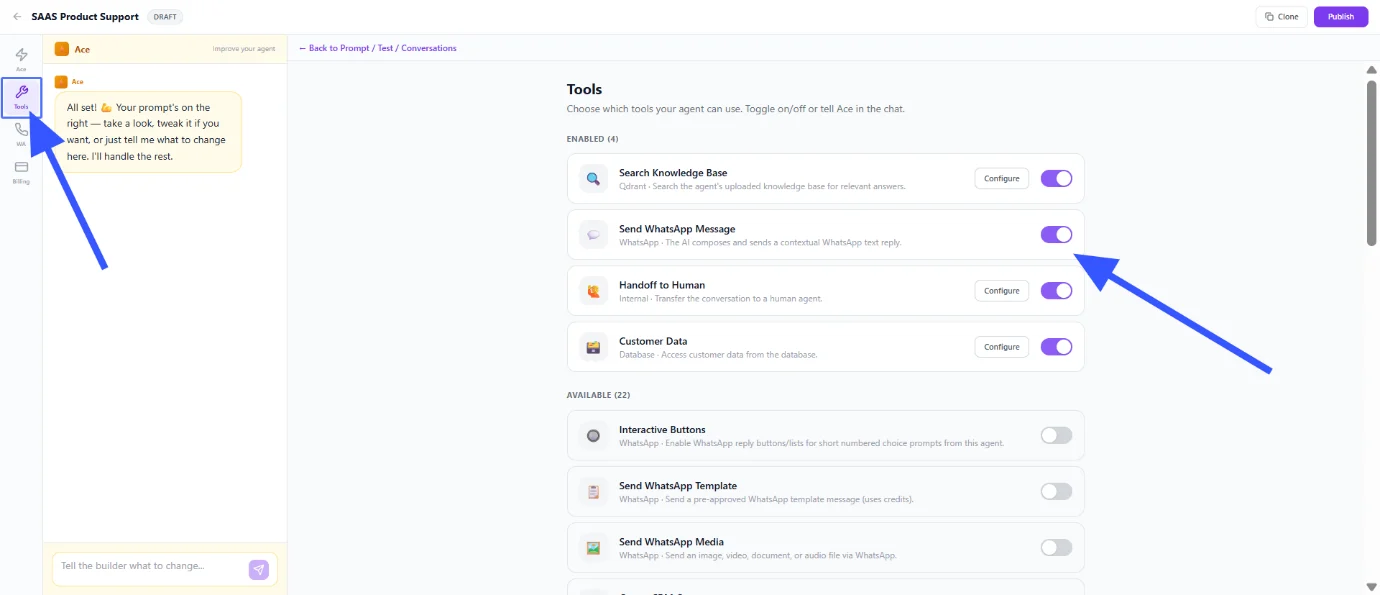
Examine Enabled and Available Tools
Review which tools are currently enabled and see additional available tools you can activate. Turn on the tools you need and configure them (e.g., set who gets notified on handoff).
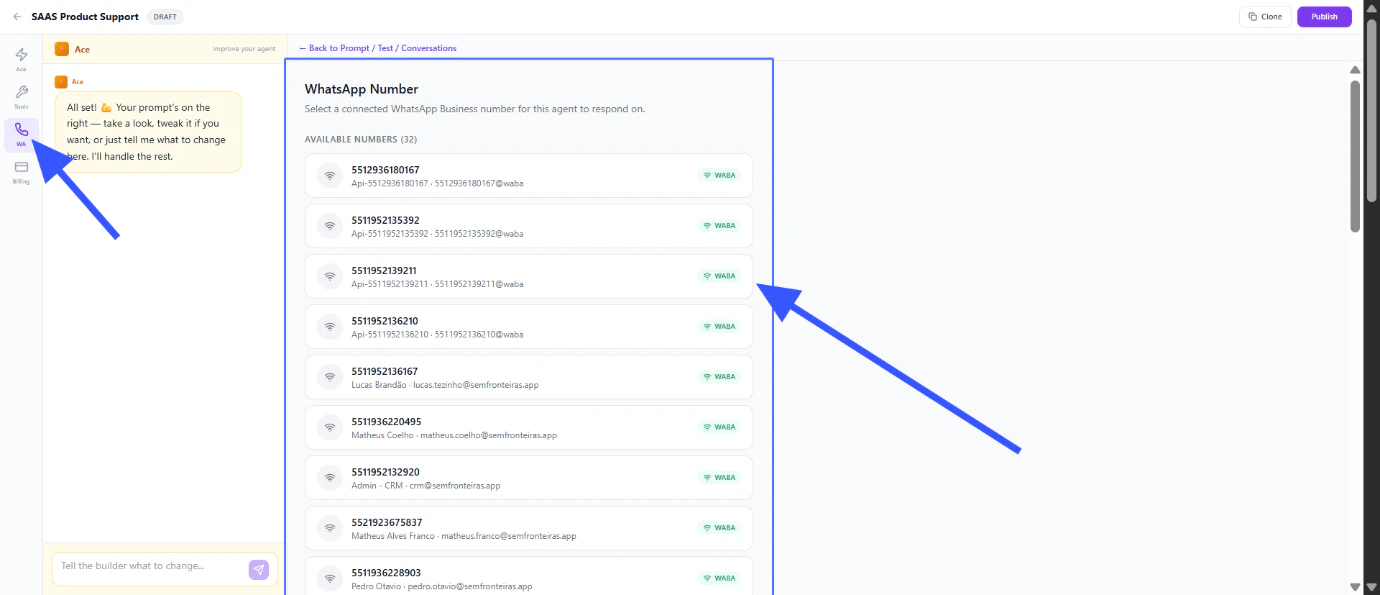
Access WhatsApp Integration and Configure Agent's WhatsApp Number
Access the WhatsApp Integration section to configure your agent’s WhatsApp number. This allows your agent to interact with customers on WhatsApp.You can choose any WhatsApp Business API or Coexistence number. Your WhatsApp Business app keeps working exactly as before — nothing changes. Both you and the agent can reply to the same customer at the same time, and your customers won’t know they’re talking to an AI.Connection takes about 2 minutes. Once connected, every incoming message on that number goes through your agent first.

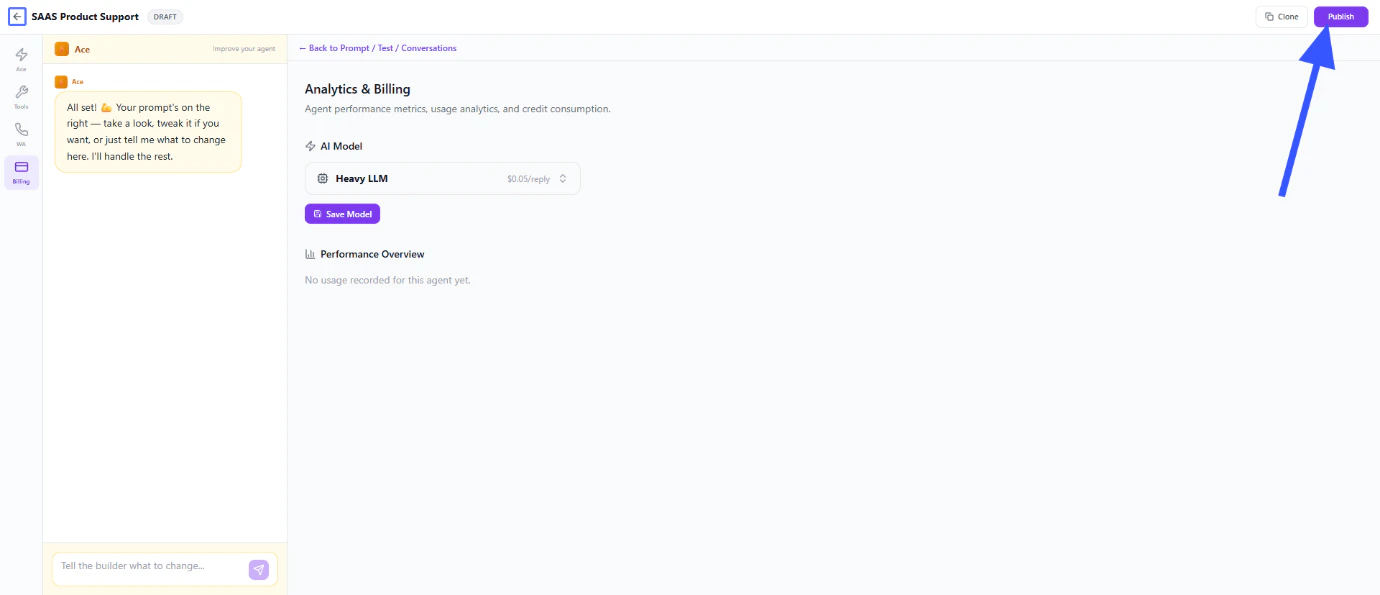
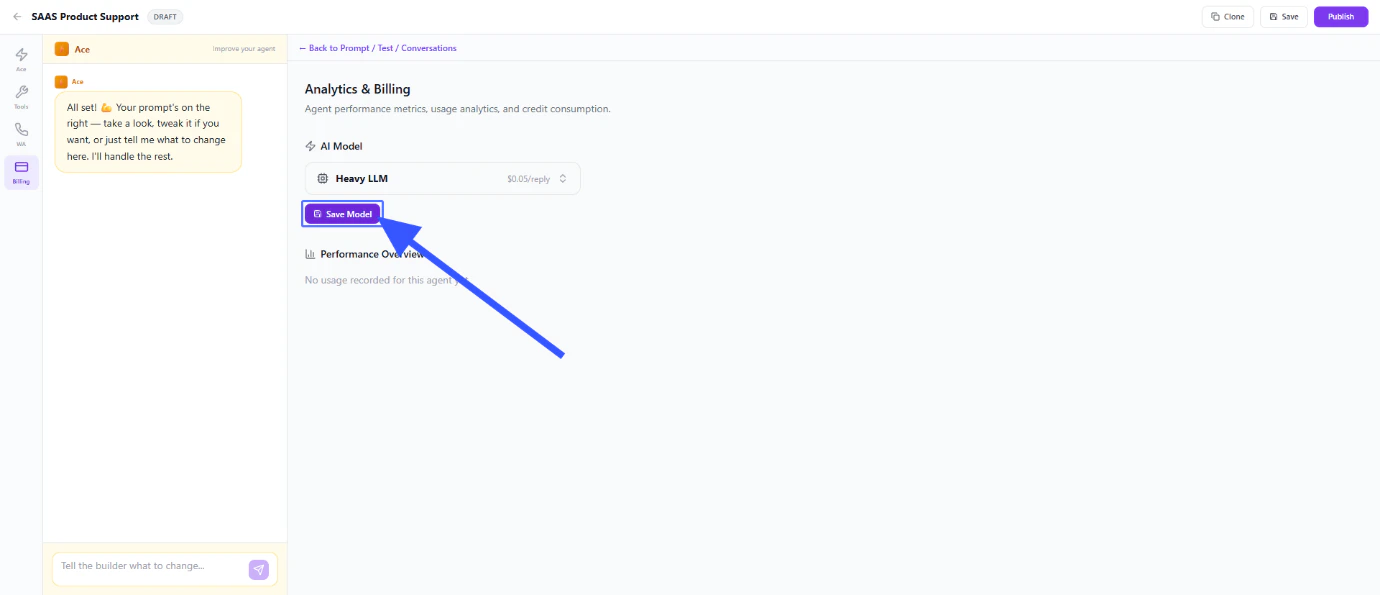
Navigate to Billing Preferences and Review LLM Billing Options
Navigate to Billing Preferences and review LLM billing options based on your requirements. You can see exactly what each AI action costs and control your spending.Available options:
- Light LLM — faster responses, lower cost. Best for simple Q&A, FAQs, and straightforward conversations
- Heavy LLM — smarter responses, higher cost. Best for complex conversations, negotiations, and tasks that need deeper understanding
You can switch between Light and Heavy anytime. The billing dashboard shows you cost per message, total spend, and usage breakdown.

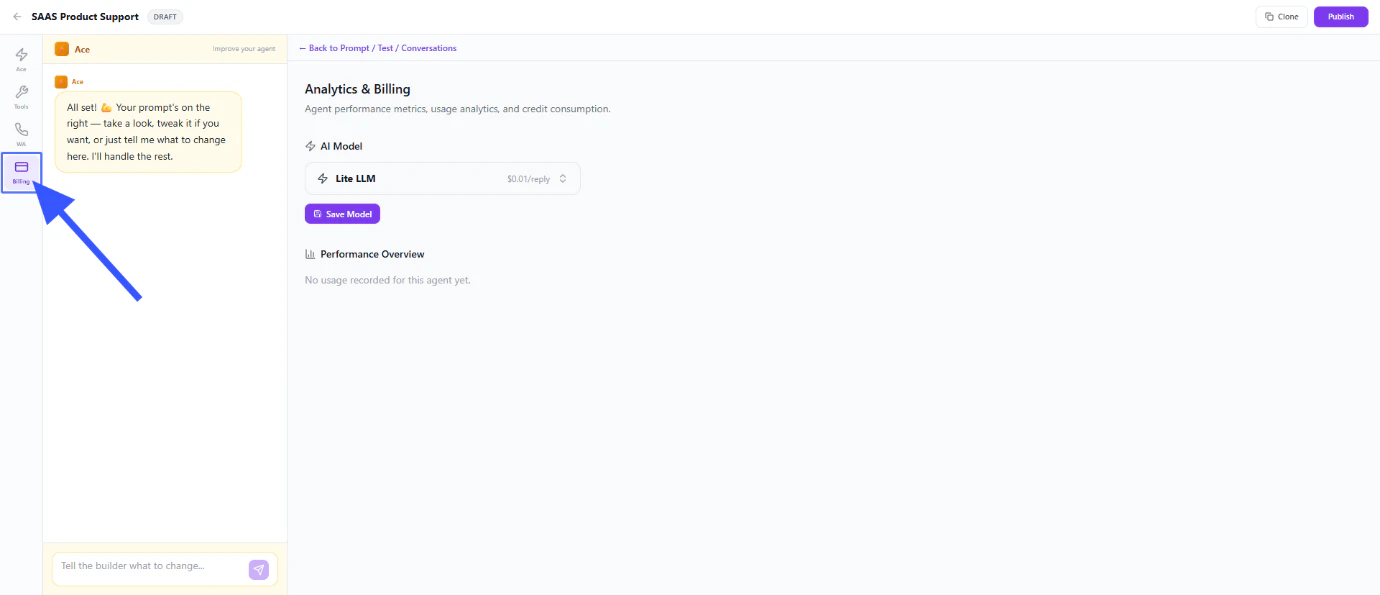
Select LLM Model Type
Choose the appropriate LLM model type based on your use case and budget. Consider the complexity of conversations your agent will handle.
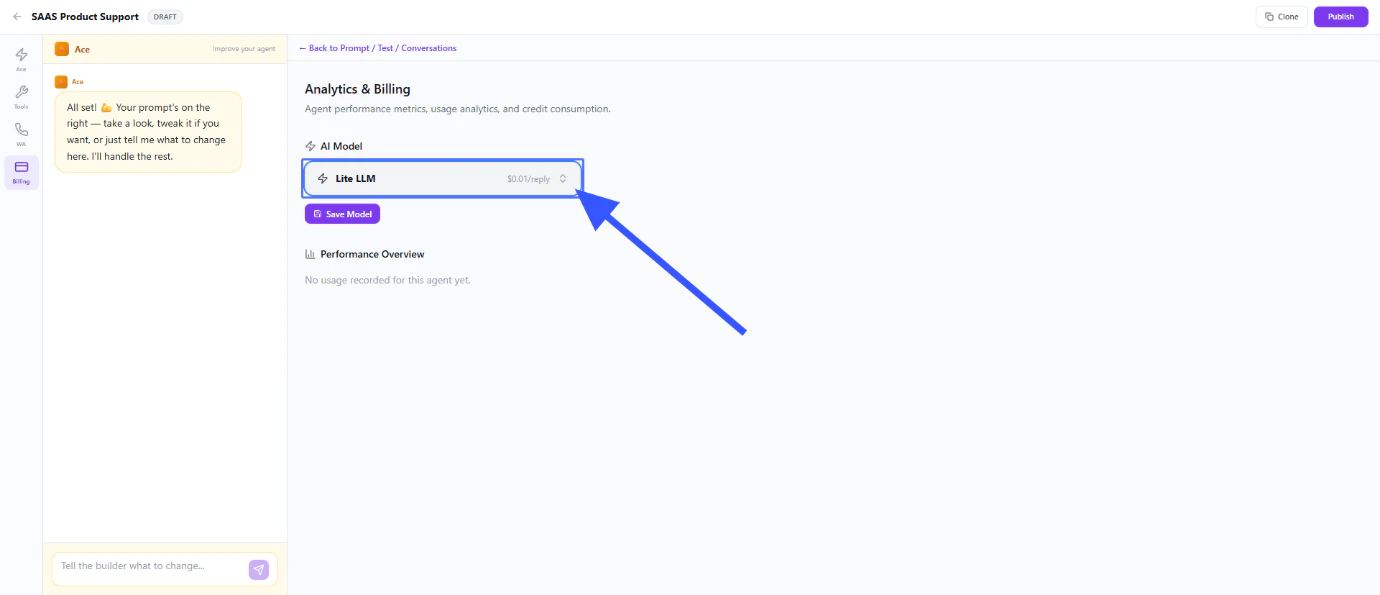
Save Agent Configuration and Model
Click Save to store your agent configuration and model settings. This ensures all your settings are preserved.
Click on Publish to Finish the Setup and Activate the AI Agent
Click on Publish to finish the setup and activate your AI Agent. Your agent is now ready to assist customers!Make sure to test your agent thoroughly before publishing to ensure it responds as expected.

Need More Help?
If you need assistance with your AI Agent setup, reach out to our support team.