> ## Documentation Index
> Fetch the complete documentation index at: https://help.eazybe.com/llms.txt
> Use this file to discover all available pages before exploring further.
# Template-Based Chatbot
> Orchestrate fully automated, interactive WhatsApp journeys directly within your HubSpot Workflows. Transform static message templates into dynamic, two-way conversations using Quick Reply buttons.
Orchestrate fully automated, interactive WhatsApp journeys directly within your HubSpot Workflows. This feature transforms static message templates into dynamic, two-way conversations. By leveraging Quick Reply buttons, you can build intelligent chatbots that engage leads, qualify prospects, and handle support queries 24/7—without writing a single line of code.
Using Eazybe's advanced "Send WhatsApp & Wait for Reply" action, your HubSpot workflows pause to listen for customer inputs, then instantly route them down specific branches based on which button they clicked. It's the ultimate tool for turning WhatsApp into an always-on engine for sales and support.
## Why the Template-Based Chatbot Matters
In an era of instant gratification, customers expect immediate answers. This feature bridges the gap between manual chatting and complex custom coding. It allows scaling businesses to automate repetitive conversations while keeping all data synchronized inside HubSpot, ensuring that your human agents only step in when high-value interactions occur.
### Key Benefits
Stop wasting time on cold leads. Set up a workflow that asks qualifying questions via button clicks (e.g., "Budget?", "Timeline?"). Based on the reply, automatically update the HubSpot contact property or route them to the right sales rep.
Your business never sleeps. Create workflows that greet customers, provide product details, or schedule demos instantly, regardless of the time of day, ensuring zero drop-offs due to delayed responses.
Ensure every prospect receives the exact same high-quality onboarding or support experience. By pre-planning flows, you eliminate human error and maintain consistent brand messaging across every interaction.
Unlike external bot builders, this lives inside HubSpot. Every button click and response is captured natively, allowing you to trigger further marketing emails, tasks, or deal stage updates based on the chat outcome.
## Scope of Capability
The template-based chatbot can handle various automation scenarios:
| Use Case | Description |
| ----------------------- | ----------------------------------------------------------------------------------------- |
| **Surveys & Feedback** | Send a template asking for a rating (1-5 buttons) and tag customers based on their score. |
| **Appointment Booking** | Guide users through selecting a time slot or service type. |
| **FAQ Automation** | Let users choose a topic (Pricing, Features, Support) and receive instant answers. |
## How It Works: Step-by-Step Configuration
To deploy your chatbot, follow this structured setup within your HubSpot account.
### Step 1: Blueprint & Template Creation
First, map out your desired conversation flow. Create your WhatsApp Templates in Eazybe with Quick Reply buttons (e.g., "Yes," "No," "More Info") corresponding to the choices you want to offer.
### Step 2: Initialize the Workflow
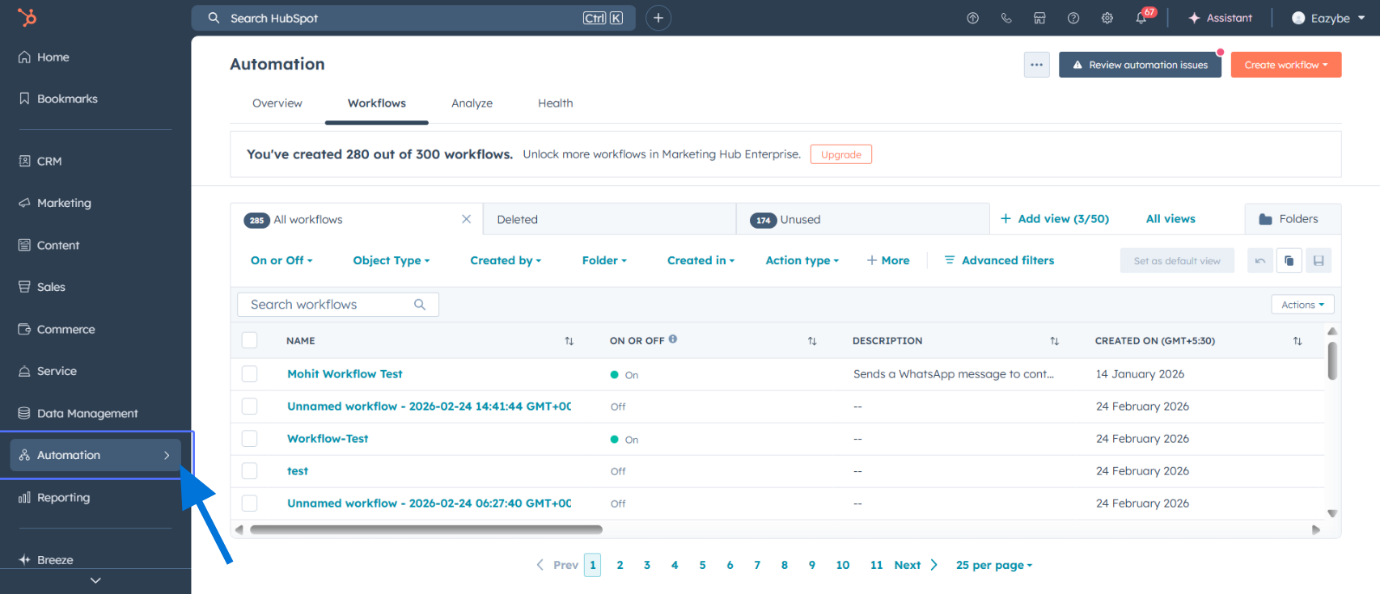
Go to **Automation** in your HubSpot account.
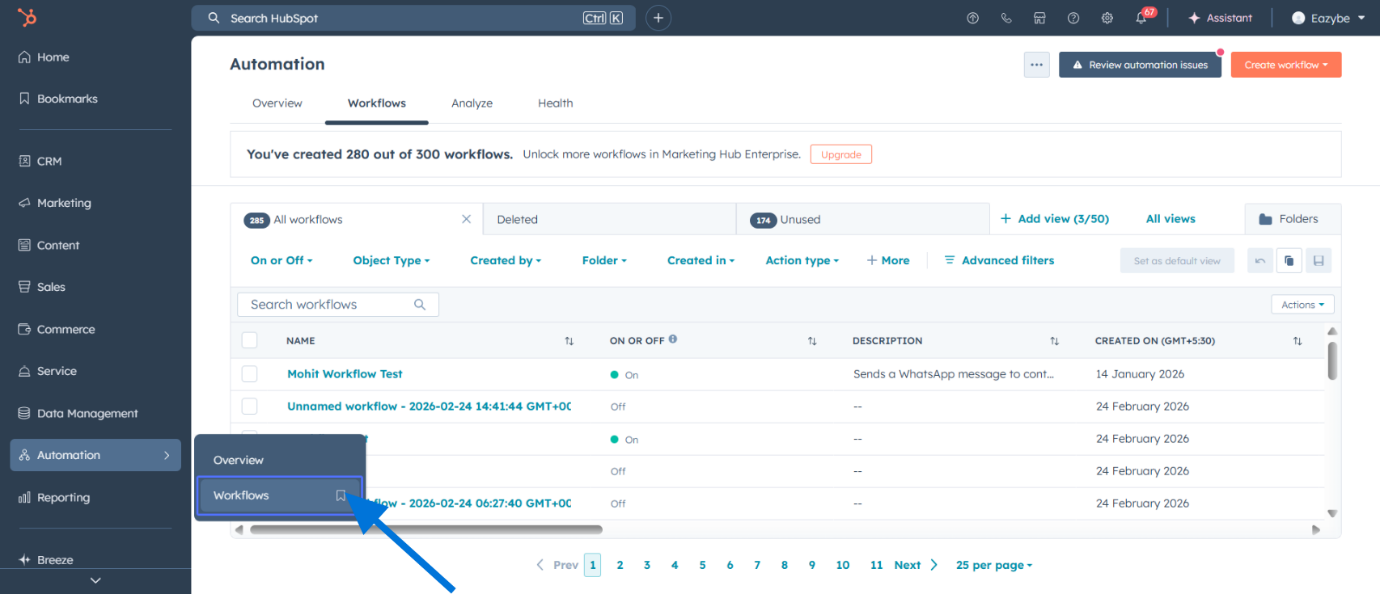
 Click on **Workflows** from the automation menu.
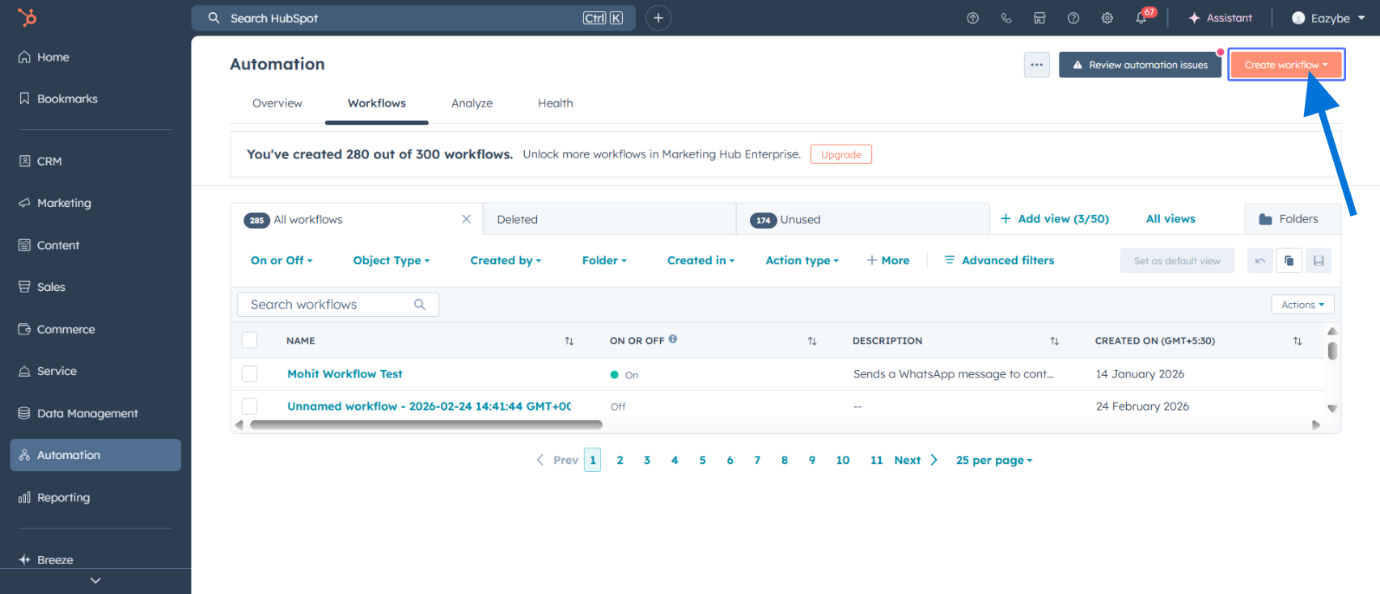
 Click **Create workflow** to start building your automation.
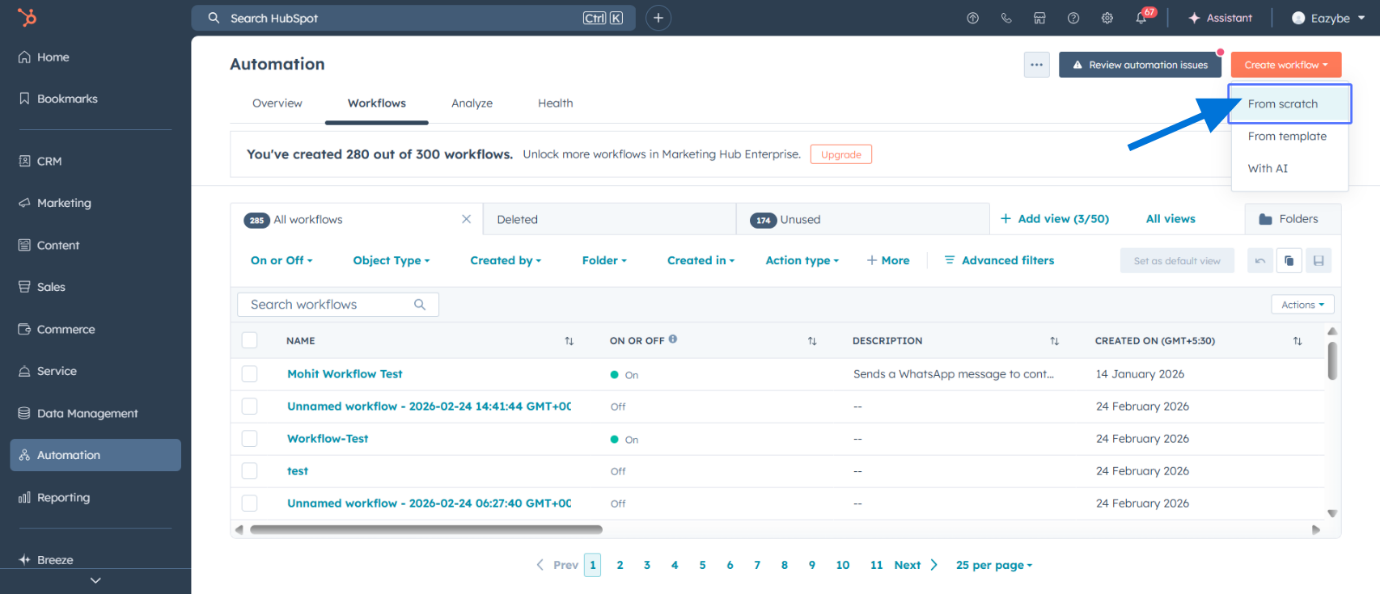
 Select **From scratch** to create a custom workflow.
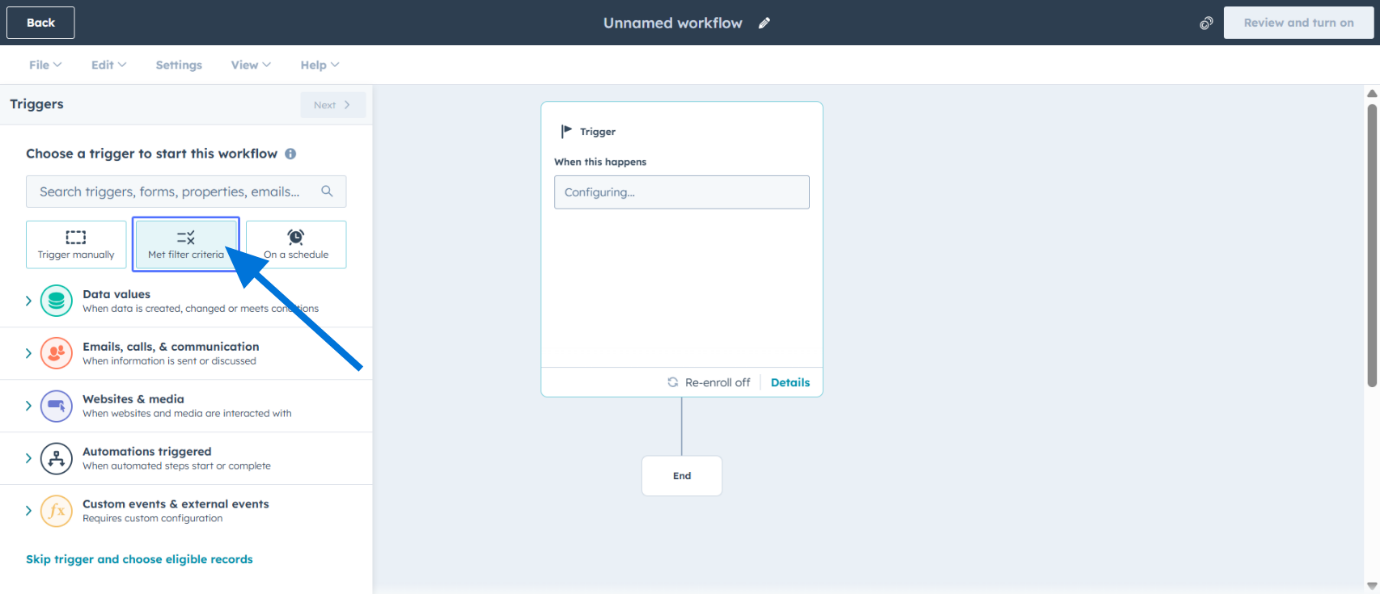
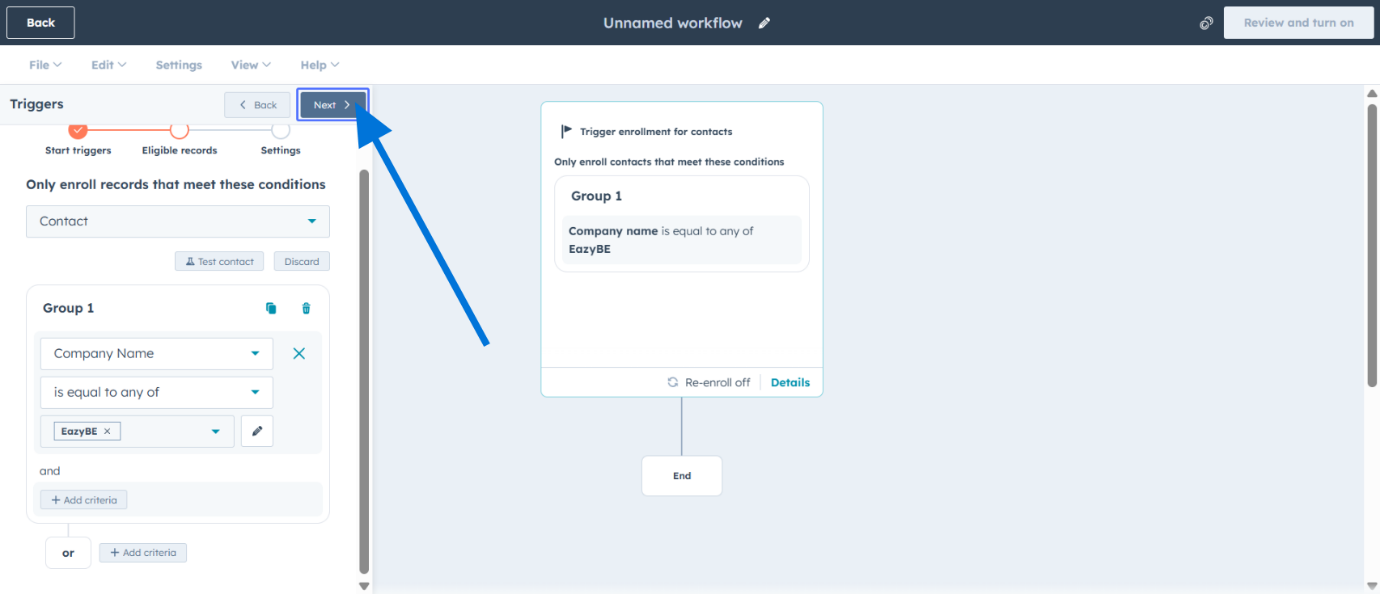
 Set the enrollment trigger to **Met filter criteria**. You can choose any filter criteria of your choice.
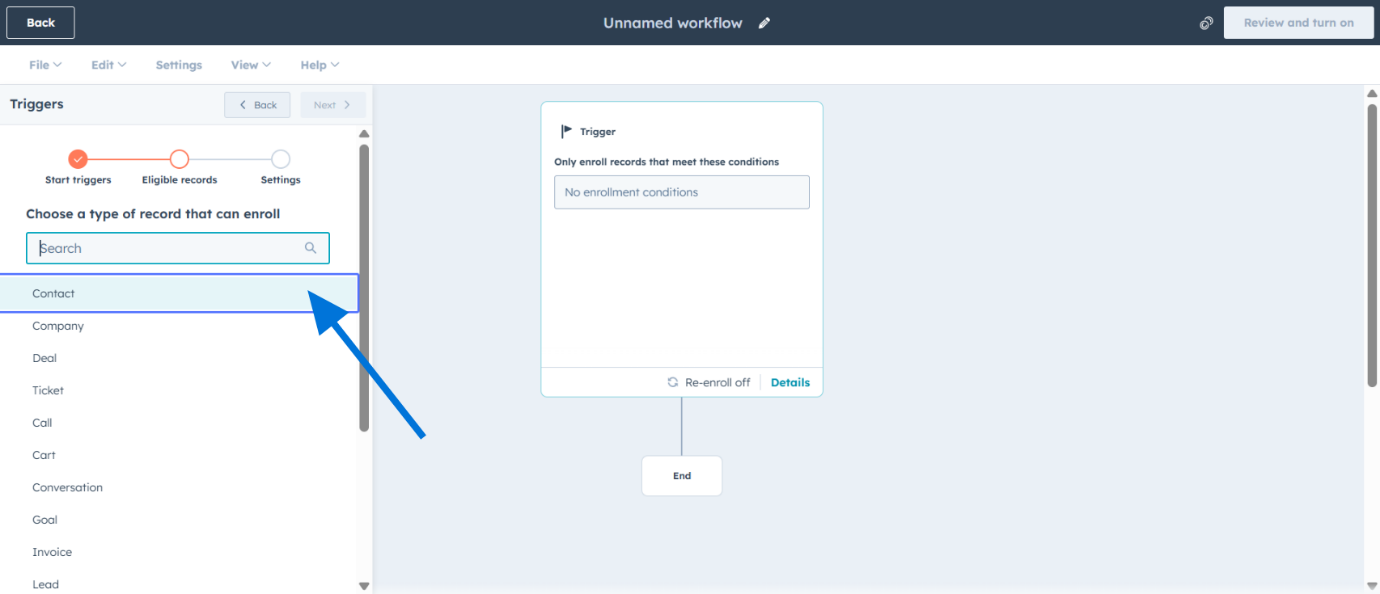
 Choose **Contact** as the workflow type.
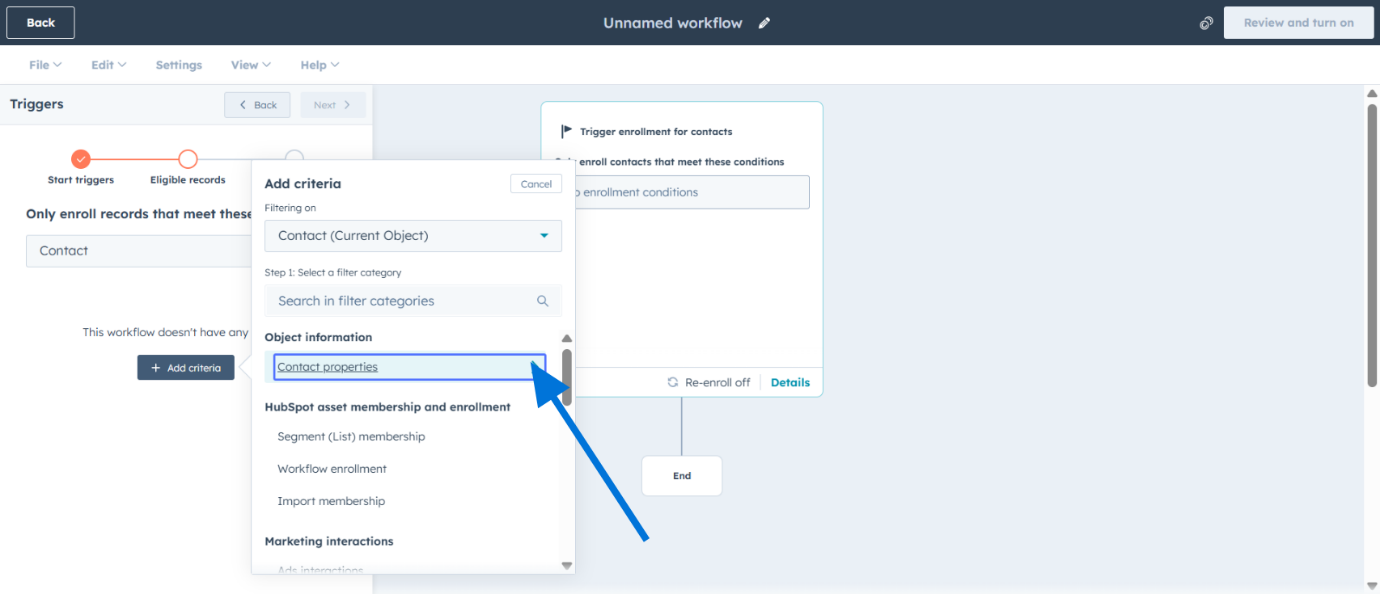
 Define enrollment filters by contact properties to determine who enters the workflow.
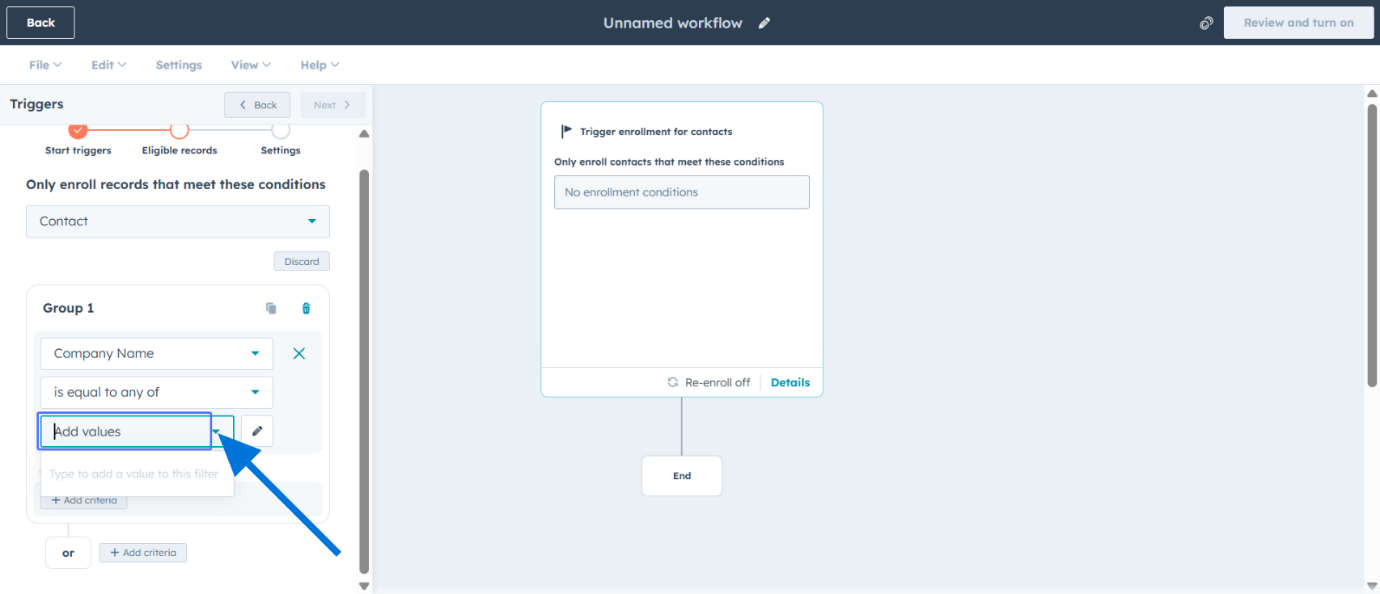
 Add the specific values for your filter criteria.
 Click to proceed to the workflow actions section.
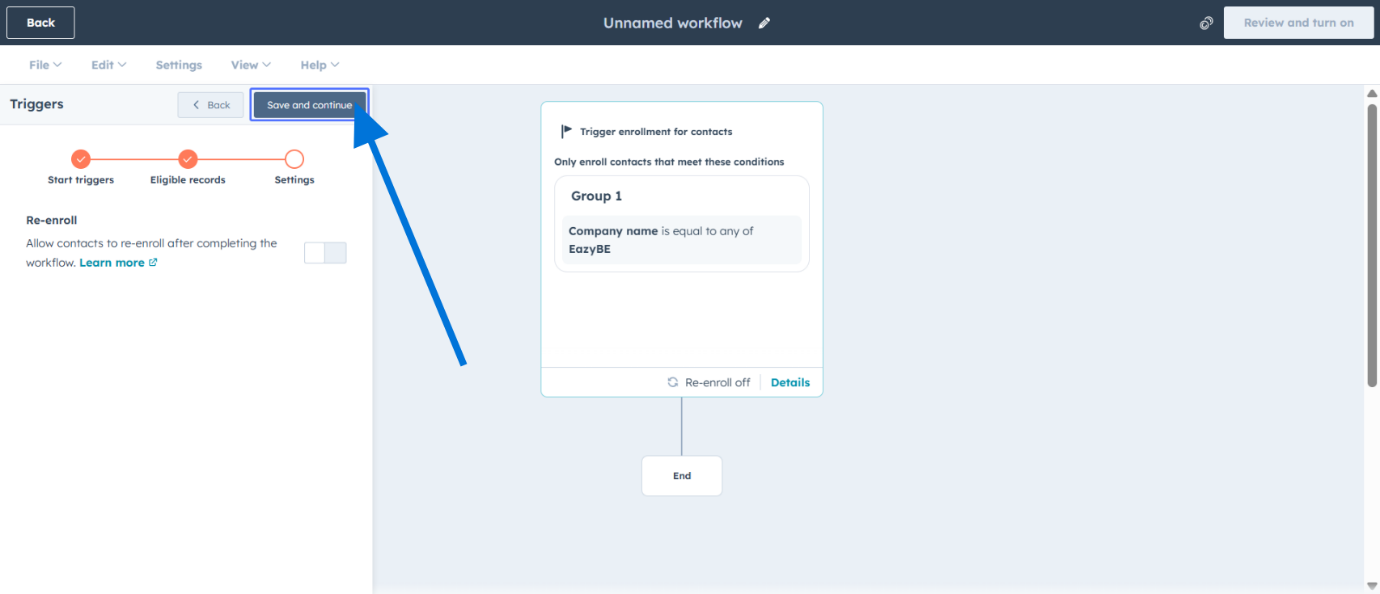
 Save the initial workflow setup configuration.
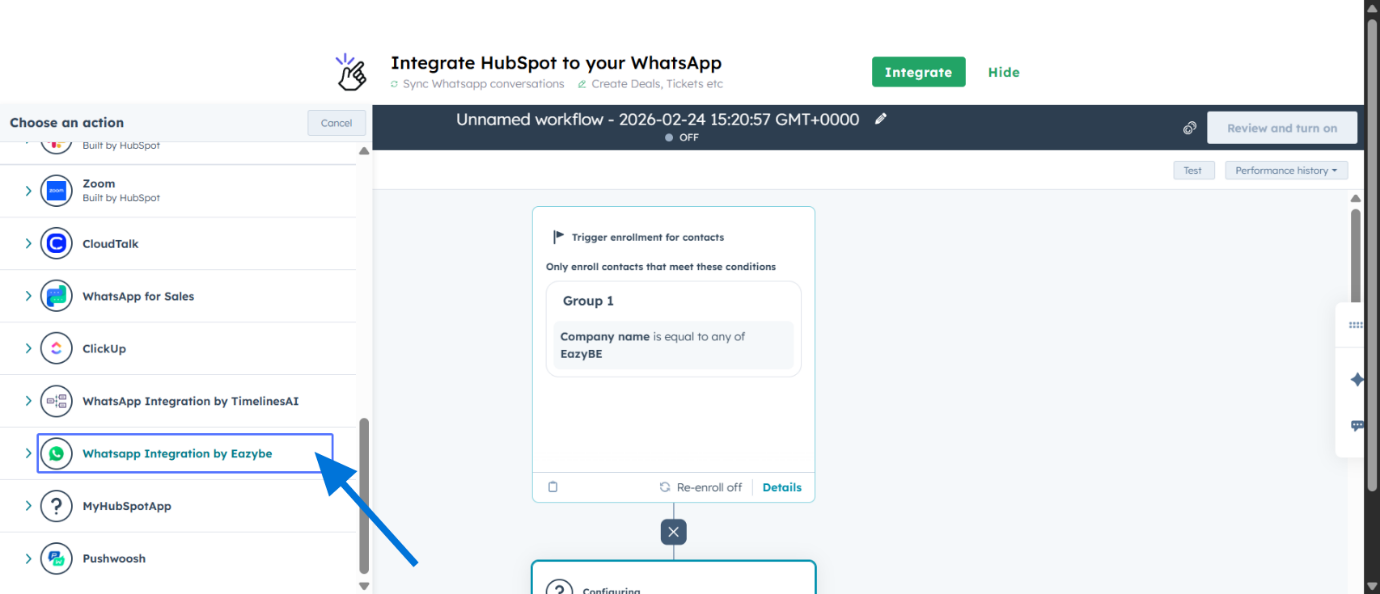
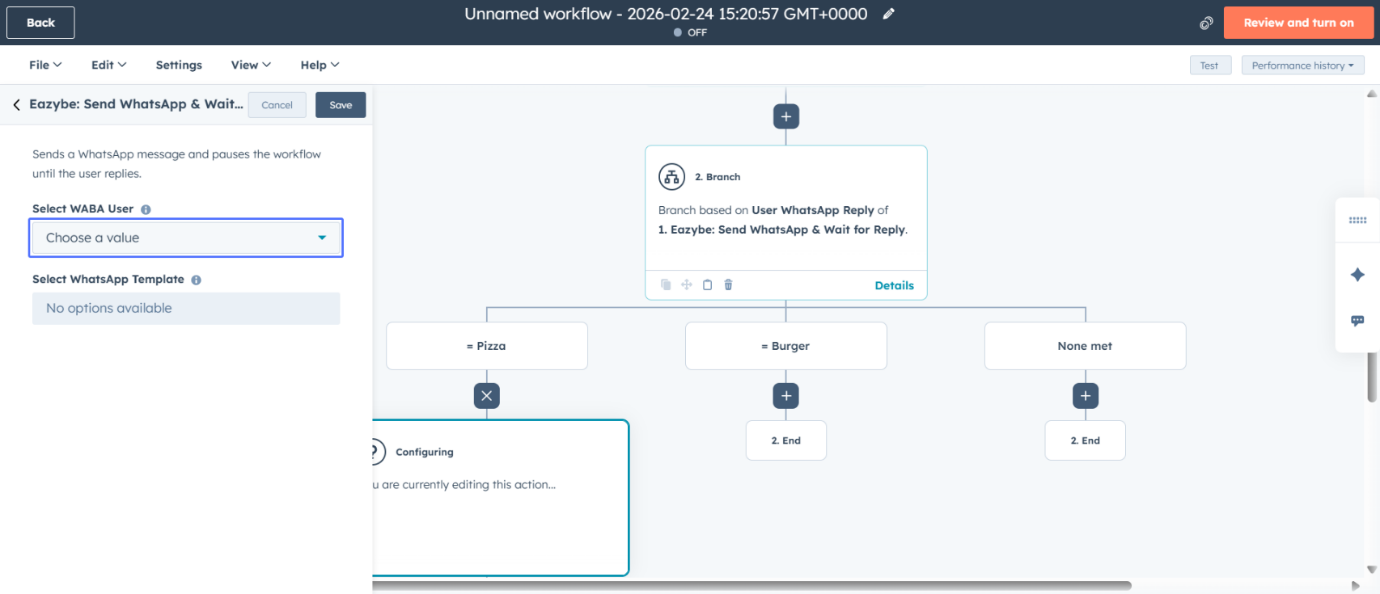
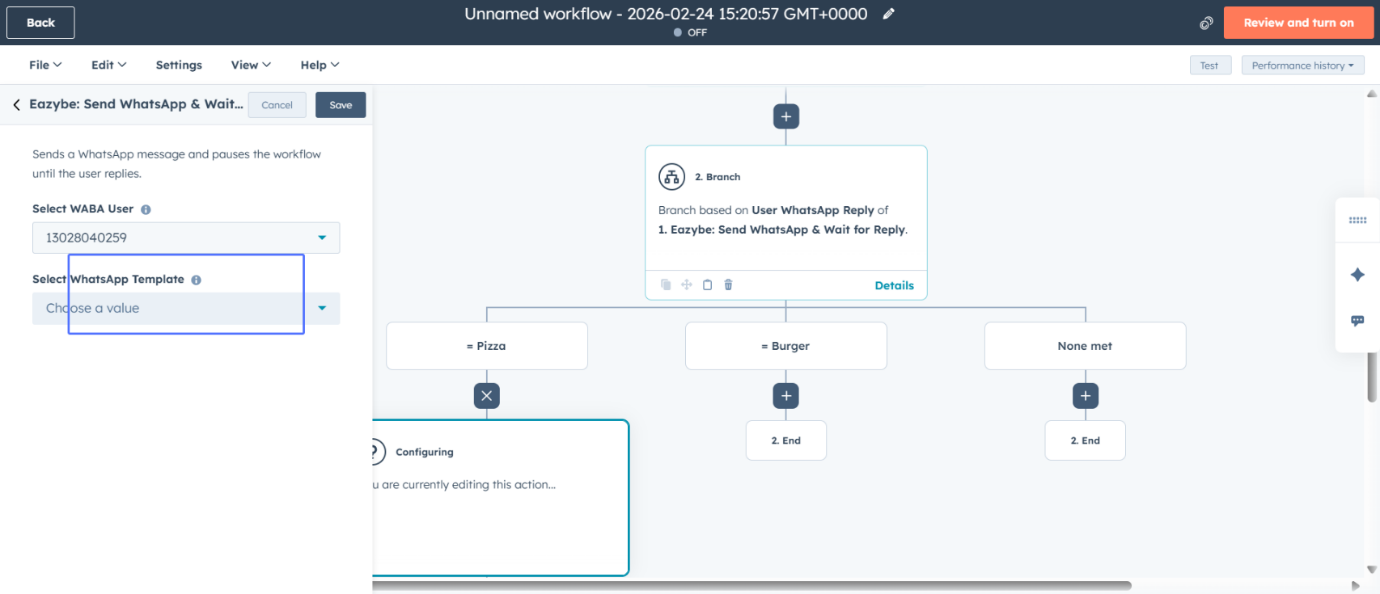
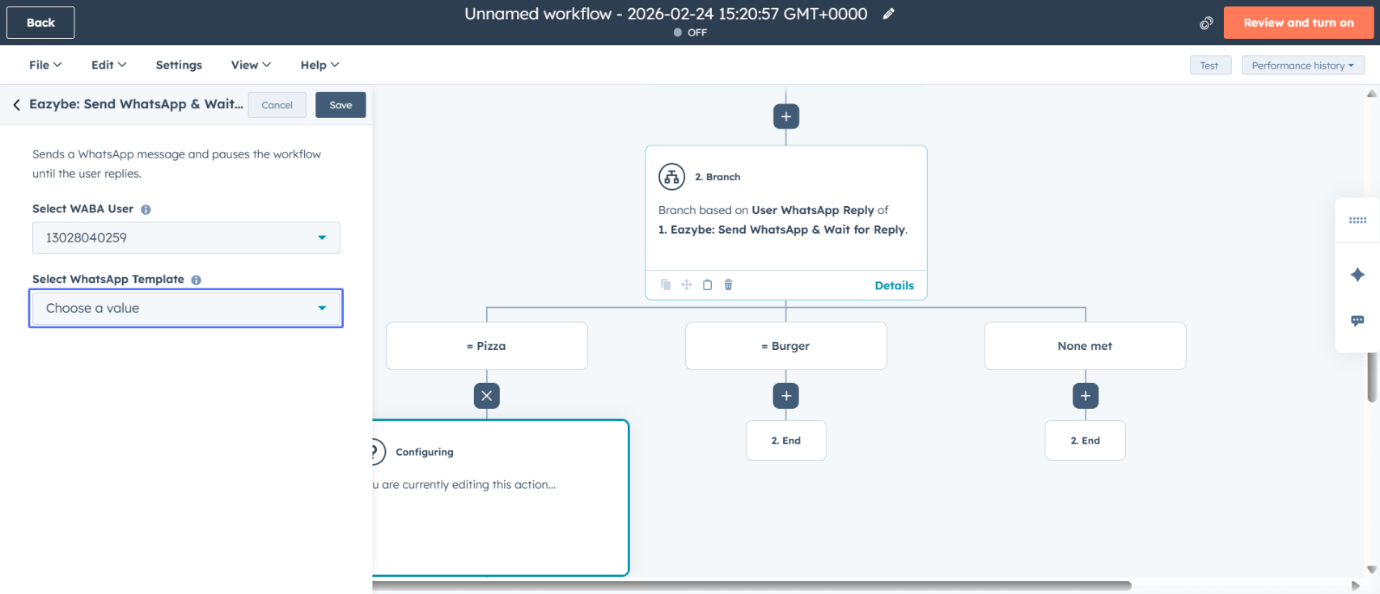
 ### Step 3: Deploy the "Listen" Action
Click to add a new WhatsApp integration action to your workflow.
### Step 3: Deploy the "Listen" Action
Click to add a new WhatsApp integration action to your workflow.
 Choose **Send WhatsApp & Wait for Reply** from the available actions.
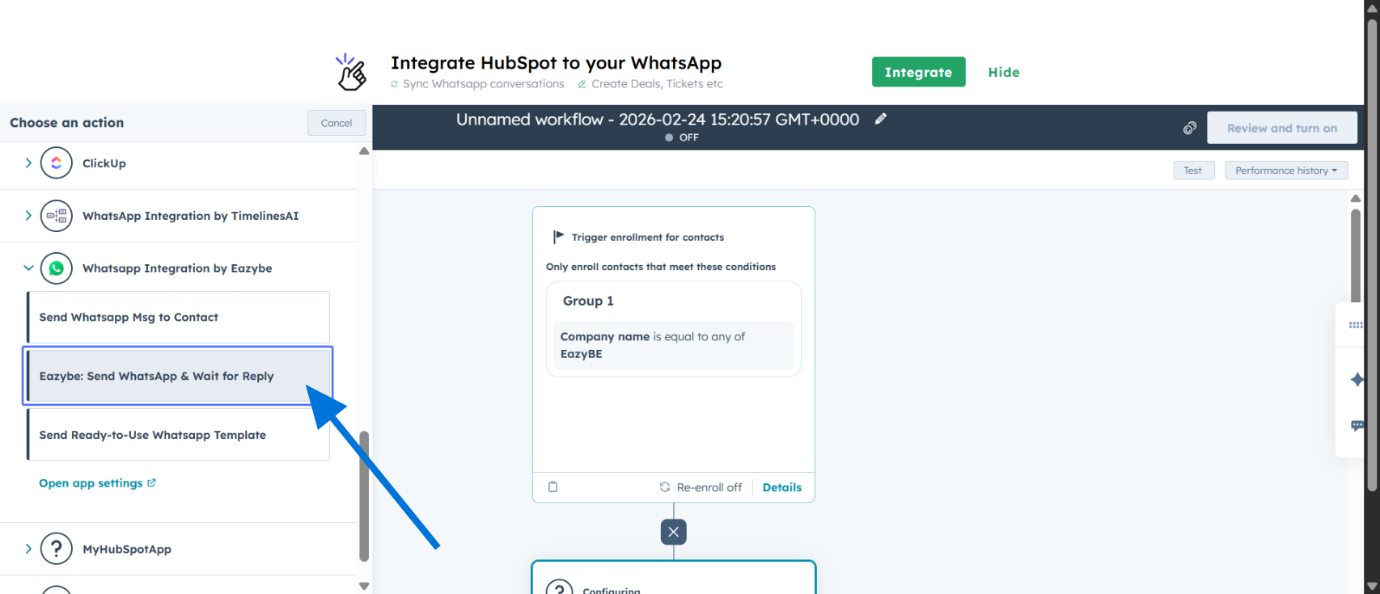 Select the sender phone number for this workflow.
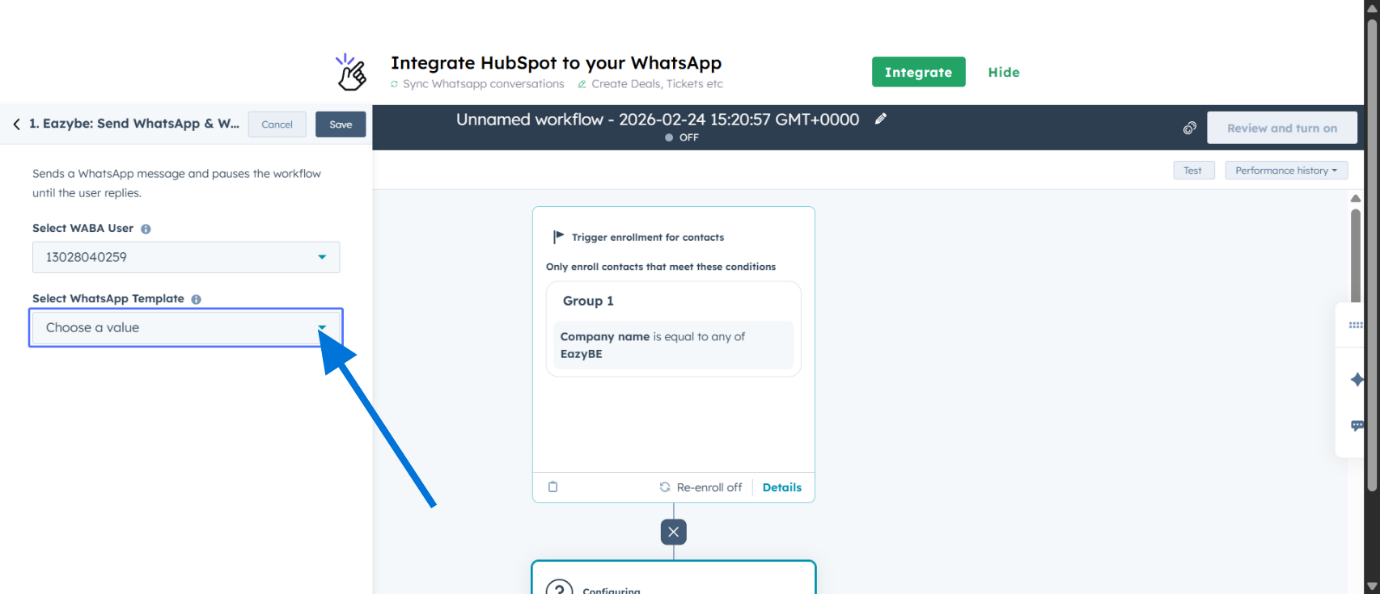
 Select the template you created in Step 1 with Quick Reply buttons.
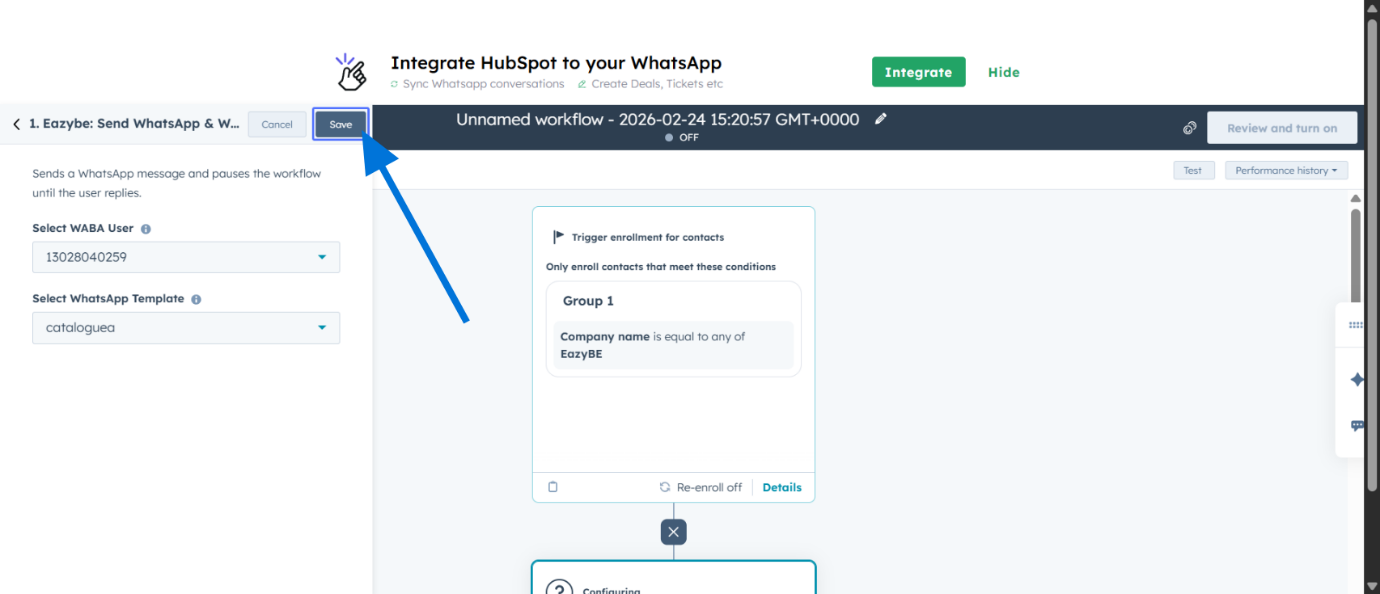
 This action pauses the workflow until the user clicks a button.
Click **Save** to save the WhatsApp send action.
This action pauses the workflow until the user clicks a button.
Click **Save** to save the WhatsApp send action.
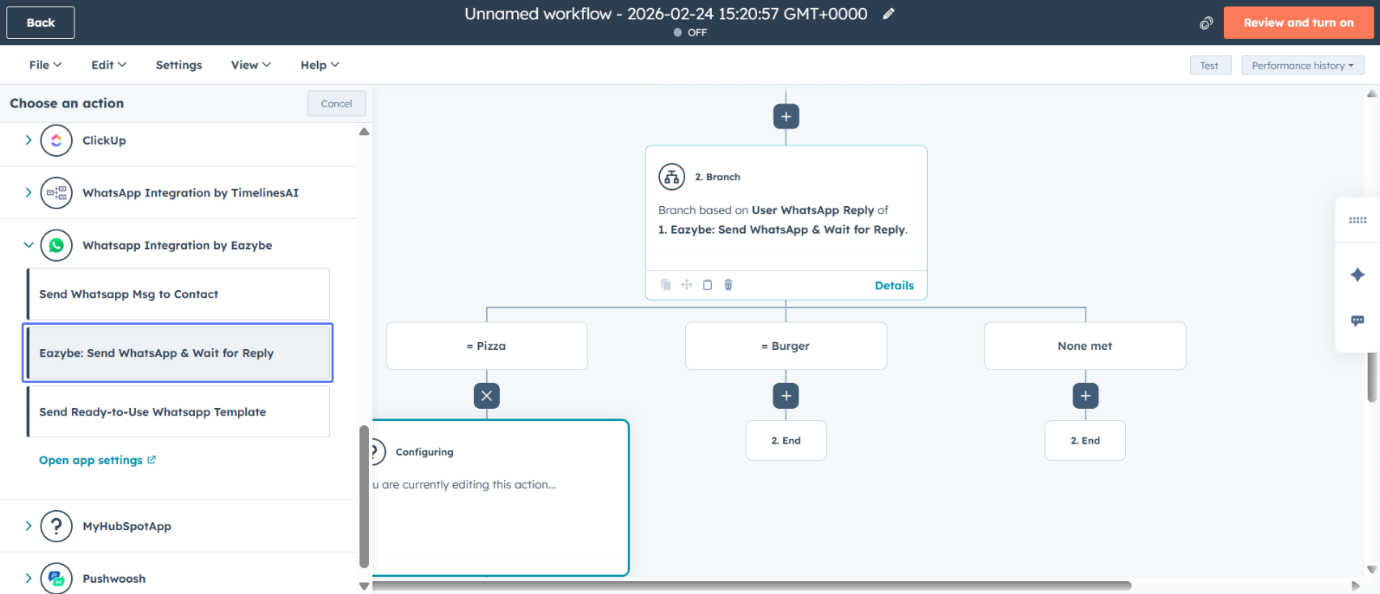
 ### Step 4: Configure Smart Branching
Add another workflow action to create branching logic.
### Step 4: Configure Smart Branching
Add another workflow action to create branching logic.
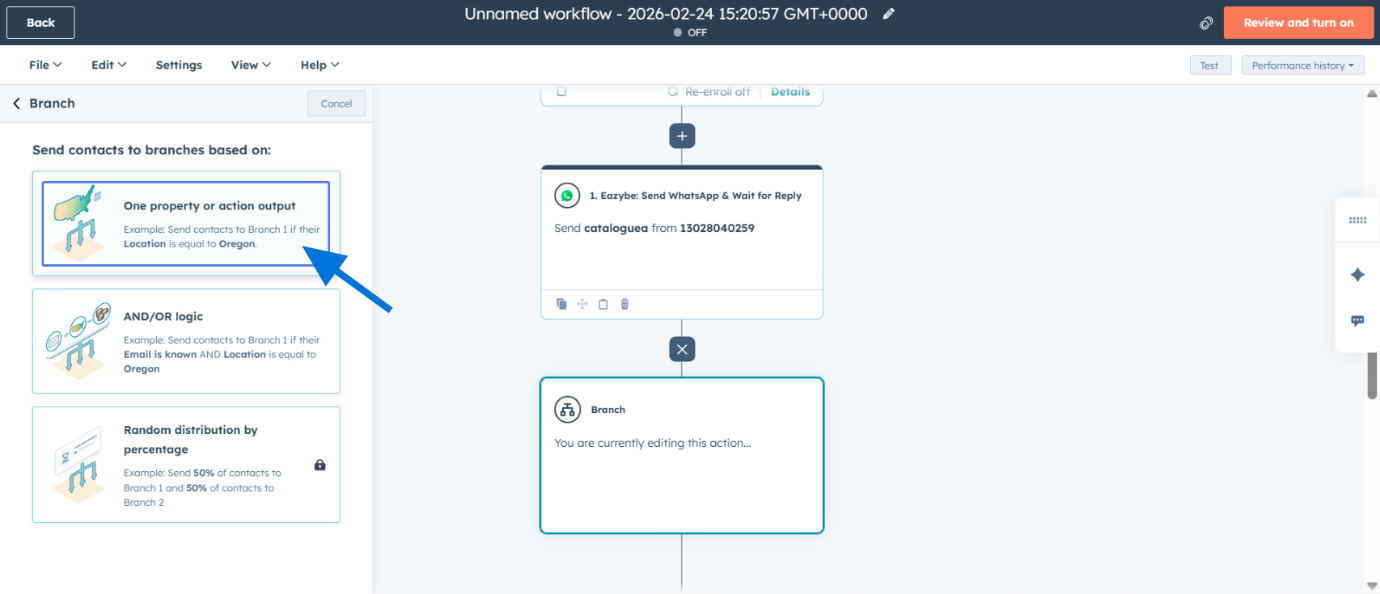
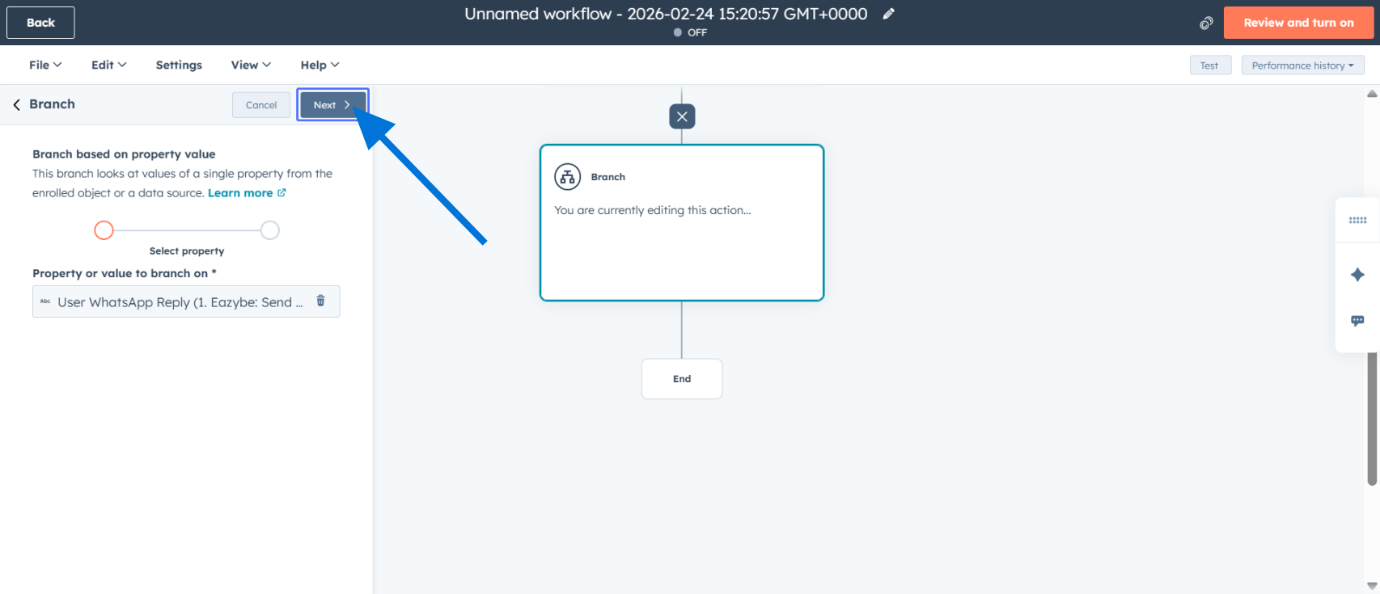
 Select the **Branch** action from the available options.
 Choose **One property or action output** for your branching logic.
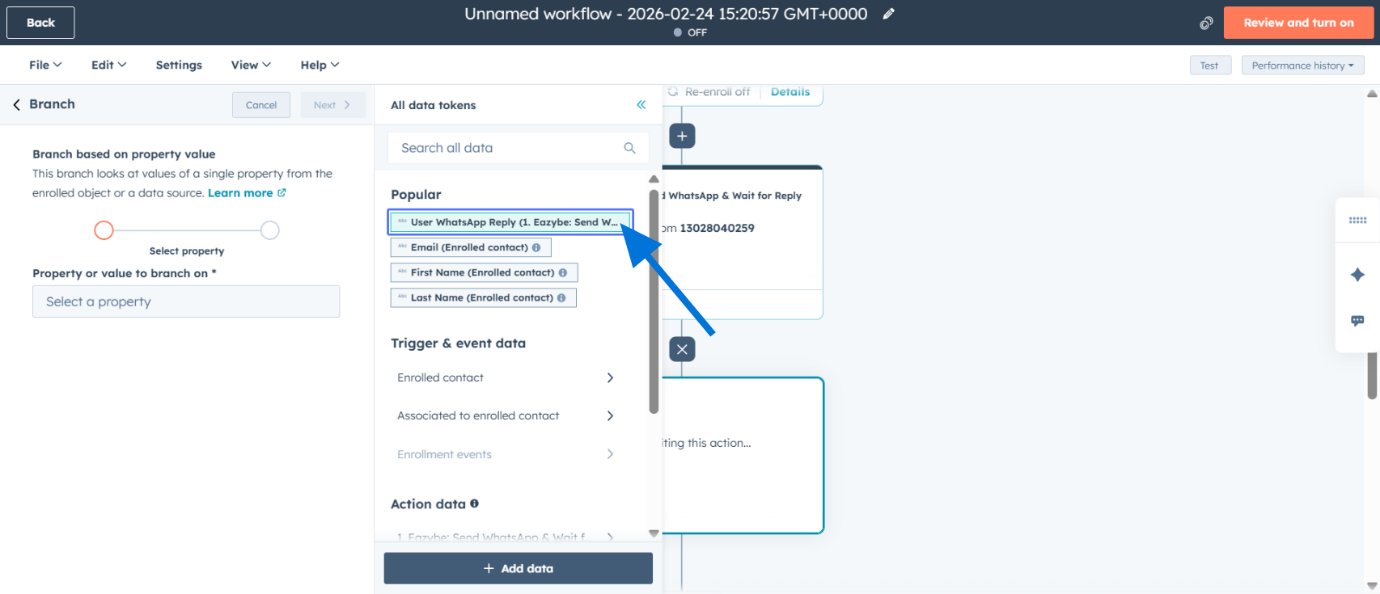
 Select the property that will determine the branch path.
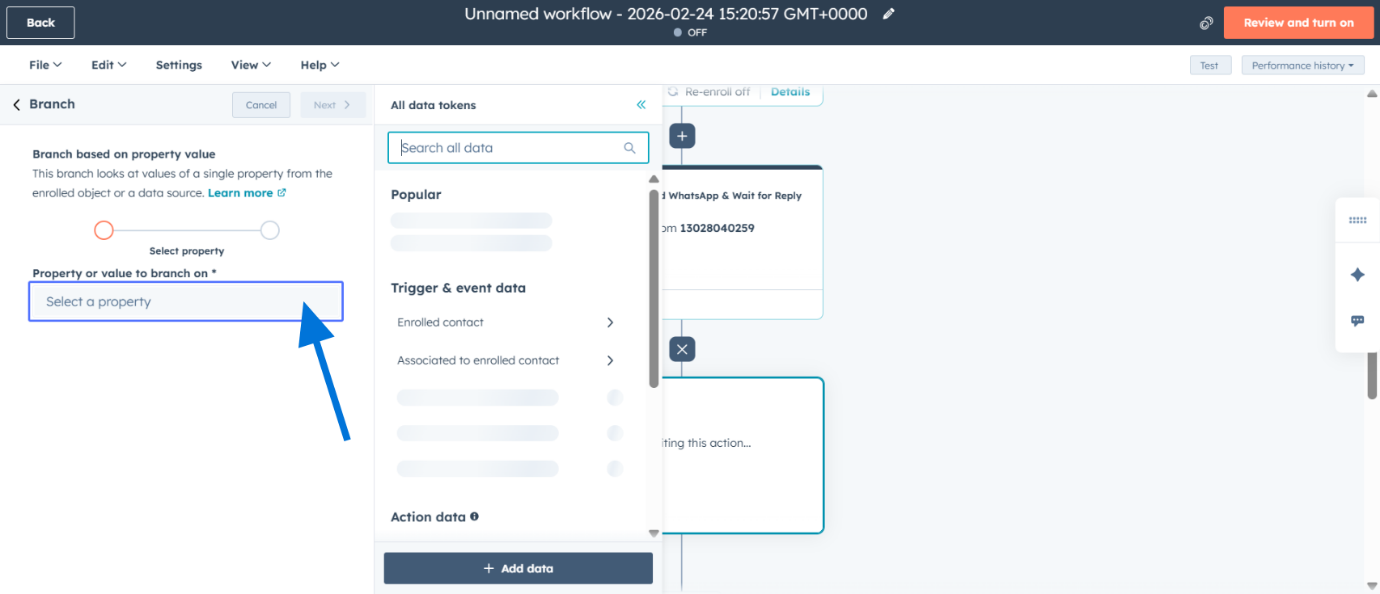 Use **User WhatsApp Reply** as the branching property.
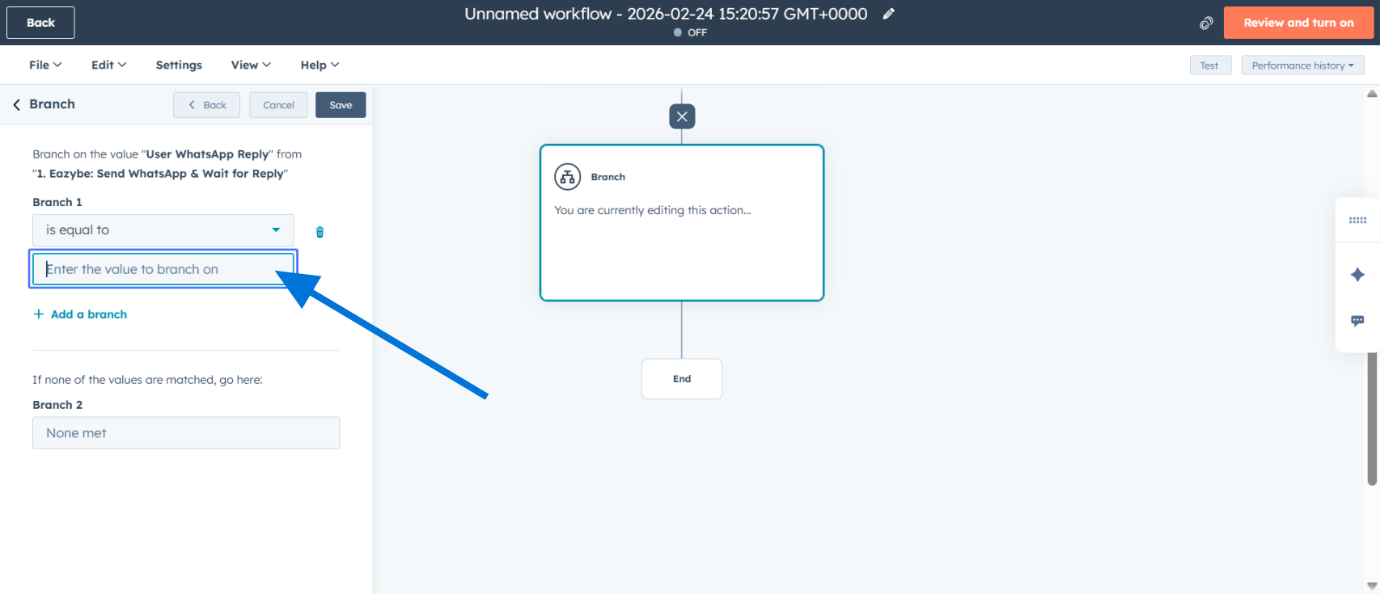
 Configure the conditions for each branch based on button replies.
 Enter the value for Branch 1 condition (must match the button text exactly).
 Click to add an additional branch for another button option.
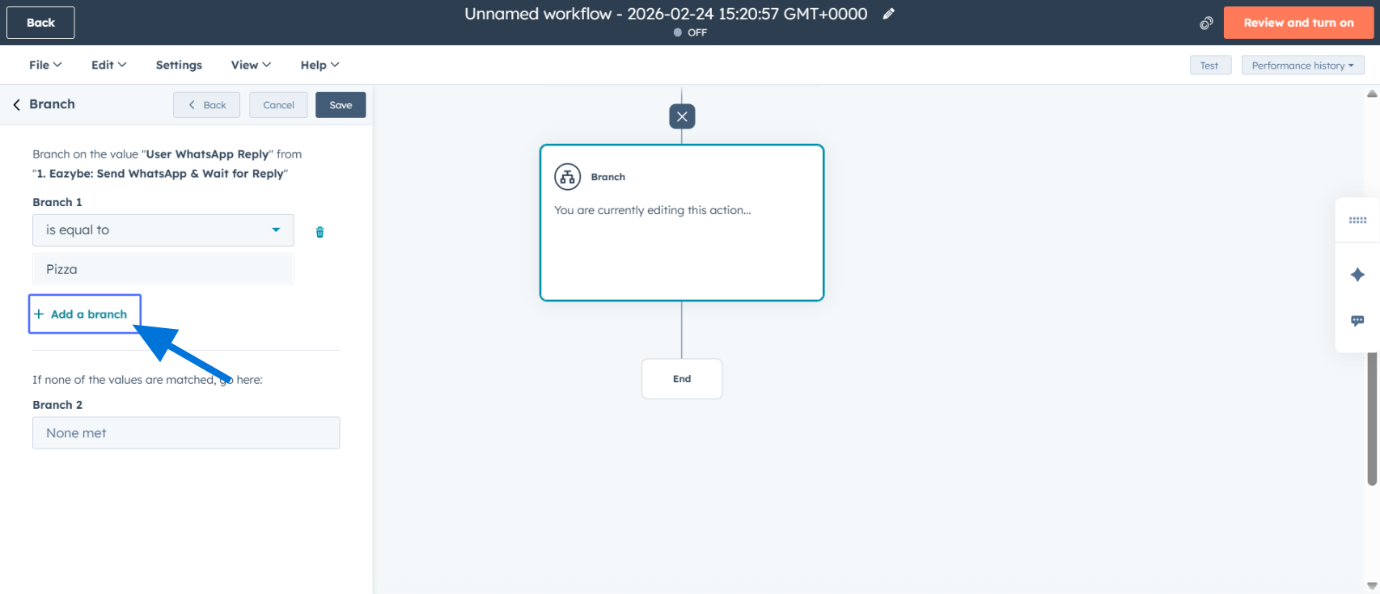 Enter the value for Branch 2 condition.
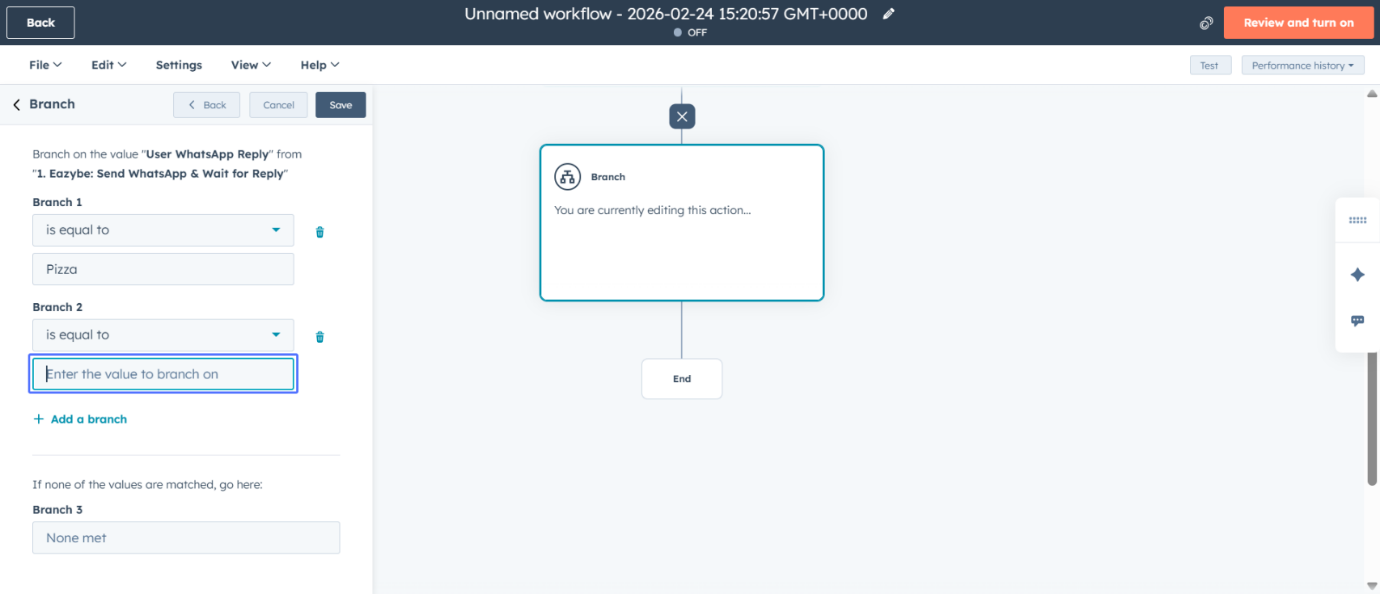 Save the conditional branch configuration.
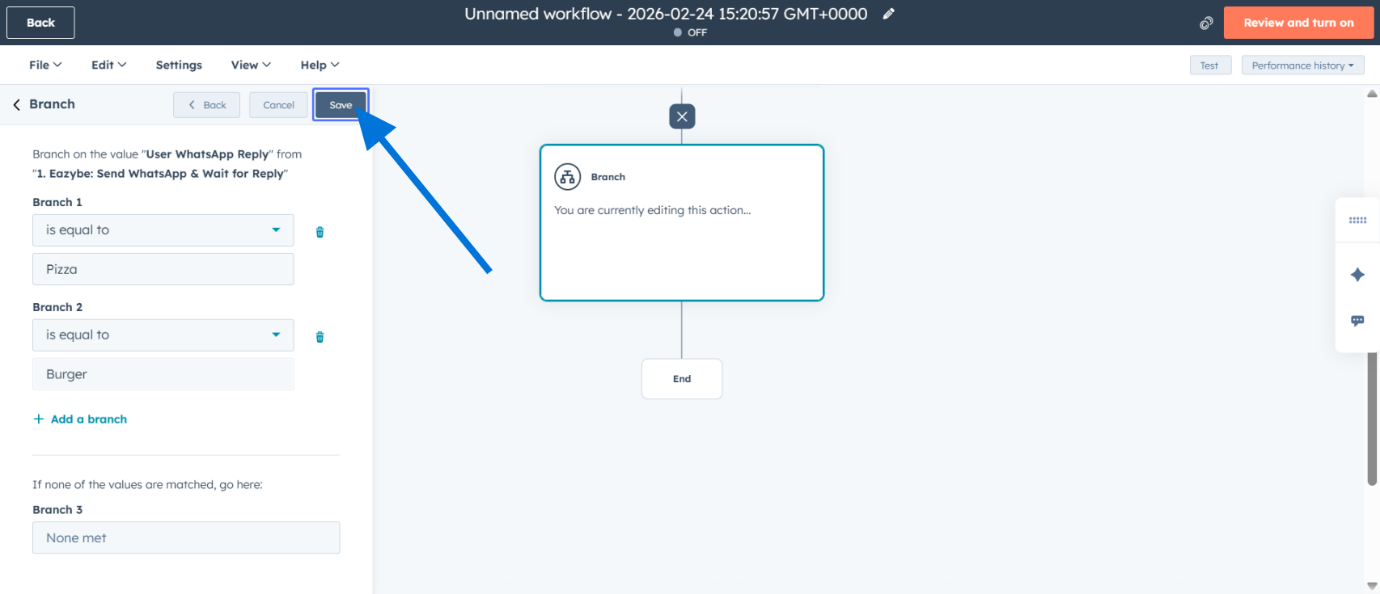 **Crucial**: Ensure the branch name/value matches the exact text on your Quick Reply button. Any mismatch will cause the workflow to fail.
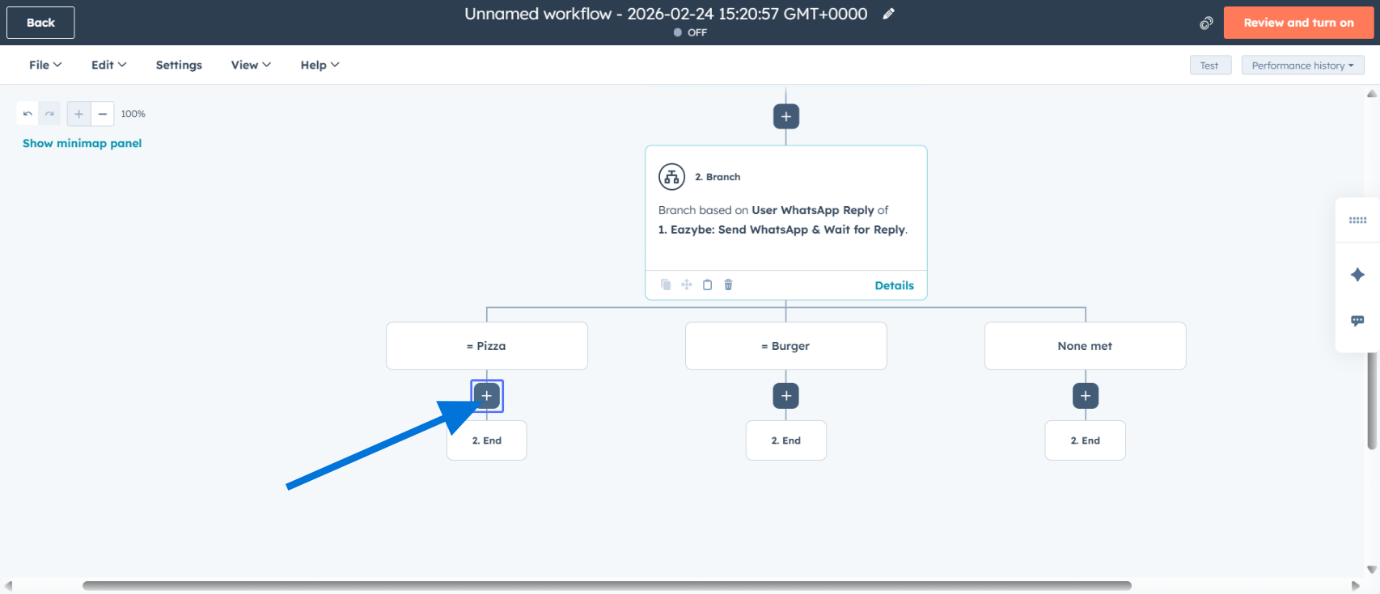
### Step 5: Build the Journey
Add an action within a branch to define what happens for that path.
**Crucial**: Ensure the branch name/value matches the exact text on your Quick Reply button. Any mismatch will cause the workflow to fail.
### Step 5: Build the Journey
Add an action within a branch to define what happens for that path.
 Add another WhatsApp integration action within the branch.
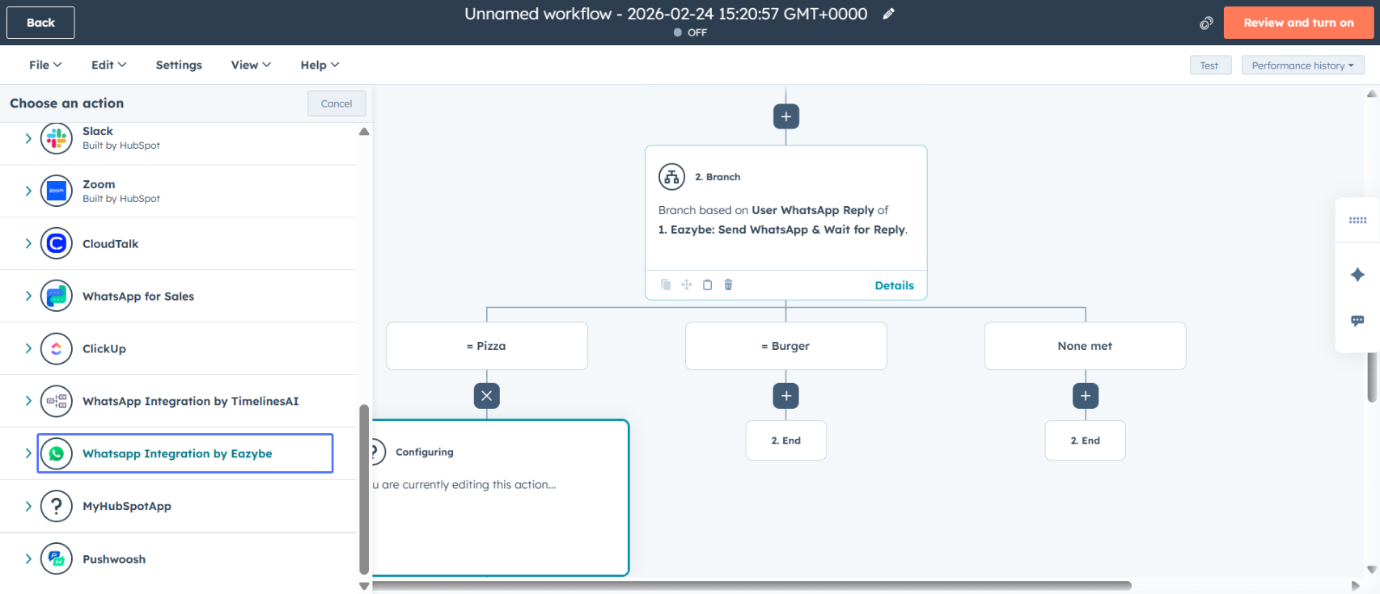 Choose **Send WhatsApp & Wait for Reply** within the branch.
 Select a value for the branch-specific WhatsApp message template.
 Choose the WhatsApp sender number for this branch.
 Select the WhatsApp template for this specific branch.
 Confirm your template selection (e.g., "catalogue2").
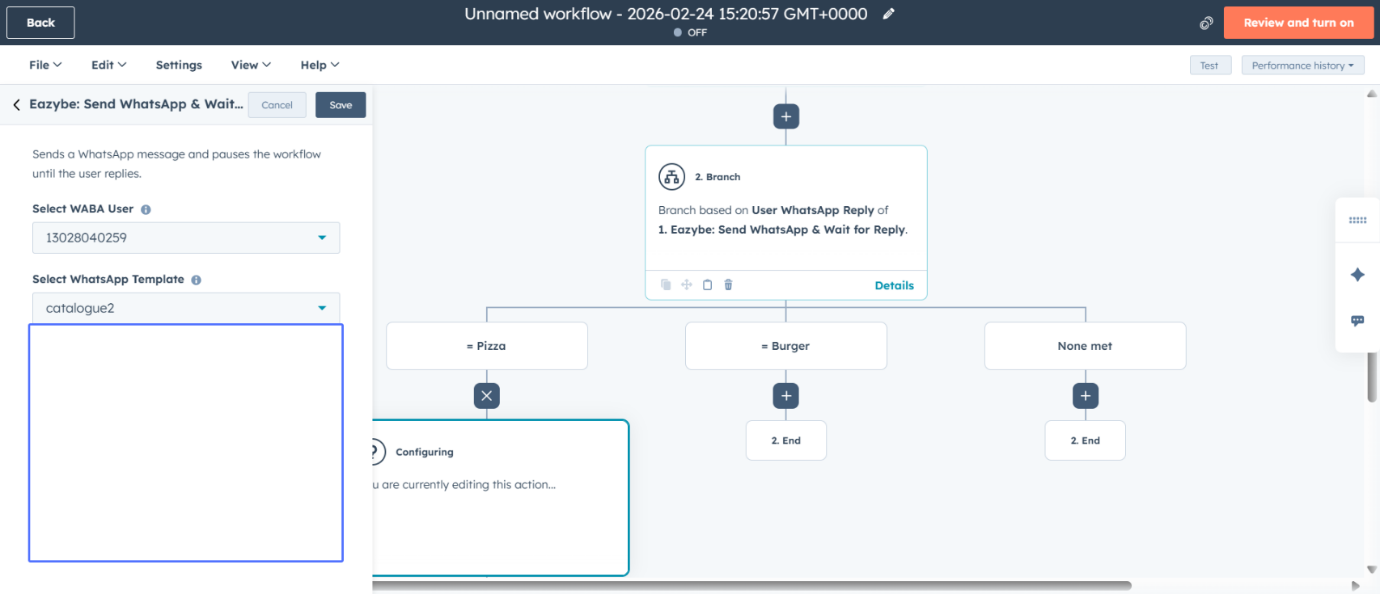 Save the branch-specific WhatsApp action.
 Review the complete workflow and activate it.
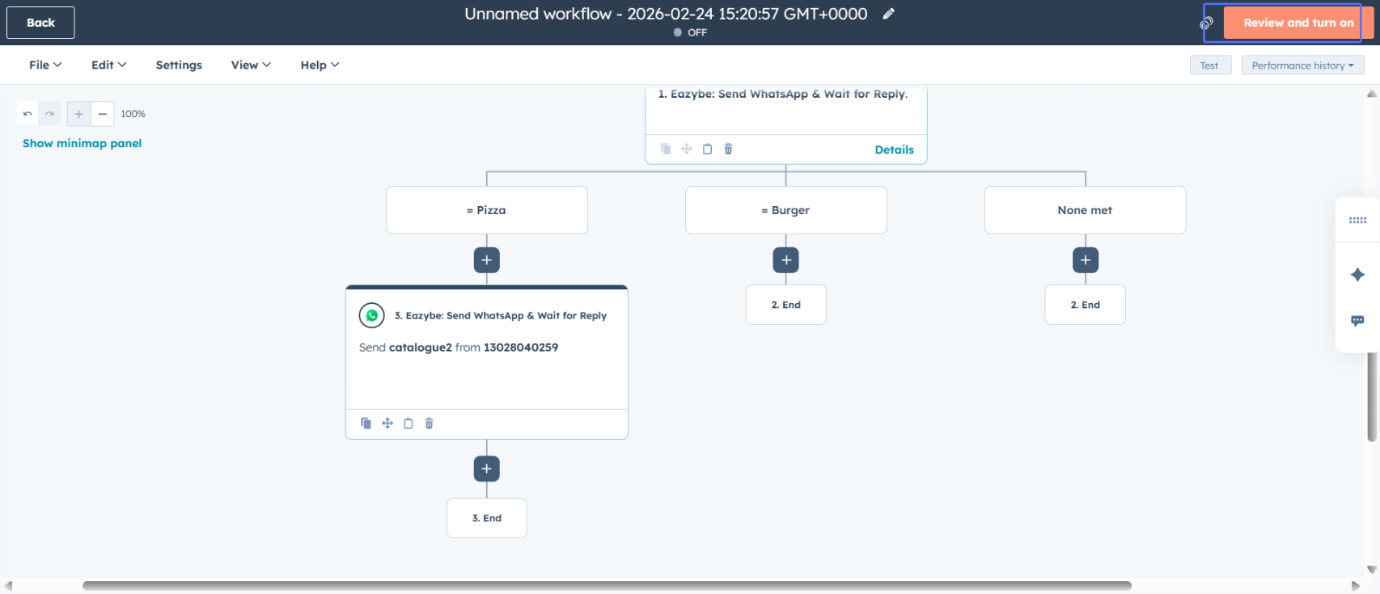 Under each branch, add the next step of your flow—whether it's sending another WhatsApp template, assigning a task to a sales agent, or updating a deal stage. Repeat the process to build deep, multi-step conversations. Then save the workflow and your response-based HubSpot chatbot is ready.
## Your Chatbot is Ready
**Pro Tip**: Test your chatbot thoroughly before deploying to production. Create a test contact and walk through each button path to ensure the branching logic works correctly.
## Related Resources
Learn how to create WhatsApp message templates with Quick Reply buttons
Complete guide to setting up HubSpot workflows
Common issues and solutions for workflow problems
Send bulk WhatsApp messages to multiple recipients
## Need Help?
If you have any questions or need further assistance, reach out to us at [support@eazybe.com](mailto:support@eazybe.com).
Under each branch, add the next step of your flow—whether it's sending another WhatsApp template, assigning a task to a sales agent, or updating a deal stage. Repeat the process to build deep, multi-step conversations. Then save the workflow and your response-based HubSpot chatbot is ready.
## Your Chatbot is Ready
**Pro Tip**: Test your chatbot thoroughly before deploying to production. Create a test contact and walk through each button path to ensure the branching logic works correctly.
## Related Resources
Learn how to create WhatsApp message templates with Quick Reply buttons
Complete guide to setting up HubSpot workflows
Common issues and solutions for workflow problems
Send bulk WhatsApp messages to multiple recipients
## Need Help?
If you have any questions or need further assistance, reach out to us at [support@eazybe.com](mailto:support@eazybe.com).