> ## Documentation Index
> Fetch the complete documentation index at: https://help.eazybe.com/llms.txt
> Use this file to discover all available pages before exploring further.
# Create Contact
> How to create a new Salesforce contact from WhatsApp using EazyBe
This guide explains how to create a new Salesforce Contact for individuals not yet present in your system using the EazyBe WhatsApp Extension.
## Creating a New Contact
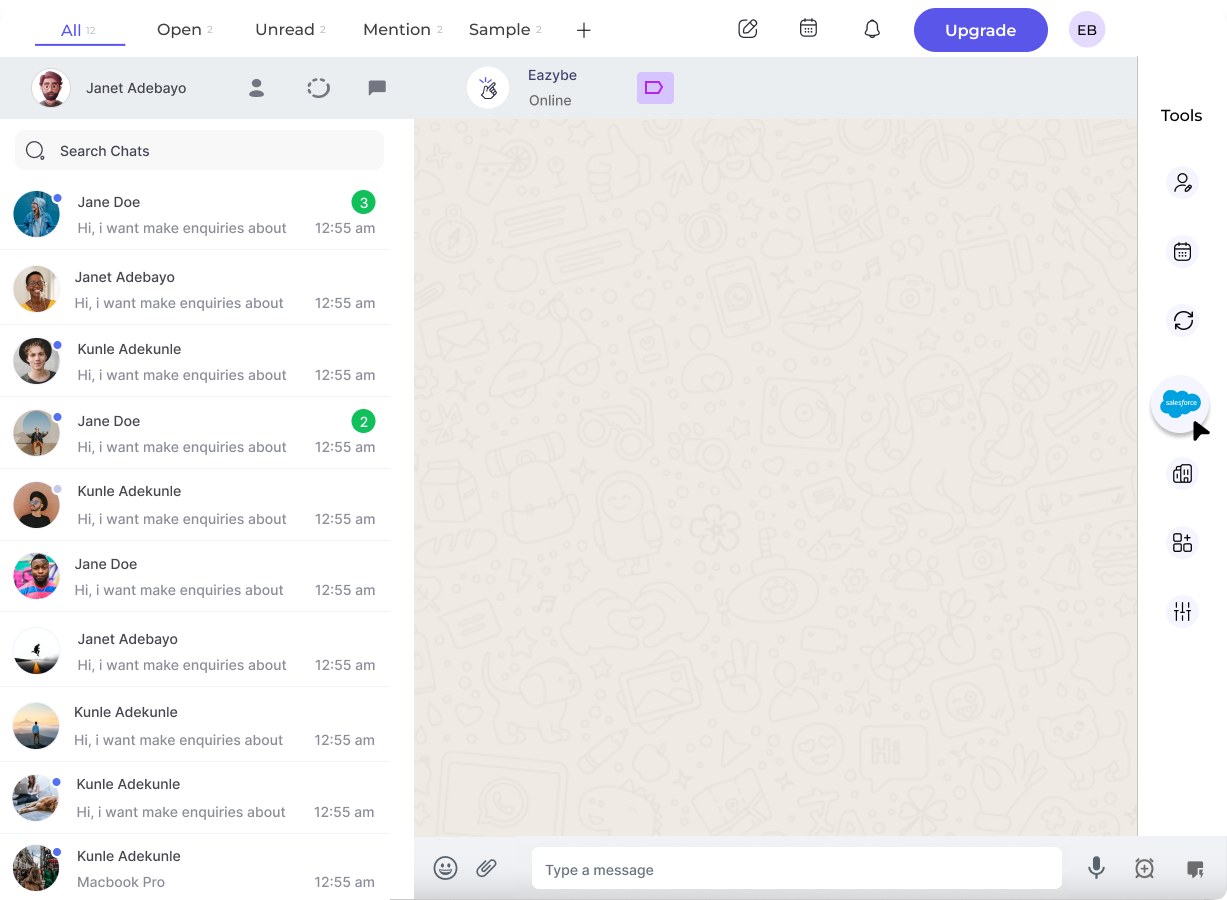
Launch the WhatsApp conversation with the contact you wish to add to Salesforce.
Select the Salesforce icon located in the extension's right sidebar.
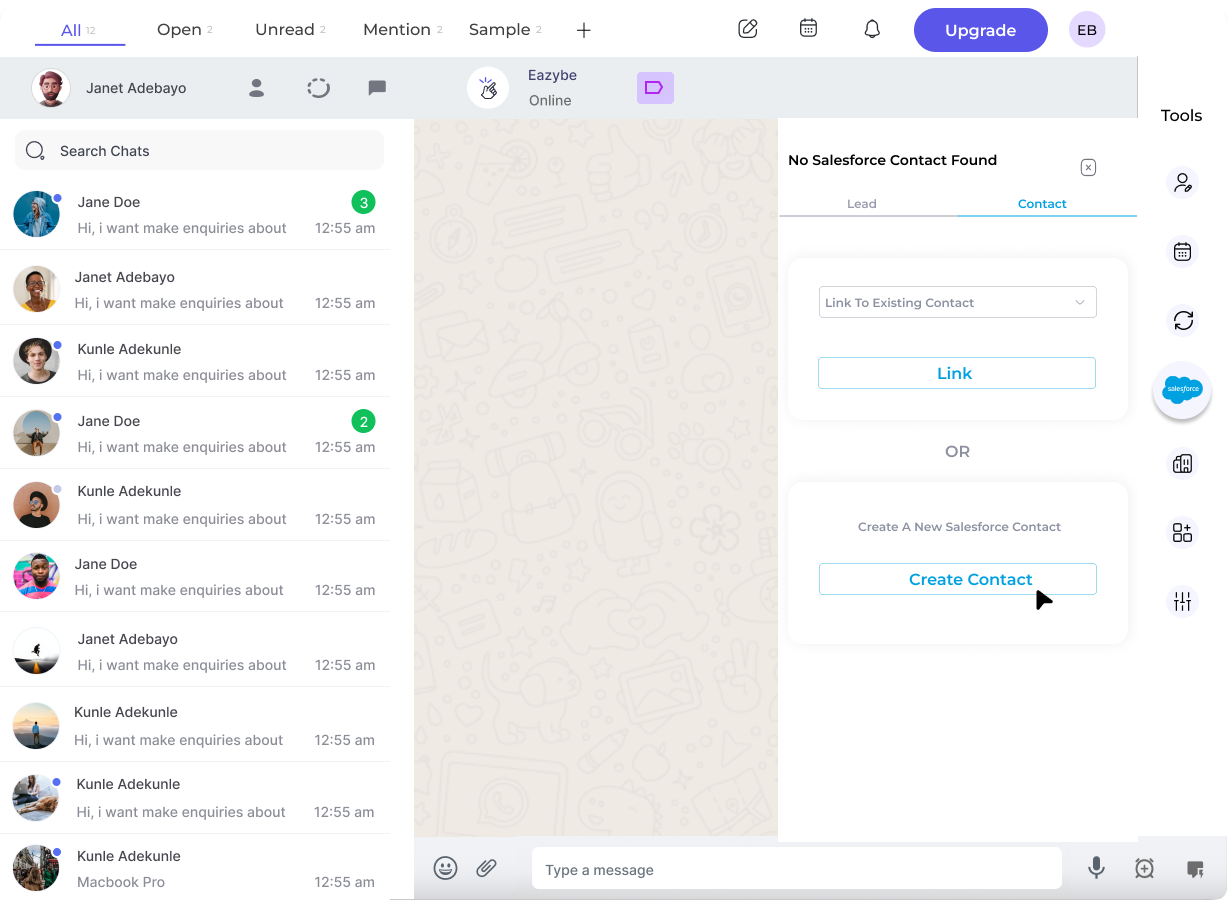
 Click the **Contact** header at the top of the Salesforce Mini-CRM View.
You have two options:
* **Link to existing contact** - If the contact already exists in Salesforce, choose "Link to existing Salesforce contact" and select from the dropdown
* **Create new contact** - For new contacts, click the **Create Contact** button
Click the **Contact** header at the top of the Salesforce Mini-CRM View.
You have two options:
* **Link to existing contact** - If the contact already exists in Salesforce, choose "Link to existing Salesforce contact" and select from the dropdown
* **Create new contact** - For new contacts, click the **Create Contact** button
 Complete all required fields for the new contact. You can customize which fields appear using the **Edit** button.
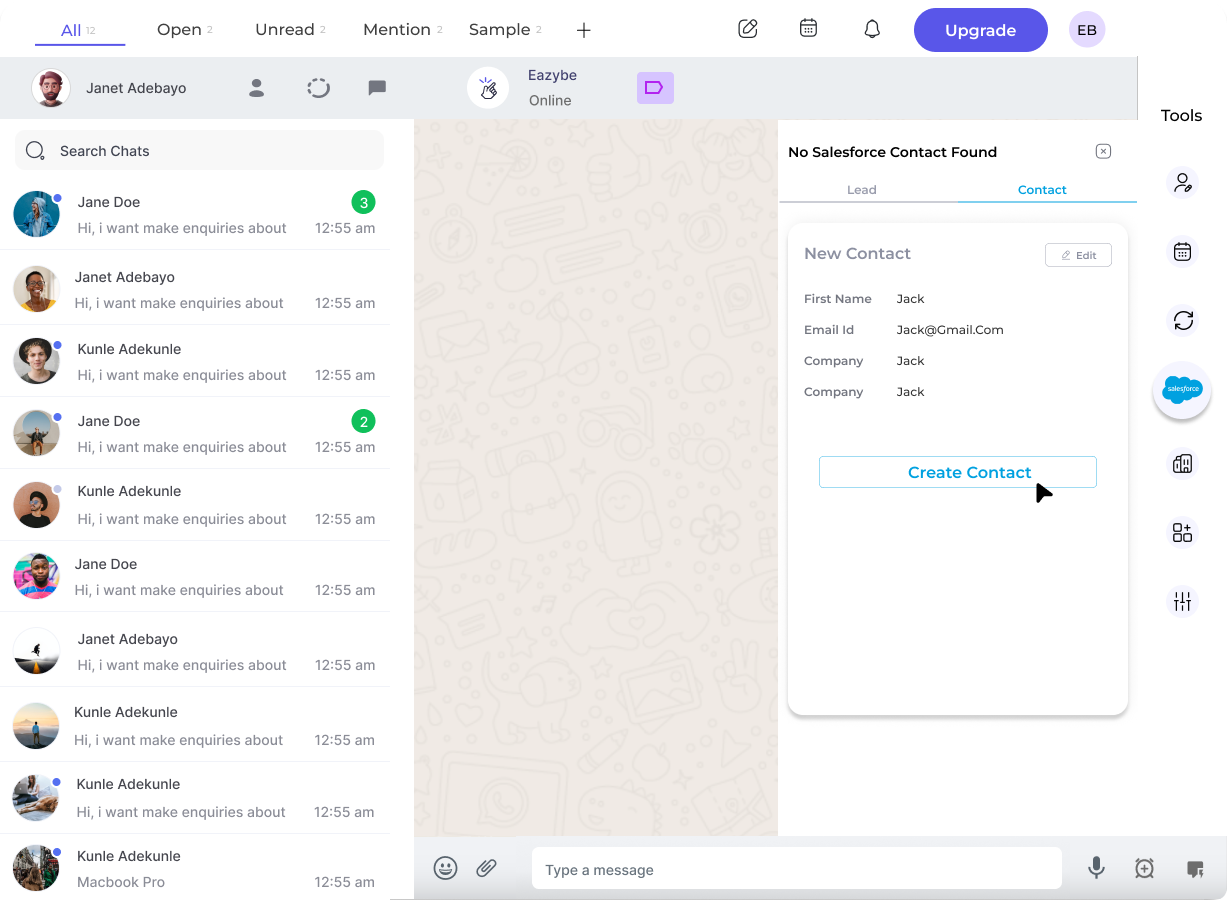 Click **Create Contact** to save the new record to Salesforce.
## Viewing the Contact
Once created, you can access the contact directly in Salesforce by clicking the **View Contact on Salesforce** button.
Click **Create Contact** to save the new record to Salesforce.
## Viewing the Contact
Once created, you can access the contact directly in Salesforce by clicking the **View Contact on Salesforce** button.
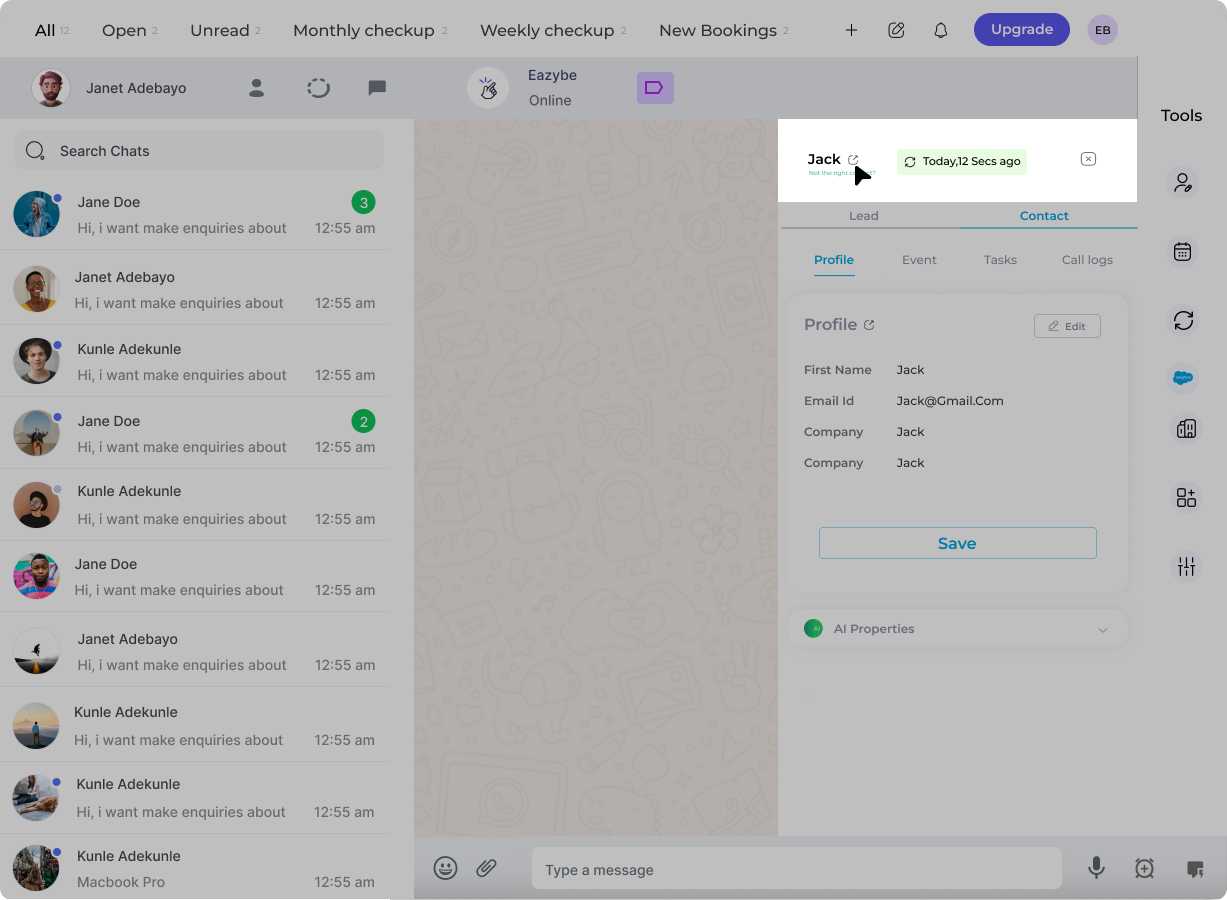 The new contact is synced directly to Salesforce when you create it. All contact information will be reflected in your Salesforce records.
## Need Help?
If you have any questions or need assistance, contact our support team at **[hey@eazybe.com](mailto:hey@eazybe.com)**.
The new contact is synced directly to Salesforce when you create it. All contact information will be reflected in your Salesforce records.
## Need Help?
If you have any questions or need assistance, contact our support team at **[hey@eazybe.com](mailto:hey@eazybe.com)**.