> ## Documentation Index
> Fetch the complete documentation index at: https://help.eazybe.com/llms.txt
> Use this file to discover all available pages before exploring further.
# Create Workflow
> Learn how to use HubSpot workflows to send automated WhatsApp messages with Eazybe integration
## Overview
HubSpot workflows allow you to automate WhatsApp messaging based on triggers like lifecycle stage changes, deal updates, or custom events. This guide walks you through setting up automated WhatsApp messages using the Eazybe integration.
***
## Setting Up Your Workflow
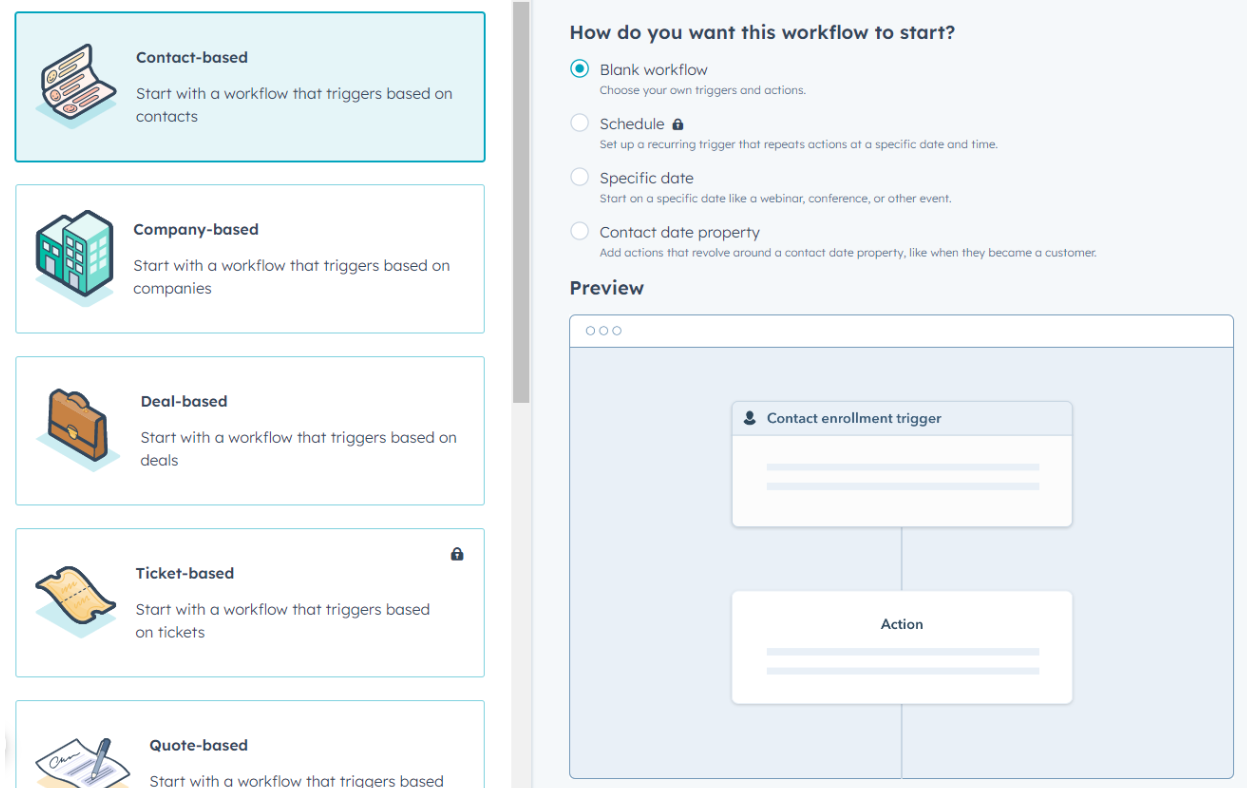
Navigate to the **Automation** tab in HubSpot and select **Workflows** from the dropdown menu. Click **Create workflow** and choose **From scratch**.
Select the workflow type based on your needs:
* **Contact-based** — Trigger based on contact properties
* **Deal-based** — Trigger based on deal stage changes
* **Company-based** — Trigger based on company properties
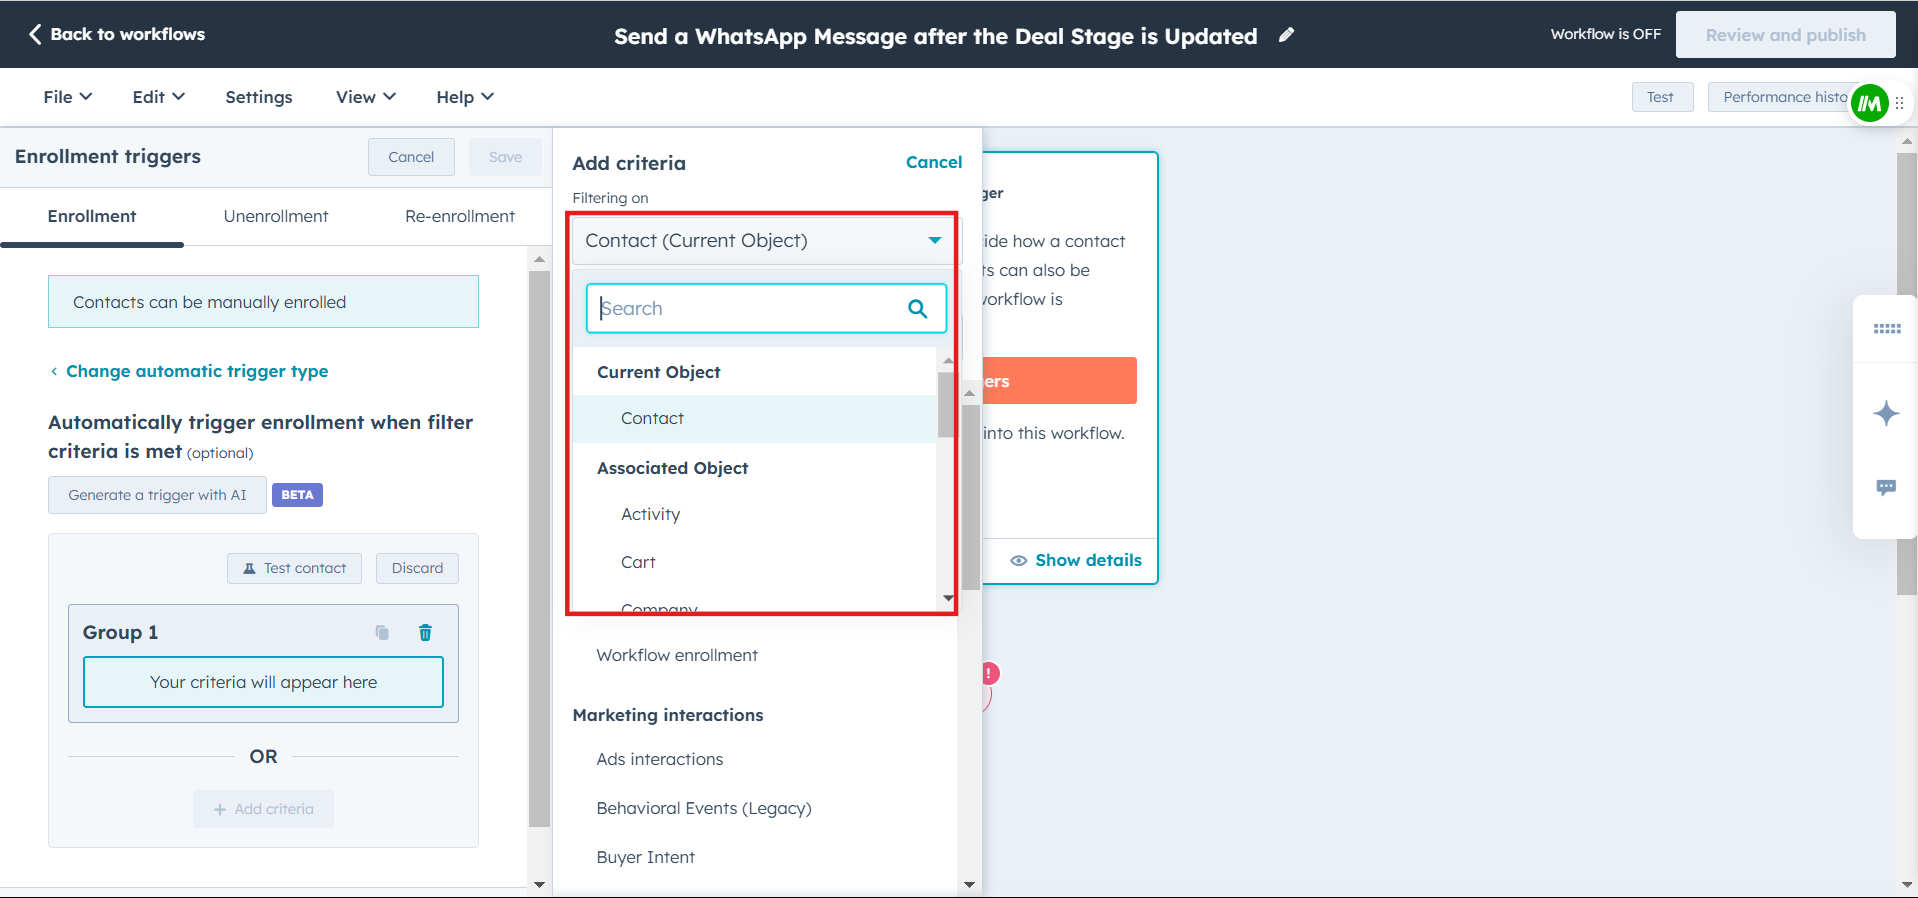
Give your workflow a descriptive name, then click **Set up triggers** to define the conditions that will initiate the workflow.
Choose from available trigger options:
* **Contact properties** — Trigger when a contact reaches a specific lifecycle stage
* **Deal properties** — Trigger on deal stage changes
* **Custom triggers** — Define your own conditions
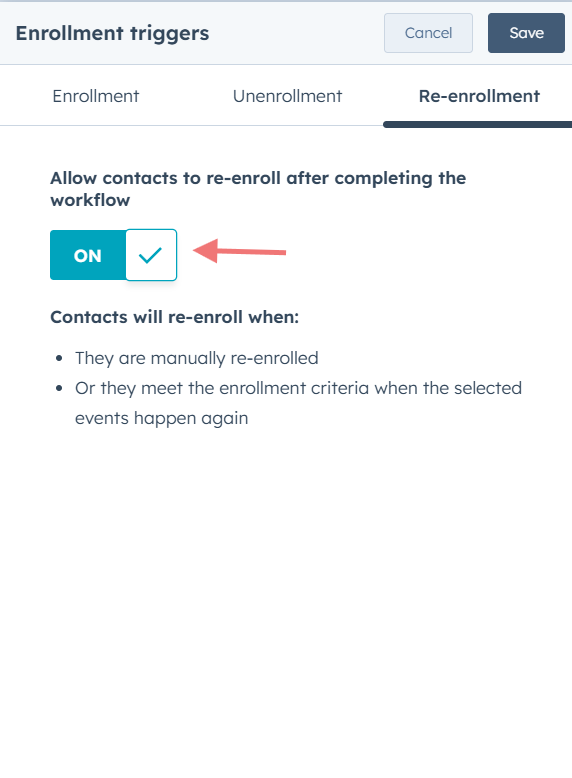
Make sure to enable **Re-enrollment** if you want the workflow to trigger multiple times for the same contact when they meet the conditions again.
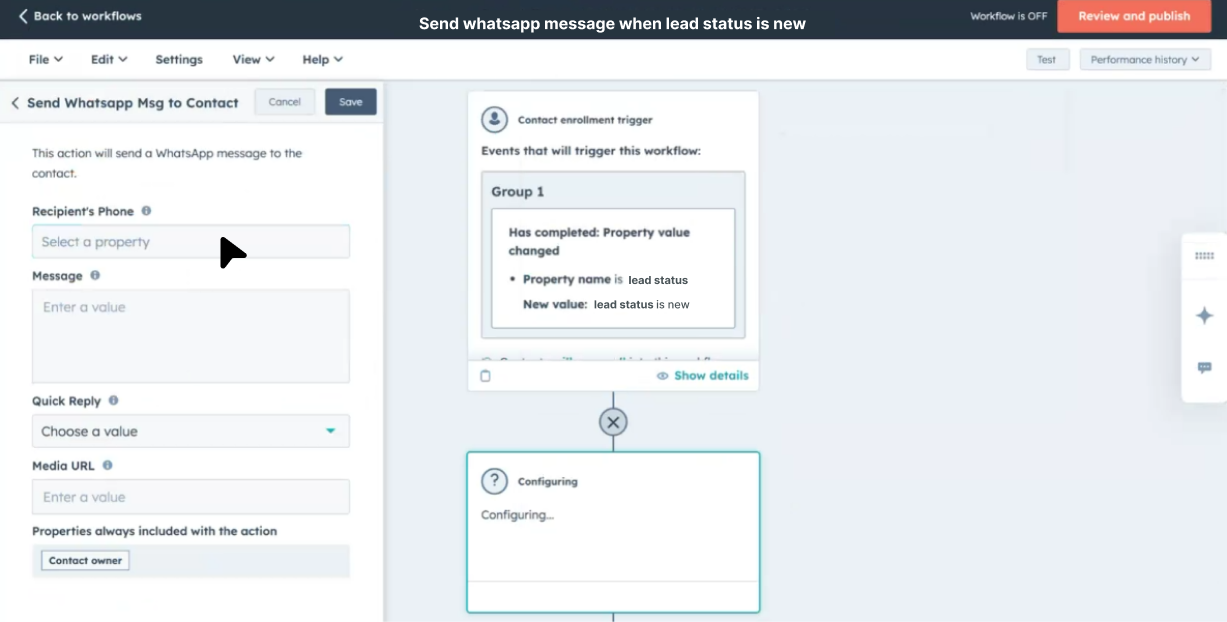
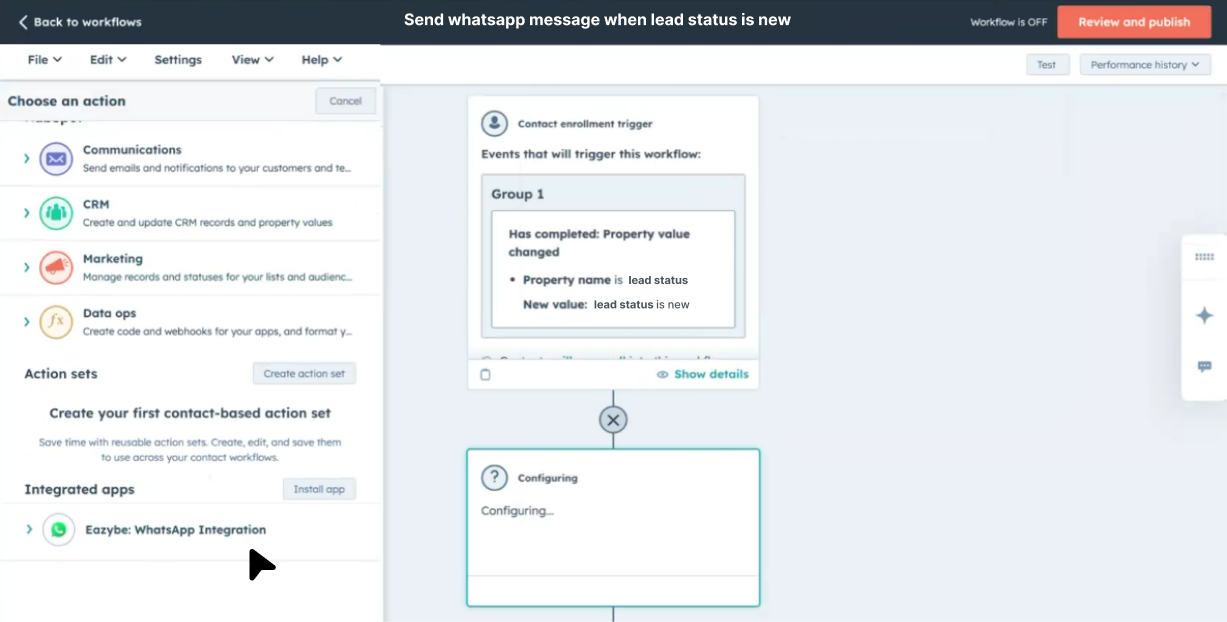
Click the **+** icon below your trigger to add an action. Scroll down through the available actions and select **Send WhatsApp message** under the **Eazybe** integration section.
Set up your WhatsApp message with the following options:
| Field | Description |
| -------------------------- | --------------------------------------------------------------- |
| **Recipient Phone** | Select the contact phone number field from HubSpot |
| **Message** | Customize your message using contact tokens for personalization |
| **Media URL** *(Optional)* | Add a URL to share documents, images, or files |
Use personalization tokens like `{{contact.firstname}}` to make your messages more engaging and relevant to each recipient.
Preview your workflow to ensure all steps are configured correctly. When ready, click **Review and publish** to make your workflow live.
***
## Best Practices
Always test your workflow with a sample contact before activating it for your entire database.
Define specific trigger conditions to avoid sending messages to unintended recipients.
Leverage HubSpot tokens to create personalized WhatsApp messages that resonate with your contacts.
Regularly review workflow analytics to optimize your messaging strategy.
***
## Key Benefits
This setup allows you to schedule automated WhatsApp messages at the perfect time, ensuring consistent engagement with your leads and customers. Benefits include:
* **Timely Follow-ups** — Automatically reach out when contacts hit key milestones
* **Consistent Communication** — Never miss an opportunity to engage
* **Personalized Outreach** — Tailor messages based on contact data
* **Scalable Automation** — Handle high volumes without manual effort
***
## Need Help?
If you have questions or need assistance setting up your workflows, reach out to us at **[hey@eazybe.com](mailto:hey@eazybe.com)**.
 | Field | Description |
| -------------------------- | --------------------------------------------------------------- |
| **Recipient Phone** | Select the contact phone number field from HubSpot |
| **Message** | Customize your message using contact tokens for personalization |
| **Media URL** *(Optional)* | Add a URL to share documents, images, or files |
| Field | Description |
| -------------------------- | --------------------------------------------------------------- |
| **Recipient Phone** | Select the contact phone number field from HubSpot |
| **Message** | Customize your message using contact tokens for personalization |
| **Media URL** *(Optional)* | Add a URL to share documents, images, or files |