> ## Documentation Index
> Fetch the complete documentation index at: https://help.eazybe.com/llms.txt
> Use this file to discover all available pages before exploring further.
# AI Properties
> Understand the properties BEA Radar creates on its own, customise existing properties and options, add your own fields, and configure everything from Team Inbox settings.
## Auto-Created Company Properties
The standout capability: **the AI creates the properties your business needs, on its own.**
It studies your conversations, works out what your team actually tracks, and **generates those custom fields automatically** — then keeps them filled on every chat.
* A **real estate** team gets fields like *Property Type* and *Budget*.
* A **SaaS** team gets *Plan Interest* and *Seat Count*.
* A **travel** team gets *Destination* and *Travel Dates*.
You don't configure anything. It learns your business from your chats.
## Custom Properties
When you want a specific field, admins can add it in a few clicks from **Team Inbox → Settings**:
1. Click **+ Add Property**
2. Choose the type — **Text/Number** or **Dropdown**
3. Write a short **description** of what to capture (this is how the AI understands it)
From then on, the AI fills that property in on every relevant chat, going forward.
Renaming, adding, and deleting properties and options is available to the **Admin** role only. Employees can change a property's **value**, but not the property itself.
## Customising an Existing Property
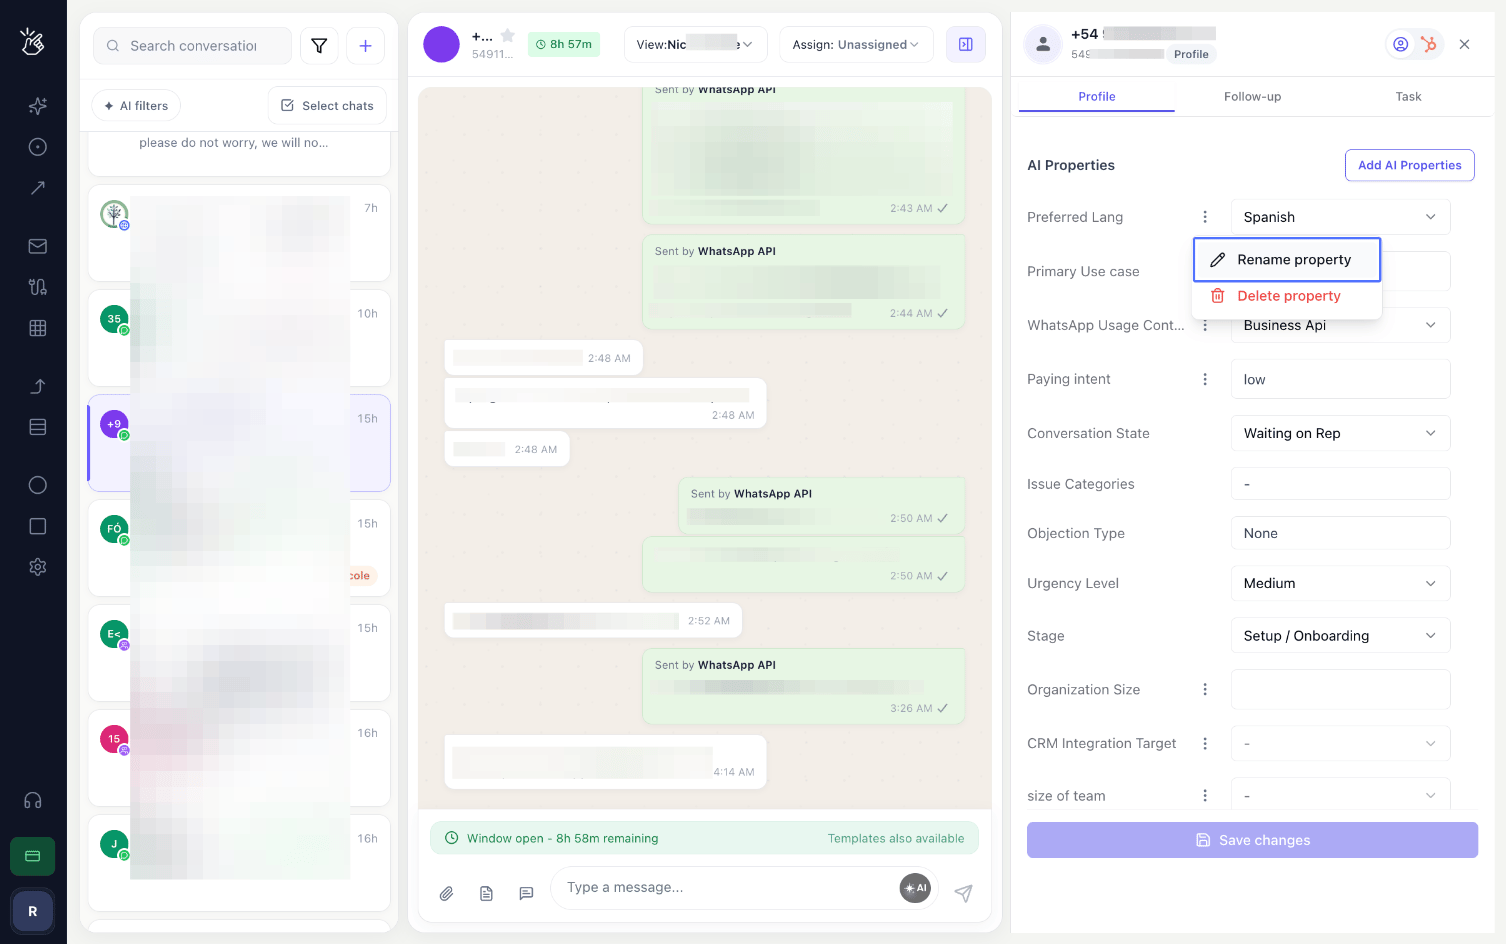
All properties and options are customisable — you can rename, add, or delete properties and their options. Click the **three dots** next to a property to view the available options.
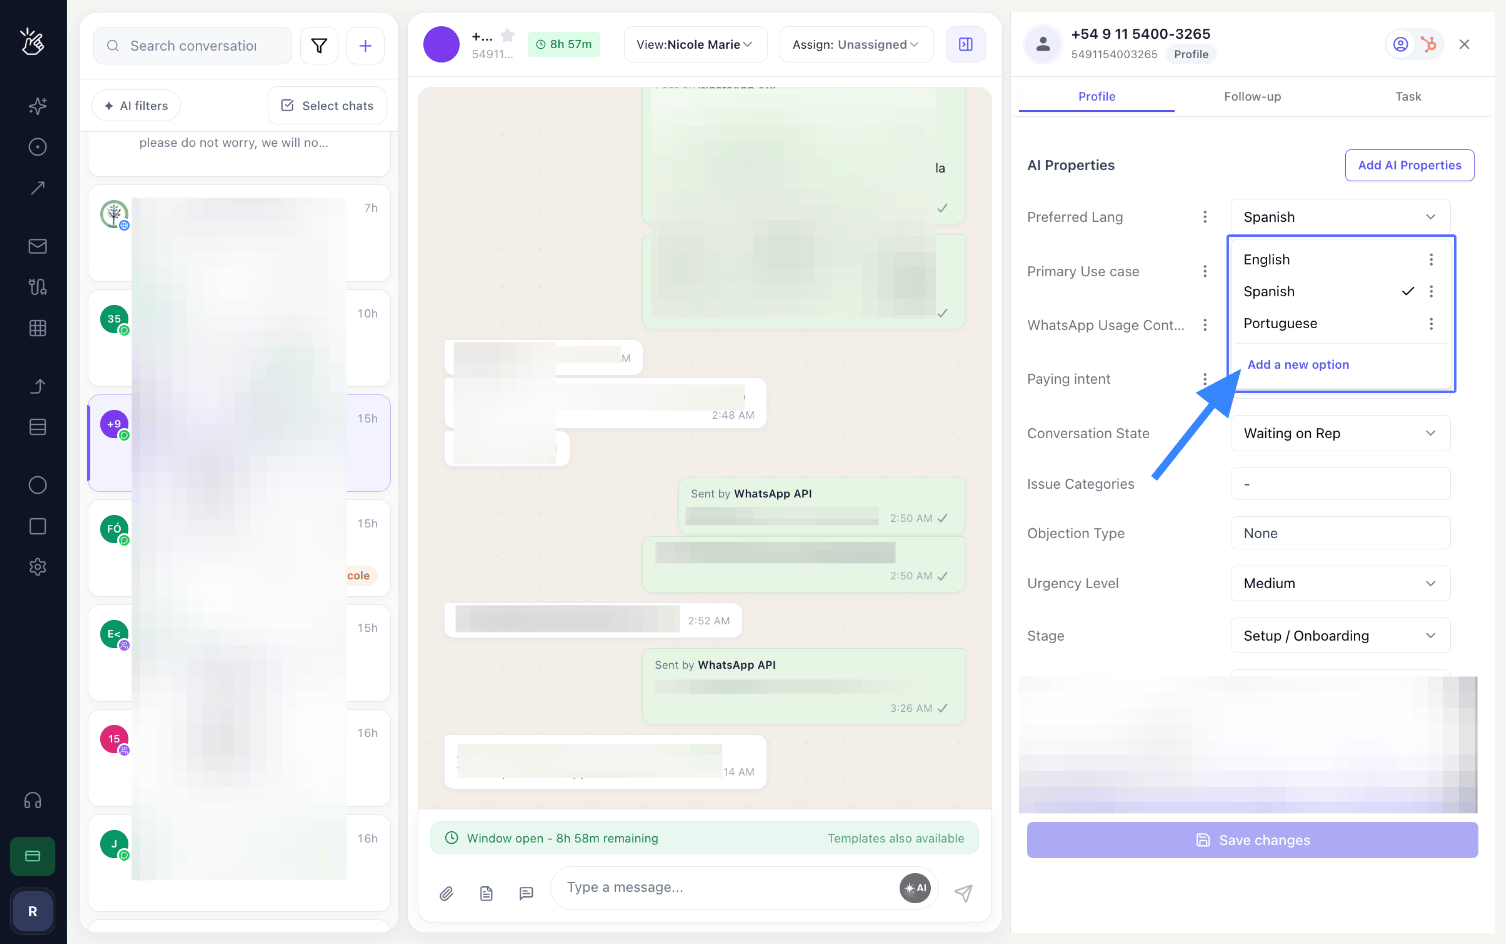
 Open the option drop-down to change the property value or add a new option to the list. Then click **Save changes** to apply.
 ## Adding a New AI Property
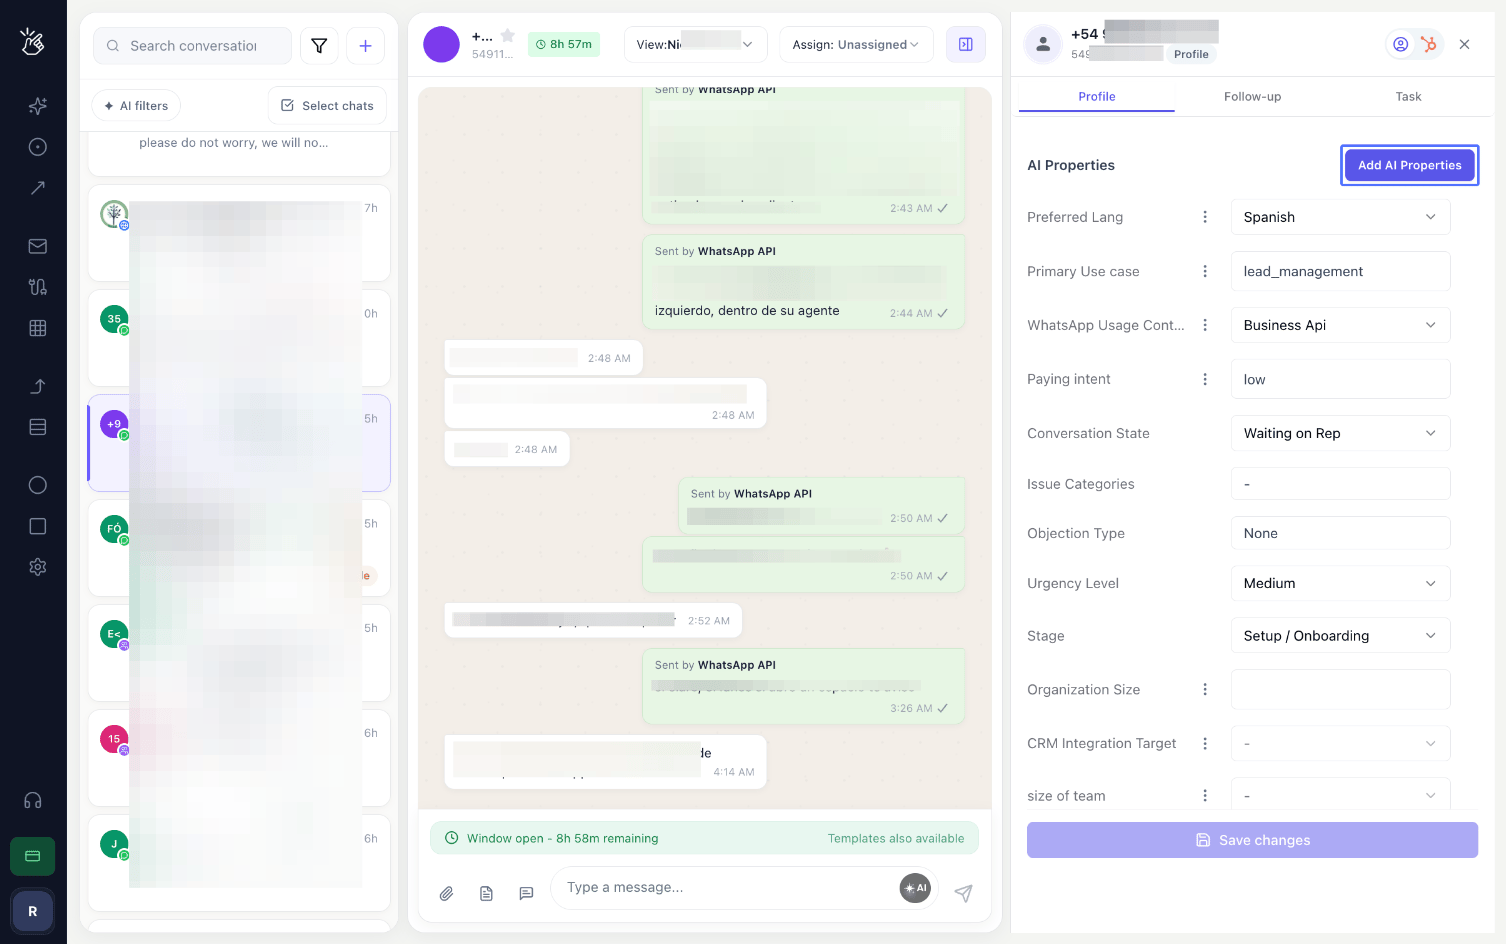
Click on the **"Add AI Properties"** button at the top of the AI Properties panel.
## Adding a New AI Property
Click on the **"Add AI Properties"** button at the top of the AI Properties panel.
 Enter the **Property name**, choose the **Property type** (Text/Number or Dropdown), and then describe the property.
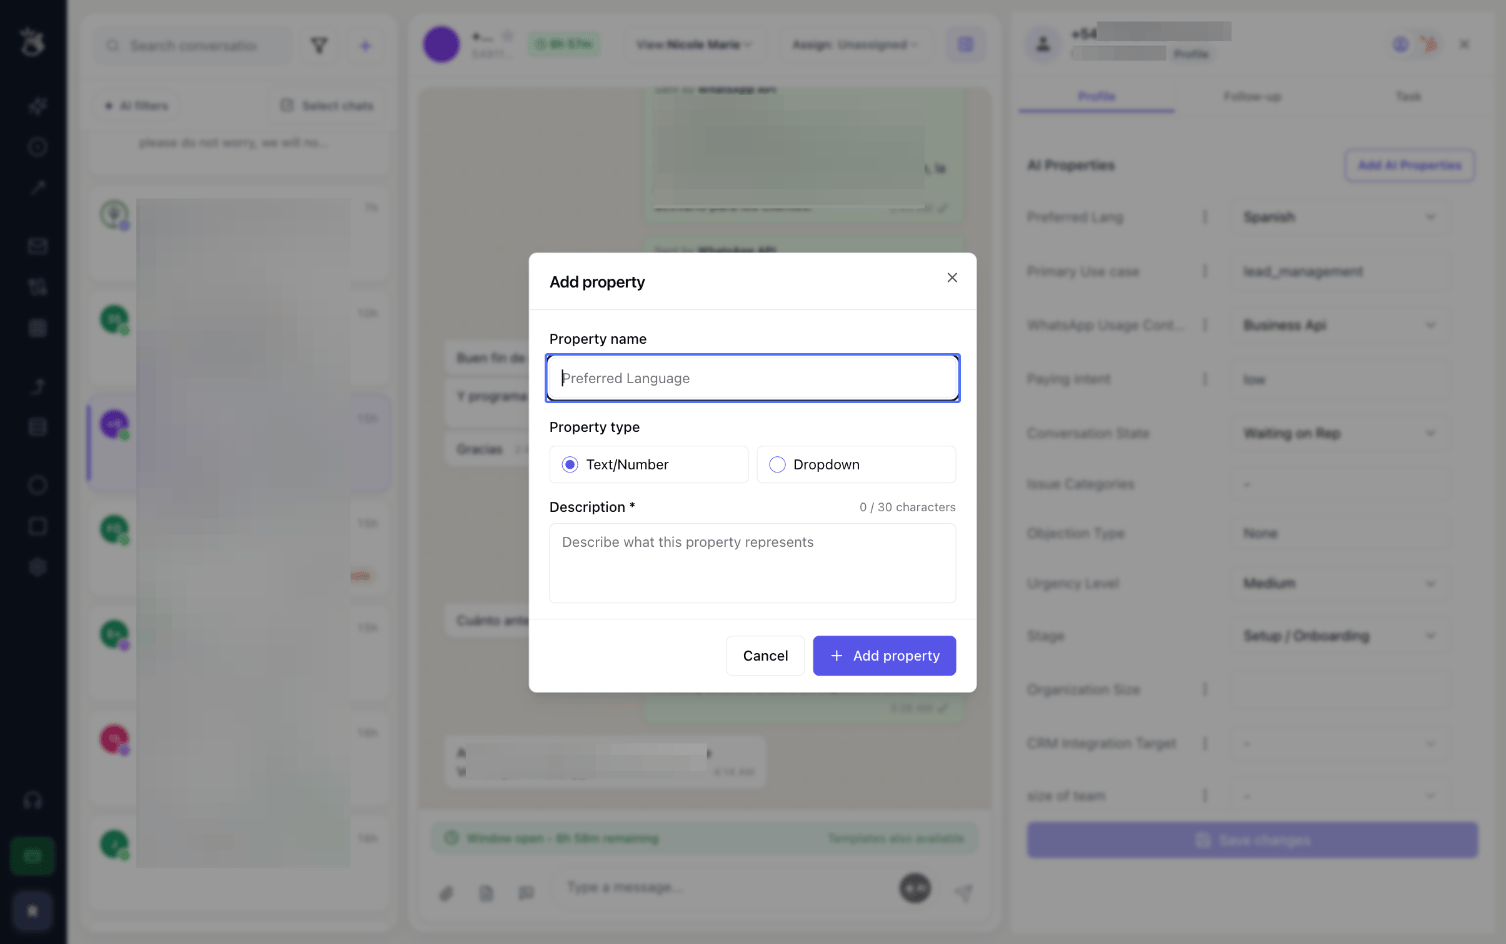 The **description is crucial** — the AI understands what to capture based on it. Write a short, specific sentence describing exactly what the property represents.
## Configuring from Team Inbox Settings
You can also manage AI Properties outside of an individual chat, from the Team Inbox settings.
You can customise AI Properties directly from the **Integration** page in the Team Inbox settings.
The **description is crucial** — the AI understands what to capture based on it. Write a short, specific sentence describing exactly what the property represents.
## Configuring from Team Inbox Settings
You can also manage AI Properties outside of an individual chat, from the Team Inbox settings.
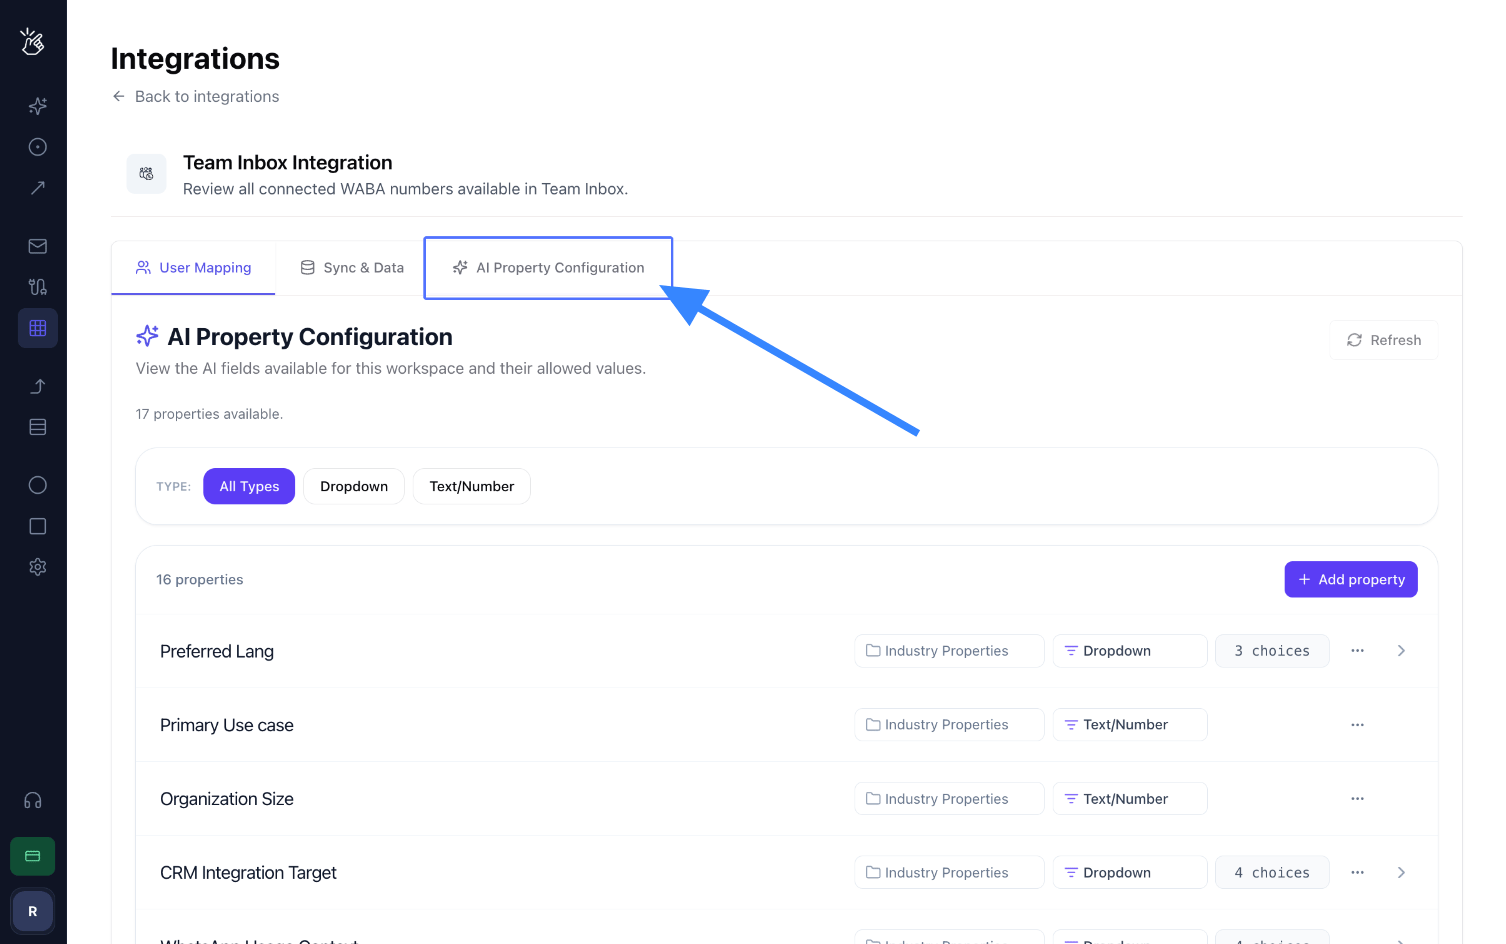
You can customise AI Properties directly from the **Integration** page in the Team Inbox settings.
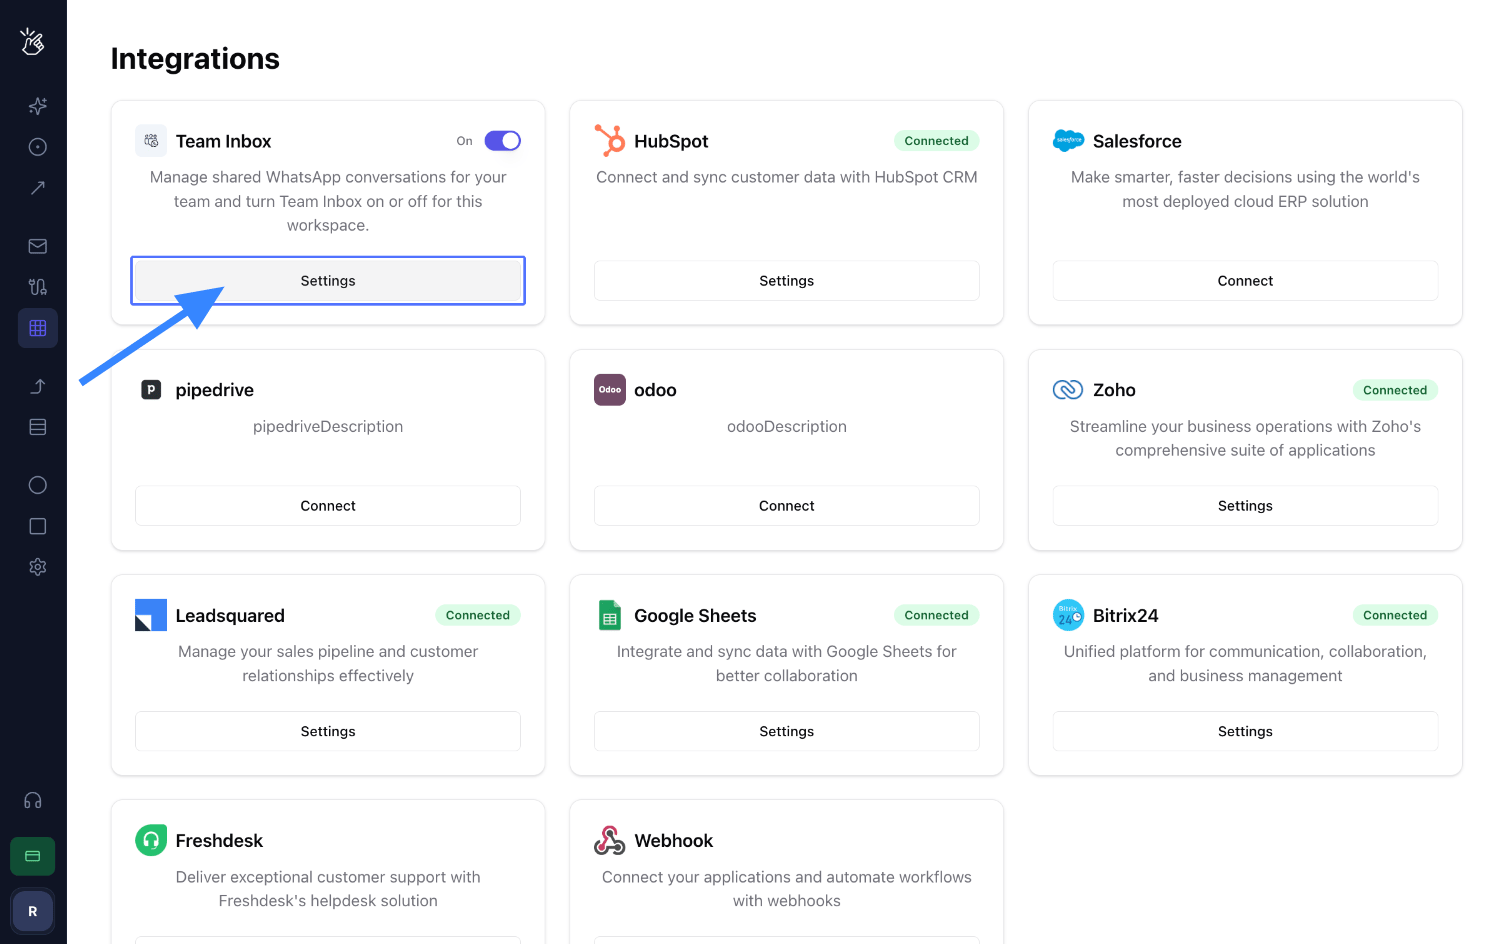 Click on **"AI Property Configuration"** to configure your AI Properties.
 ## Next Steps
Filter your whole inbox by any of these properties
See the sales brief the AI writes on every conversation
## Next Steps
Filter your whole inbox by any of these properties
See the sales brief the AI writes on every conversation